


System Startup 1 - 5
Quick Start Guide
1
System Startup
1. Remove all packing materials, and place the computer on a stable surface.
2. Securely attach any peripherals you want to use with the notebook (e.g. keyboard and mouse) to their ports.
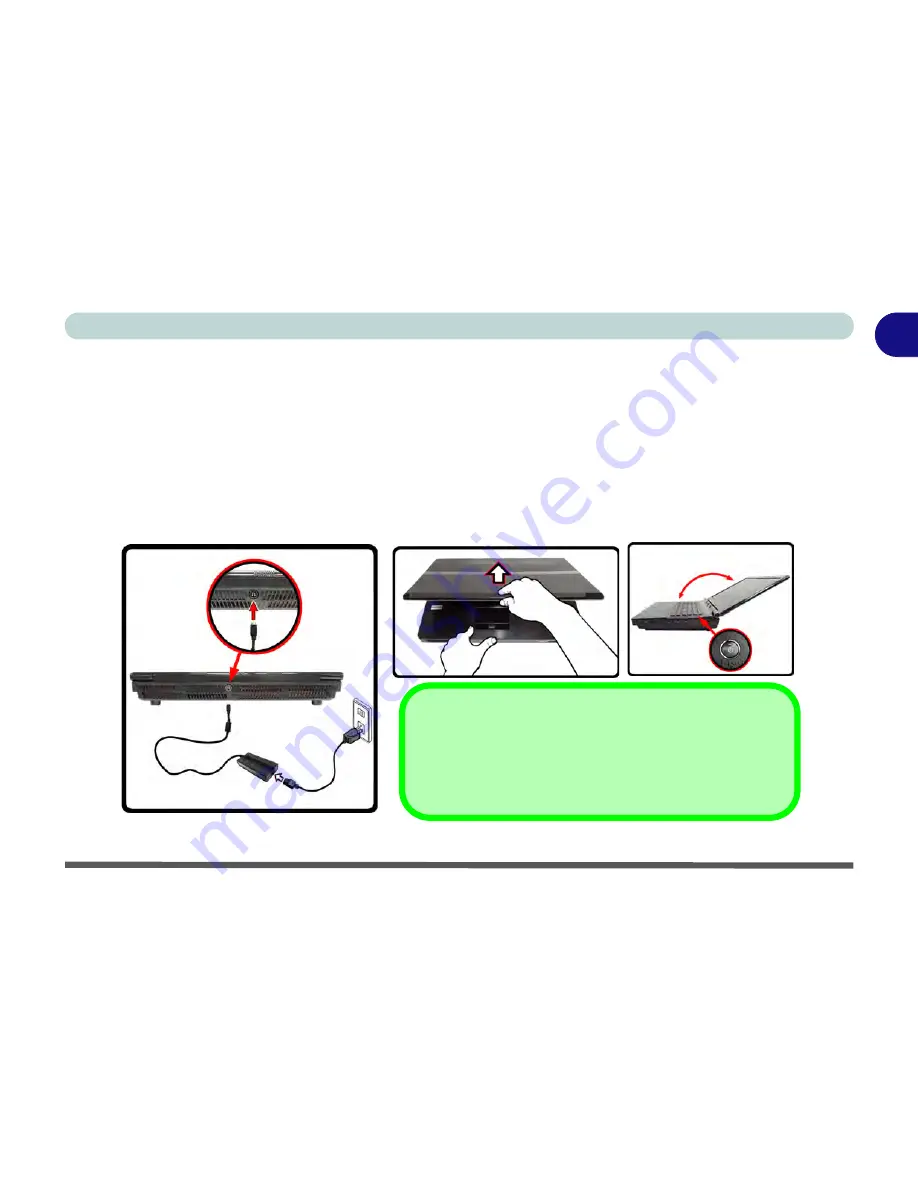
3. Attach the AC/DC adapter to the DC-In jack at the rear of the computer, then plug the AC power cord into an
outlet, and connect the AC power cord to the AC/DC adapter.
4. Use one hand to raise the lid/LCD to a comfortable viewing angle (it is preferable not to exceed 135 degrees); use
the other hand (as illustrated in
Figure 1 - 1
below) to support the base of the computer (
Note
:
Never
lift the
computer by the lid/LCD).
5. Raise the lid/LCD to a comfortable viewing angle, and press the power button.
Figure 1 - 1 - Computer with AC/DC Adapter Plugged-In/Opening the Lid/LCD
Shutdown
Note that you should always shut your computer down by choos-
ing the
Shut Down
command from the
Start
menu in
Windows 7
.
This will help prevent hard disk or system problems.
135
Содержание Notebook V11.6.00
Страница 1: ...V11 6 00...
Страница 2: ......
Страница 46: ...Quick Start Guide 1 22 1...
Страница 68: ...Storage Devices Mouse Audio Printer 2 22 2...
Страница 86: ...Power Management 3 18 3...
Страница 98: ...Drivers Utilities 4 12 4...
Страница 172: ...Modules 7 36 PC Camera Module 7 Figure 7 23 Audio Setup for PC Camera Right click...
Страница 214: ...Modules 7 78 7...
Страница 234: ...Troubleshooting 8 20 8...
Страница 240: ...Interface Ports Jacks A 6 A...
Страница 278: ...AMD Video Driver Controls C 20 C...
Страница 284: ...Specifications D 6 D...


