- 44 -
Using optional accessories - Uso de accesorios opcionales - Utilisation des accessoires en option
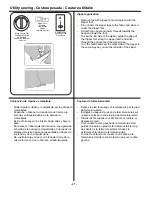
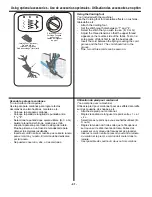
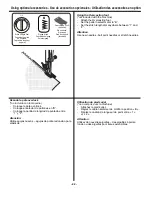
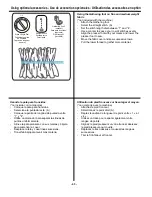
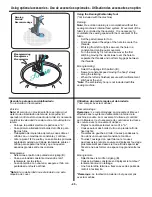
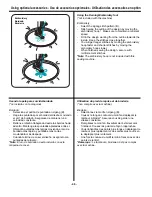
Darning/Embroidery
Foot* (optional)
Pata de zurcido/bordado*
(opcional)
Pied de repriser
et de broderie*
(facultatif)
Lower feed dog
Baje la pata prensora
Abaissez la griffe
d’alimentation
Remove presser
foot holder
Quite el soporte de
la pata prensora
Retirez le porte-pied
presseur
Attach Darning/Embroidery foot
Coloque la pata de zurcido/bordado
Attachez le pied de
repriser et de broderie
0
4
0
Stitch Length Dial
Longitud de puntada
Cadran de longueur de point
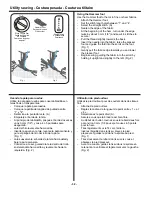
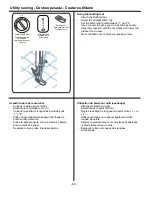
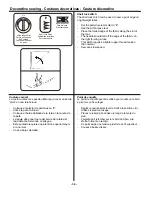
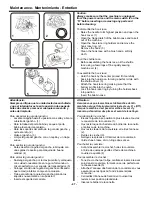
Using the Darning/Embroidery foot
(*not included with the machine)
- Push the drop feed control to “ ” to lower the feed
dogs. (See page 22 for instructions.)
- Set the stitch length dial to “0”.
- Remove the presser foot holder and attach the
Darning/Embroidery foot to the presser foot holder
bar.
- The lever (a) should be behind the needle clamp
screw (b).
- Press the Darning/Embroidery foot on firmly from
behind with your index finger and tighten the screw
(c).
Utilisation du pied de reprise et de broderie
(*non compris avec la machine)
- Poussez la commande du pied d’entraînement à
« » pour abaisser la griffe d’entraînement. (Voir
page 22 pour les instructions.)
- Réglez le cadran de longueur du point à « 0 ».
- Retirez le porte-pied presseur et attachez le pied de
reprise et de broderie à la barre du porte-pied
presseur.
- Le levier (a) doit être derrière la vis de serrage de
l’aiguille (b).
- Appuyez fermement sur le pied de raccommodage et
de broderie avec le dos de votre index et serrez la vis
(c).
Usando la pata para zurcido/bordado
(*no incluida con la máquina)
- Empuje el control del mecanismo alimentador a
“ “ para bajar el alimentador. (Vea la página 22
por instrucciones.)
- Coloque la perilla de longitud de puntada en "0".
- Quite el soporte de la pata prensora y coloque la pata
de zurcido/bordado en la barra de soporte de la pata
prensora.
- La palanca (a) debe quedar por detrás del tornillo de
sujeción de la aguja (b).
- Presione firmemente la pata de zurcido/bordado
desde atrás con su dedo índice y ajuste el tornillo (c).
A
Straight Stitch
Puntada recta
Point lancé
Push
Presione
Poussez
Содержание Shark 803XC
Страница 4: ... 3 calibre de 15 watts ...


