Operating Instructions
How to Use Your Toaster
1. Place unit on a dry, flat surface.
2. Plug cord into any 120 V. 60 Hz.
outlet. The unit may emit an odor
and/or smoke during first few uses
from oils used in manufacturing. This
is normal for a new appliance.
Note:
Never
operate the toaster without
the removable crumb trays in place.
Do
not
cover the removable crumb trays or
any other part of the toaster with foil.
Toasting Instructions
1. Set toast color control knob to the
color of toast desired. For first use, set
control mid-way between light (1) and
dark (6) settings. Toast thin breads on
the lower toast color setting.
2. Insert bread or toaster food into bread
slots, and push down the bread
carriage lever.
Note:
Use any slot when toasting single
slice or portion. Use portions that fit into
slots. The guides in the bread slots will
hold food upright for uniform toasting.
3. When toast is done, the bread carriage
lever will pop up and the power will
shut off automatically. Lift up on bread
carriage lever for easier removal of
smaller foods like bagels or English
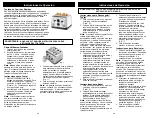
muffins. (Fig. 1)
Convenience Foods Toasting
Today there are many varieties of packaged
convenience foods available, both frozen and non-
frozen (shelf-pastry), that can be toasted in your
toaster.
Do not
leave toaster unattended when
defrosting or toasting convenience food.
Since toaster foods and individual tastes vary, it is
difficult to recommend the exact toast color control
settings, however, after a little experimentation, you will
discover the best setting for your needs. You may also
wish to refer to the heating instructions on food
packaging. For thicker convenience foods, it may be
necessary to adjust toast color control clockwise for a
longer toasting cycle.
WARNING:
NEVER USE METAL UTENSILS TO REMOVE ITEMS FROM THE
TOASTER.
4. To interrupt toasting, press the
cancel button
Note:
Do not
allow plastic to touch
the toaster while the toaster is in use.
The heat from your toaster could melt
the plastic onto the outside surface of
your toaster.
Defrosting/Toasting Instructions
1. For first use, set toast color control
to the light (1) setting.
2. Place frozen food in the toaster
slots. Push down on the toast lever
first, and then press the defrost
button. The defrost light will go on.
Note:
The defrost/toasting process will
automatically toast for approximately
20 seconds longer to assure that the
item will be defrosted as well as
toasted. Use any slot when toasting
only one frozen food item. Use food
that fits into toaster slots. The guides
in the bread slots will hold food upright
for uniform toasting.
5
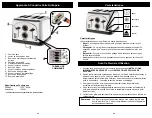
Fig. 1
3. When the food is done, the bread
carriage lever will pop up and the
defrost button will release. The power
will shut off automatically and the
defrost light will go off. The automatic
reset feature returns the toaster to
normal operation after each
defrost/toasting cycle. Lift up on bread
carriage lever for easier removal of
smaller foods like bagels or english
muffins. (Fig. 1)
4. To interrupt toasting, press the cancel
button.
Bagel Instructions
1. For first use, set toast color control to
light (1) setting.
2. Place bagel halves facing each other
in the toaster slots. Push down on the
toast lever first, and then press the
bagel button. The bagel light will go
on.
Note:
Use any slot when toasting only
one half of the bagel. Use only bagels
that fit into toaster’s slots. The guides in
the bread slots will hold the bagel upright
for uniform toasting.
3. When the bagel is done, the bread
carriage lever will pop up and the
bagel button will release. The power
will shut off automatically and the
bagel light will go off. The automatic
reset feature returns the toaster to
normal operation after each
defrost/toasting cycle. Lift up on bread
carriage lever for easier removal of
smaller foods like bagels or English
muffins. (Fig. 1)
4. To interrupt toasting, press the cancel
button.
Operating Instructions
WARNING:
NEVER USE METAL UTENSILS TO REMOVE ITEMS FROM THE
TOASTER
.
Reheat Instructions
1. Place food in the toaster slots.
Push down on the toast lever first
and then press the reheat button.
The reheat light will go on.
Note:
The reheat process will be a
30-second toasting cycle to assure that
the item is reheated. Use any slot
when reheating a single slice or
portion. Use only portions that fit into
toaster’s slots. The guides in the bread
slots will hold food upright for uniform
toasting.
2. When reheating is done, the bread
carriage lever will pop up and the
reheat button will release. The
power will shut off automatically and
the reheat light will go off. The
automatic reset feature returns the
toaster to normal operation after
each reheat cycle. Lift up on bread
carriage lever for easier removal of
smaller foods like bagels or English
muffins. (Fig. 1)
3. To interrupt toasting, press the
cancel button
6


