408-35141
Rev
B
6
of 8
11. While holding the wire in place, fully cycle the tool until the ratchet releases and allows the handle to
open.
12. Remove the crimped contact from the locator by pressing on back of the wire stop to allow the contact
to be removed from the locator.
6.
INSPECTING THE CRIMP HEIGHT
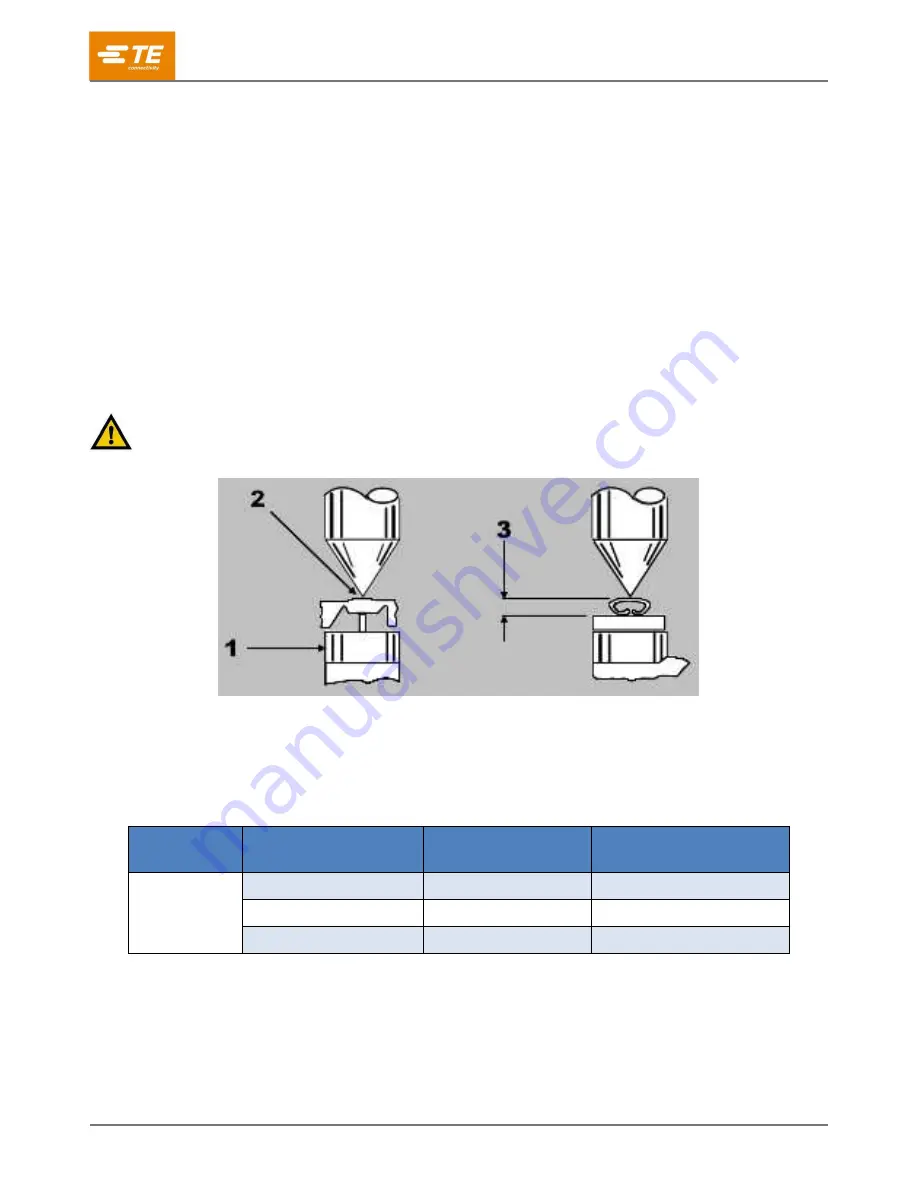
Crimp height inspection is performed using a micrometer with a modified anvil, commonly referred to as a
crimp-height comparator. TE Connectivity does not manufacture or market crimp height comparators. Detailed
information on obtaining and using crimp-height comparators can be found in instruction sheet
1. Refer to Table 1 and select a wire (maximum size) for each crimp section listed.
2. Refer to section 5, CRIMPING, and crimp the contacts accordingly.
3. Using a crimp height comparator, measure the wire barrel crimp height listed in Table 2.
If the crimp height conforms to that shown in the table, the tool is considered dimensionally correct.
If not, adjust the tool. Refer to section 7, ADJUSTING THE RATCHET.
CAUTION
Do not use damaged product. If a damaged contact is evident, replace it. Do not re-terminate contacts.
Figure 5: Crimp height
1
Modified anvil
2
Position point on center of wire barrel opposite seam
3
Crimp height (see Table 2)
Table 2: Crimp height specifications
Die assembly
Wire size max
mm
2
[AWG]
Crimp section
(wire size markings)
Crimp height mm [in.]
2383863-2
0.56 [20]
0.20-0.56 [24-20]
0.77±0.06 [.0303±.0024]
0.14 [26]
0.12-0.14 [26]
0.72±0.06 [.0283±.0024]
0.09 [28]
0.03-0.09 [32-28]
0.53±0.06 [.0210±.0024]


