409-35011
Rev D
79
of 83
After tooling changeover
1. Remove the padlock from the main power switch (Figure 4) and turn the switch back to the ON
position.
2. Remove the padlock from the main air valve (Figure 6) and turn the switch back to the ON position.
3. Restore power to the machine.
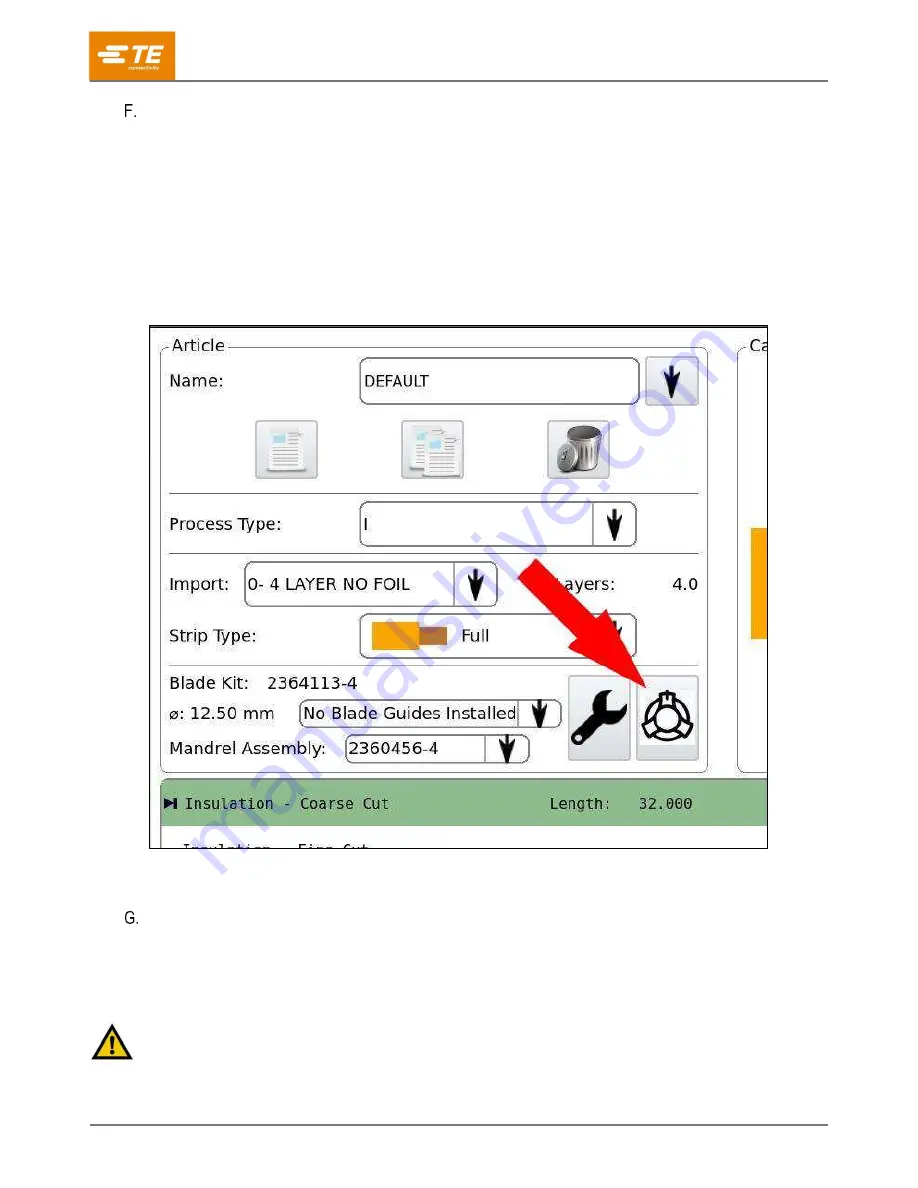
4. Perform a calibration cycle. To begin the cycle, press the calibration button on the UI. The HV-CP
automatically calibrates the tooling to ensure that the proper tooling set for the application is
installed.
Figure 101: Calibration button
5. Dispose of removed parts in compliance with the standards in force in the country where the tool is
used.
Tooling changeover for 50-60 mm
2
size cables
Due to the variance in the cable diameters, the machine selects the most appropriate tooling for the
diameters provided. However, you can select another set of tooling if necessary (refer to the Manual
Override column of Table 4).
Some smaller 60 mm
2
cables are in the 50 mm
2
tooling range and can work with both sets of tooling.
CAUTION
Selecting the wrong tool can cause a tooling crash or scrapped cables.


