background image

ETC Installation Guide

ColorSource Spot jr

Set Up the Fixture

1.

Plug the power cord into the powerCON In connector on the rear of
the fixture.

2.

Make any power-thru cable connections prior to applying a power
source.

3.

Make any DMX connections, and if the fixture is the last in a DMX line,
terminate the fixture. See

Connectors on the previous page

.

4.

Plug the power cord into the power source.

Power Up

Press any button to wake the display. The display shows the DMX address.
See

Set the DMX Address on page 7

.

You can press the Mode button to access the Presets/Sequences menu. See

Play Presets and Sequences on page 8

.

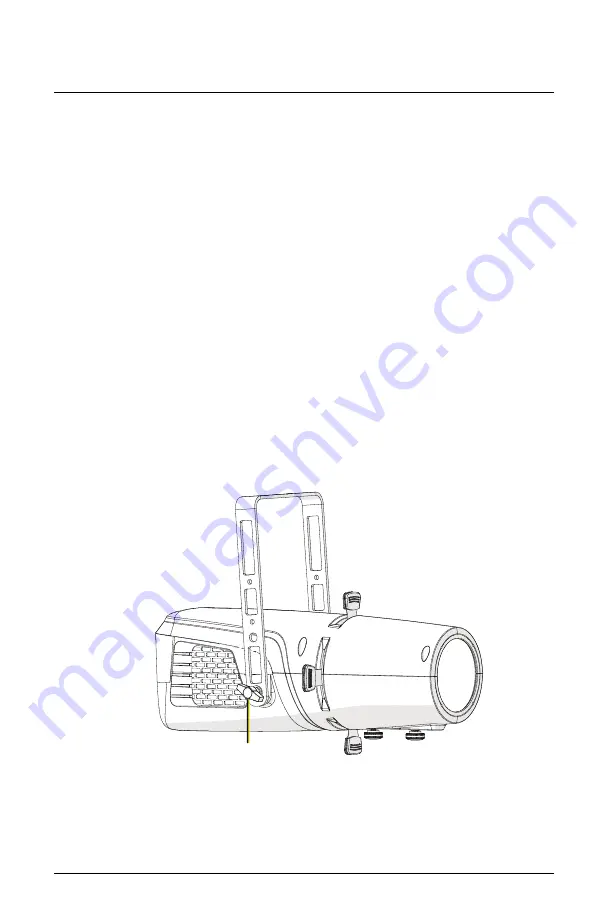
Adjust the Tilt

The fixture can be tilted up and down and rotated (panned) as needed.

1.

Loosen, but do not remove the yoke locking knob.

2.

Tilt the fixture to the desired angle.

3.

Tighten the yoke locking knob.

Yoke 

locking knob

ColorSource Spot jr

Page 5 of 12

ETC

Содержание ColorSource Spot jr

Страница 1: ...d patent info etcconnect com ip 7416M2100 2 0 Rev B Released 2020 06 Overview The ColorSourceSpot jr provides built in zoom capability and uses the RGB L red green blue and lime color system to provide a rich bright light The ColorSource Spot jr is available in both original and Deep Blue variants The Deep Blue uses an array that offers richer more saturated blues and stronger magentas in exchange...

Страница 2: ...ng the following READ AND FOLLOW ALL SAFETY INSTRUCTIONS Do not use outdoors Do not let power supply cords touch hot surfaces Do not mount near gas or electric heaters Equipment should be mounted in locations and at heights where it will not readily be subjected to tampering by unauthorized personnel The use of accessory equipment not recommended by the manufacturer may cause an unsafe condition D...

Страница 3: ... achieved at 25 C 77 F 42 C 108 F Electrical Operates between 100 V and 240 VAC at a frequency of 50 60 Hz Maximum power consumption is 200 W Up to 7 luminaires 15 A max may be linked via power thru connector 8 luminaires total per circuit when used with an R20 Relay Module or Unison Echo Relay Panel Consult breaker trip curves when used with other equipment Requires power from a non dimmable sour...

Страница 4: ...on Safety cable attachment loop Safety Cable A safety cable or other approved safety device must be attached to the fixture The attachment loop is on the rear of the fixture Take care to leave as little slack as possible in the safety cable to avoid catching the yoke of the fixture Connectors Power Two powerCON connectors for power in and thru Data DMX512 RDM Two five pin XLR connectors for data i...

Страница 5: ...vious page 4 Plug the power cord into the power source Power Up Press any button to wake the display The display shows the DMX address See Set the DMX Address on page 7 You can press the Mode button to access the Presets Sequences menu See Play Presets and Sequences on page 8 Adjust the Tilt The fixture can be tilted up and down and rotated panned as needed 1 Loosen but do not remove the yoke lock...

Страница 6: ...ocus knob Accessory holder optional attaches to front Accessories You can use standard accessories such as a gobo in the accessory slot see image above You can also attach an accessory holder to the front of the fixture order part number 7416K1001 After you attach the accessory holder you can use it to secure accessories such as a top hat or half hat See the ColorSource Spot jr datasheet at etccon...

Страница 7: ...d hold the Mode button for 3 seconds The display shows the current DMX control mode 3 Press the Up button or Down button to change the DMX control mode 5ch 5 channel mode intensity red green blue and strobe This is the default mode dir Direct emitter control intensity red green blue indigo lime and strobe 1ch 1 channel mode controls the intensity of preset 1 defaults to 3200 K White rgb RGB mode r...

Страница 8: ...ess flashes on the user interface Play Presets and Sequences The fixture has twelve factory configured presets and five factory configured sequences When you play a preset or sequence on a fixture the same preset number or sequence number plays on any connected fixtures that are not receiving DMX You can re record presets and sequences through an RDM device or manually on the fixture See Re record...

Страница 9: ...n to access the Presets Sequences menu 3 Press the Up button or Down button to navigate to the preset number that you want to re record 4 Press and hold the Mode button for 3 seconds to confirm the preset selection The user interface will show a 3 second countdown The preset number blinks once to confirm that the preset has been recorded Note When the fixture is in Direct mode dir or 1 channel mod...

Страница 10: ...oc to indicate that the user interface is locked 2 To unlock the user interface press and hold the Up button and Down button simultaneously for 3 seconds Update the Fixture Software ETC recommends using UpdaterAtor software to manage software updates For more information on UpdaterAtor see the UpdaterAtor Software Quick Guide which you can download for free from etcconnect com When you add a Color...

Страница 11: ...d to be returned to the ETC factory contact your local dealer to set up a repair OtP Screen toggles between OtP and ERR to indicate that the fixture has gone into over temperature protection mode to avoid damaging the fixture Once the fixture has self cooled the error will automatically clear No App Screen toggles between no and APP to indicate that the upgraded fixtures have a software issue Relo...

Страница 12: ...or Codes There are three error codes that may be shown on the user interface CAL Screen toggles between CAL and ERR to indicate a problem with the color calibration The fixture will need to be returned to the ETC factory contact your local dealer to set up a repair OtP Screen toggles between OtP and ERR to indicate that the fixture has gone into over temperature protection mode to avoid damaging t...

Отзывы: