34
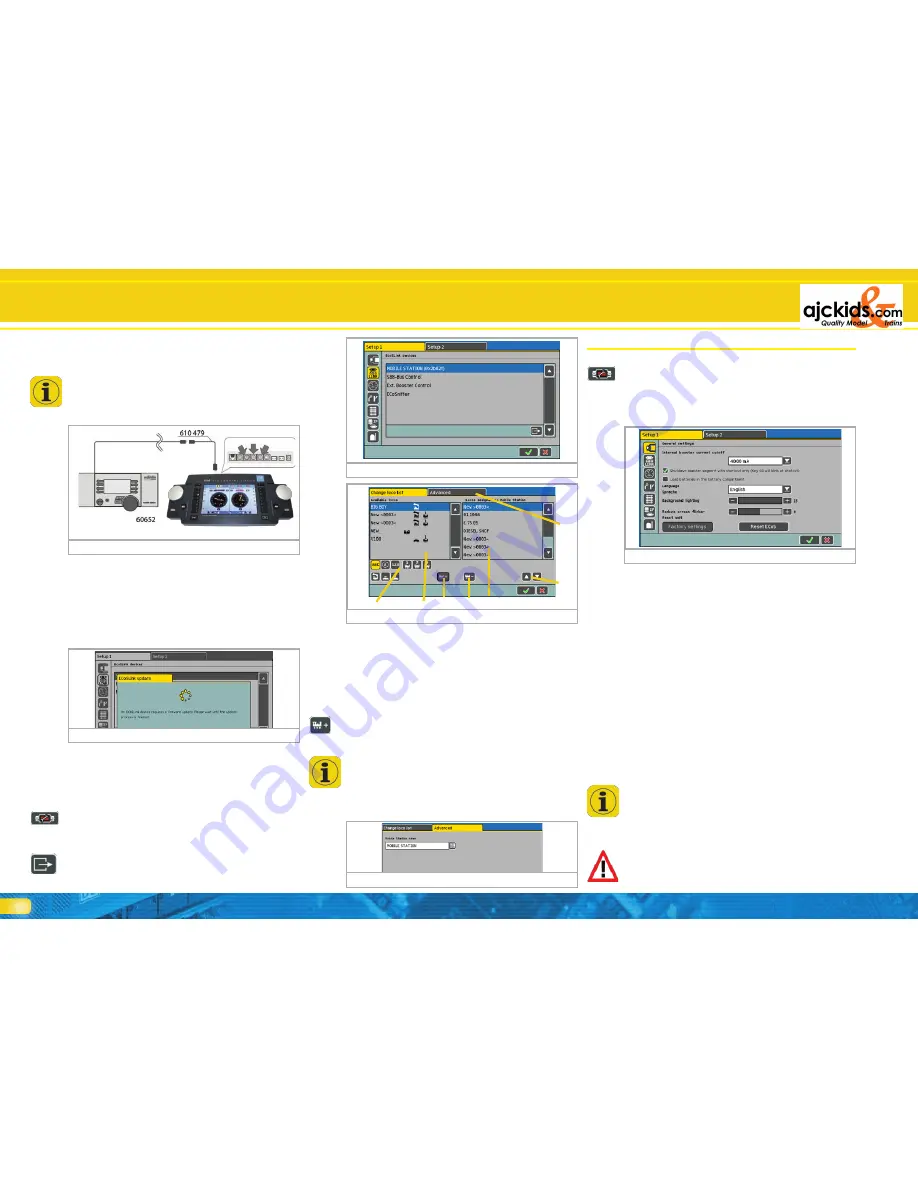
a) List of all locomotives
b) List of already allocated locomotives
c) Add a locomotive to the mobile station
d) Delete a locomotive from the mobile station
e) Move the locomotive marked on the right upwards resp.
downwards
f) Extended settings
g) Sorting and filter options for the left locomotive list
• Select the desired locomotive from the left locomotive list and
add it by pressing the symbol c).
• Select locomotive no longer required in the right hand list and
press the symbol d).
You may allocate up to 10 locomotives. The mobile station can
control locomotives with any data format since ultimately the
data format is generated by the ECoS.
20.2.2. Extended settings
In order to differentiate between different mobile stations you
can give each mobile station a name in the tab “Extensions“.
ECoSlink Bus
21. Configuration menue
Basic operational parameters are edited via the set-up menue.
After touching the pictogram for the set-up menue at the top
of the monitor the set-up dialogue is opened. This is structured
over several pages (windows).
21.1. General settings
21.1.1. Setting the language
Select the desired language from the choice list. Any adjust-
ments will be accepted immediately.
21.1.2. LCD contrast and brightness
With the slide controllers for brightness and contrast you can
adapt the screen to the surroundings and your personal pre-
ference.
21.1.3. Current threshold of the internal booster
In the choice list “Current limit of the internal booster” you
can reduce the maximum current if so desired. Never set the
current limit to a higher value as necessary in order to avoid
damage or welded rails in case of a short circuit.
The current threshold of other boosters connected to the
ECoSBoost booster is set in the configuration menu “Devices
in the system“. Please also refer to chapter 21.3.2.
If you place a tick behind the remark “Only switch off the affec-
ted booster circuit in case of a short circuit” then the internal
booster of the ECoS will not be turned off whenever other
boosters report a short circuit. Thus you can set the system so
that the internal booster will only be switched off if a short
circuit occurs in its own district.
The “Go” button blinks green if at least one booster district is
switched off due to a short circuit.
21.1.4. Reset
Pressing the screen button “Factory default values” triggers a
factory reset. All data in the command station will be deleted
including all data related to locomotives, accessories, routes
and track diagrams.
This reset is carried out immediately.
Figure 96
20.2. Märklin® Mobile Station
You can connect up to three Märklin® mobile stations 60651
and 60652 as additional cabs directly to the ECoS. More mobi-
le stations can be wired via an ECoSlink terminal.
The dedicated adapter cable (from 10-pole to 7-pole) must be
used in all circumstances. This adapter cable is supplied with
the Märklin®mobile station 60652 or is available as a spare
part under the Märklin® part number 610 479 at your local
hobby shop.
If you connect a mobile station to the command station for
the first time then the internal software version of the mobile
station will be checked. Should the mobile station still work
with an older software version than the command station then
it will be automatically updated.
The mobile station will not respond to any commands or dis-
play anything on the screen during this process. This is quite
normal! On the screen of the command station a remark refer-
ring to this process will be displayed.
After the software update a reset will take place and all locomoti-
ves stored in the data base of the mobile station will be deleted!
20.2.1. Allocating locomotives
One can allocate up to 10 locomotives from the data base of
the command station to each connected mobile station . This
process is conducted in the “Set-up” menu.
• Select the set-up symbol in the top menu bar and a menu dia-
logue window with some pictograms on the left will open.
• Select the second pictogram from the top and the dialogue
window “Devices in the system“ will open.
• Select the desired mobile station and press the “Hand“ picto-
gram. The configuration dialogue will open in which you can
allocate locomotives to the mobile station.
Figure 95
Figure 92
Figure 91
Figure 93
Figure 94
e)
b)
c)
a)
d)
g)
f)
Содержание ECoS 50200
Страница 44: ...44 Notes...
Страница 48: ...48 ESU P N 00810 08526 2010 by ESU electronic solutions ulm GmbH Co KG...


