background image

3

Contents

Safety Instructions   . . . . . . . . . . . . . . . . . . . . . . . . . . . . . . . . . . . . . . . . . . . . . . . . . . . . . . . . 2

MON15 Connectors, Controls and Indicators   . . . . . . . . . . . . . . . . . . . . . . . . . . . . . . . . . 4

MON18, MON21 and MON23 Connectors, Controls and Indicators  . . . . . . . . . . . . . 5

Picture Menu Functions and Settings   . . . . . . . . . . . . . . . . . . . . . . . . . . . . . . . . . . . . . . . 6

Audio Menu Functions and Settings   . . . . . . . . . . . . . . . . . . . . . . . . . . . . . . . . . . . . . . . . 7

OSD Menu Functions and Settings   . . . . . . . . . . . . . . . . . . . . . . . . . . . . . . . . . . . . . . . . . . 8

Functions Menu and Settings   . . . . . . . . . . . . . . . . . . . . . . . . . . . . . . . . . . . . . . . . . . . . . . 9

Mounting Guide   . . . . . . . . . . . . . . . . . . . . . . . . . . . . . . . . . . . . . . . . . . . . . . . . . . . . . . . . . . 10

Power Management   . . . . . . . . . . . . . . . . . . . . . . . . . . . . . . . . . . . . . . . . . . . . . . . . . . . . . . 10

Technical Specifications   . . . . . . . . . . . . . . . . . . . . . . . . . . . . . . . . . . . . . . . . . . . . . . . . . . 11

Caution  . . . . . . . . . . . . . . . . . . . . . . . . . . . . . . . . . . . . . . . . . . . . . . . . . . . . . . . . . . . . . . . . . . 12

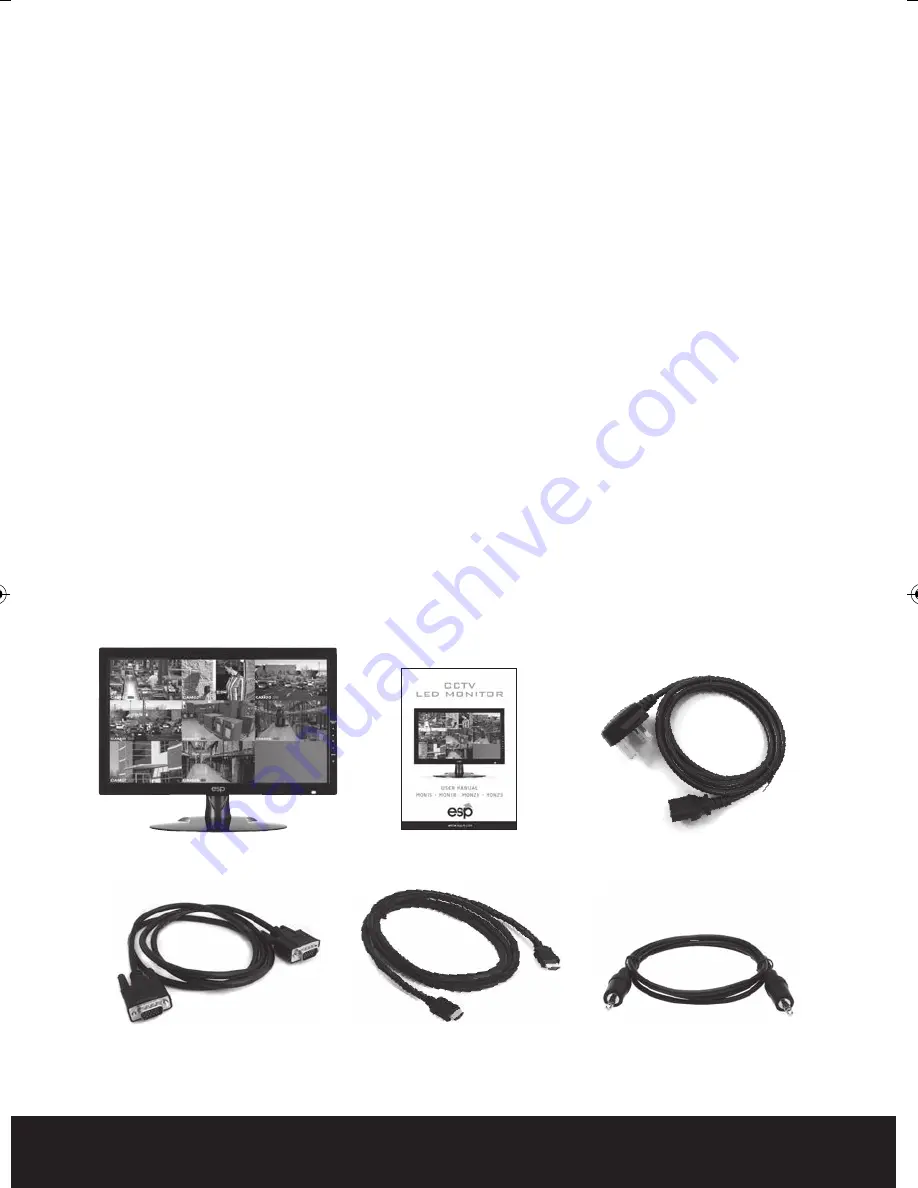
Contents of Package

CCTV LED Monitor

User Manual

Power Cord

VGA Cable

HDMI Cable

Audio Cable

MON15, MON18, MON21, MON23 Manual_Layout 2  28/01/2014  12:36  Page 3

Содержание MON15

Страница 1: ...USER MANUAL MON15 MON18 MON21 MON23 CCTV LED MONITOR...

Страница 2: ...ything to rest on the power cord or place this product where people will walk on the cord 11 If an extension cord is used with this product make sure that the total ampere ratings on the products plug...

Страница 3: ...Indicators 5 Picture Menu Functions and Settings 6 Audio Menu Functions and Settings 7 OSD Menu Functions and Settings 8 Functions Menu and Settings 9 Mounting Guide 10 Power Management 10 Technical...

Страница 4: ...EO input signal DOWN Button Press the button to scroll the cursor to desired function UP Button Press the button to scroll the cursor to desired function MENU Button Press the button to show the OSD m...

Страница 5: ...the button to scroll the cursor to desired function Volume button Press the button to increase volume Press the button to increase the value of selected function in sub OSD menu Volume button Press t...

Страница 6: ...o save the values 6 Press Source EXIT to exit the sub menu and go back to the main menu choices 7 Pressing the Source EXIT button while at the top level will close the menu and return to normal operat...

Страница 7: ...3 4buttons to adjust the value of the highlighted item 5 Press the MENU button to save the values 6 Press Source EXIT to exit the sub menu and go back to the main menu choices 7 Pressing the Source EX...

Страница 8: ...utton to save the values 6 Press Source EXIT to exit the sub menu and go back to the main menu choices 7 Pressing the Source EXIT button while at the top level will close the menu and return to normal...

Страница 9: ...enter the highlighted FUNCTION sub menu 4 MON15 press the6 5buttons MON 18 MON 21 MON23 press the3 4buttons to adjust the value of the highlighted item 5 Press the MENU button to save the values 6 Pre...

Страница 10: ...e riser can be removed In order to prevent losing the two screws we suggest replacing the screws in their original holes 2 Attach the VESA mount 100mm x 100mm plate to the rear of the monitor and foll...

Страница 11: ...BNCx1 BNCx1 BNCx1 BNCx1 BNCx1 BNCx1 VGA x 1 x 1 x 1 x 1 Audio Inputs x 1 x 1 x 1 x 1 Audio Outputs x 1 x 1 x 1 x 1 HDMI x 1 x 1 x 1 x 1 Auto Adjustment YES YES YES YES Wall Hanging VESA Standard VESA...

Страница 12: ...E ENVIRONMENTS To prevent electrical shock or a fire hazard do not expose the unit to rain or moisture This unit is designed to be used in the office or home Do not subject the unit to vibrations dust...

Отзывы: