background image

10

LIVE VIEWING


On start up the DVR will display a divided screen. Using the Mouse Control, double 

click on any image to bring to full screen. Double click again to return to that main 

divided screen.


The recording status and alarm status are indicated by the following icons:

                       Recording 


Motion Detect

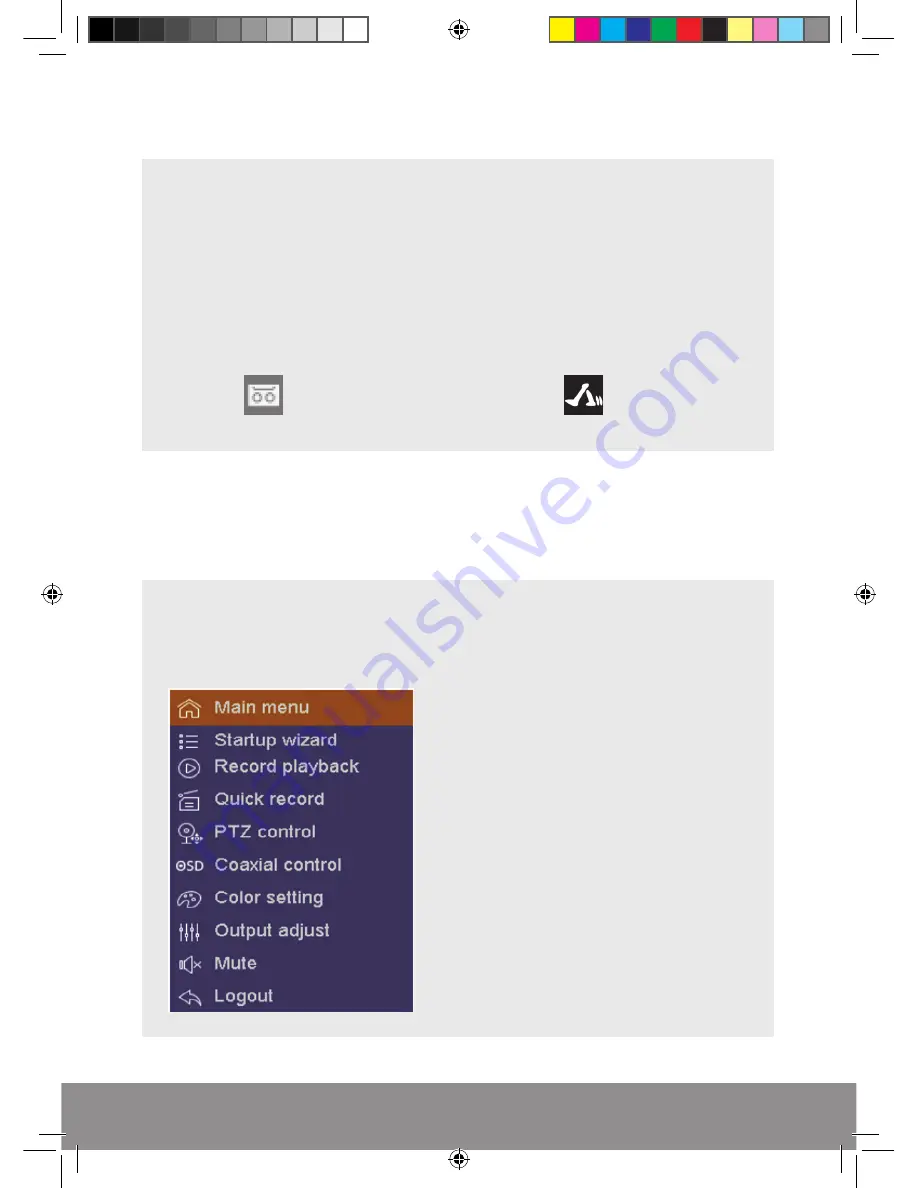
SHORTCUT MENU


Right-clicking on the live camera screen will activate the

 Shortcut Menu

 where the 

most regularly used settings can be found.

Main Menu 

Enter to adjust all system settings 

Start-up Wizard 

Enter to adjust initial system settings 

Record Playback


Shortcut for Record Control 

Quick Record


To view recorded files 

PTZ Control Settings

Reserved for future use 

Coaxial Control 

Reserved for future use  

Colour Settings 

Edit colour settings per channel 

Output Adjust

Alter system monitor output settings 

Logout 

Log-out, Shutdown or Reboot system 

RekorHD DVR Manual.indd   10

09/05/2017   16:38:46

Содержание HDview

Страница 1: ...1 4 M E G AP IXE L CCT V SYSTEM U SER MA NUAL www espuk com RekorHD DVR Manual indd 1 09 05 2017 16 38 45...

Страница 2: ...he DVR will require a connection to a monitor to be programmed IMPORTANT NOTICE Please read this manual and keep for later use Do not use accessory devices not recommended by the manufacturer Please u...

Страница 3: ...I Output for Monitor 3 Audio IN OUT 4 VGA Output for Monitor 5 LAN Socket for Network Cable 6 USB for Mouse Controller and USB backup 7 DC12V Input Power RekorHD DVR Manual indd 3 09 05 2017 16 38 45...

Страница 4: ...f Please ensure the connections are made internally or housed in a suitable enclosure RekorHD DVR Manual indd 4 09 05 2017 16 38 45 DVR Connections Monitor Router HDMI Lead Power Input System Power Su...

Страница 5: ...r supply input marked on the DVR Turn on the DVR at the mains power point The Power supply indicator light will illuminate on the DVR s front panel followed by several short bleeps POWER OFF Select Lo...

Страница 6: ...advance options and settings are found in the Main Menu INTRODUCTION LOG IN An opportunity to change the password is provided within the Main Menu The default settings are User Name admin Password le...

Страница 7: ...efault the system is set to record continuously on all channels on every day of the week The system automatically overwrites the HDD Storage Device so no additional recording set up should be required...

Страница 8: ...page displays the capacity of storage for the HDD To ensure full use of the HDD please format before 1st use 1 Select the HDD with the mouse control 2 Click Format and select OK on the prompt RekorHD...

Страница 9: ...l apply automatically during power up of the DVR CLOUD CONNECTION The Cloud service makes remote viewing via smart phone simpler If the status on the menu states Connected scan the applicable QR to ob...

Страница 10: ...creen will activate the Shortcut Menu where the most regularly used settings can be found Main Menu Enter to adjust all system settings Start up Wizard Enter to adjust initial system settings Record P...

Страница 11: ...roller anywhere on screen to activate the Shortcut Menu Selecting Main Menu option will automatically display the following screen To exit from the Main Menu at any point Right Click on the mouse cont...

Страница 12: ...ight click on the live screen to bring up the Shortcut Menu and selecting Main Menu to log in From the Setting menu Select Record 1 Click inside the box for Norm to select the continuous record mode 2...

Страница 13: ...ect Copy to Highlight which channels are to be triggered by Motion Detection and select OK 4 Returning back to the Record screen Select Apply 5 Then select Alarm RekorHD DVR Manual indd 13 09 05 2017...

Страница 14: ...6 Select applicable channel and then select Enable 7 Select Trigger process 8 Enable Record CHN and highlight which channels are to record and select Save RekorHD DVR Manual indd 14 09 05 2017 16 38...

Страница 15: ...3 Select play and use the curser on the timeline to view required footage Event Playback Operation Motion Detection 1 Select Event Play 2 Select which Cameras to play back enter Begin and End time and...

Страница 16: ...t required Start and End Time for the footage also set the File Format to AVI 4 Select Search and the required files will be confirmed and finally select Start to begin backup process NB Practice back...

Страница 17: ...17 MENU LAYOUT RekorHD DVR Manual indd 17 09 05 2017 16 38 47...

Страница 18: ...ptop Software CMS Central Management Software that is supplied on the CD supplied with the DVR Windows compatible Web Browsing Internet Explorer Windows Internet Explorer NB As with all networkable de...

Страница 19: ...layed on the monitor The camera power supply is not correctly connected or damaged The camera signal cable is not correctly connected or damaged Try another channel input There is a connection issue w...

Страница 20: ...ts Unit 7 Target Park Shawbank Rd Lakeside Redditch B98 8YN www espuk com Telephone 01527 51 51 50 Fax 01527 51 51 43 email info espuk com E OE Errors and omissions excepted I16 RekorHD DVR Manual ind...

Отзывы: