background image

INDEX

User Instructions
1. 

Quick Operating Guides 


1.1  

Display and Button Functions 


1

1.2  

Quick Command Guide  


2

2.  

Setting the Time and Date (

tINE

  3 

3.  

Operation Modes  


 3.1.1: 

Auto 


    4


3.1.2: Manual 

3.1.3: Off / Frost Protection   


3.2  

All Day Mode (

AL

    5

3.3  

Holiday Mode (

HOLI

   6

4.  

Main Menu  

4.1  

Copy Function (

CoPy

   7

4.2 

Backlight On/Off (

LIGH

   7

4.3 

Resetting the Unit (

rESE

   8

5.  

Programme Settings (ProG)

5.1 


Pre-Set 

Temperatures 

   9


5.1.1: 5/2 Day 

5.1.2: 7 Day 

5.1.3: 24 Hours  9 

5.2 

Setting the Operation Mode 

(ProG)


  10

5.3 

Setting the Programme 

(ProG)


  10

 5.3.1: 

5/2 

Day 


    10


5.3.2: 7 Day 

5.3.3: 24 Hour 


11

INDEX

Installation Instructions
6. 

Technical Specification 


6.1 


Parameter 

Settings    12

6.2 

Thermostat 

Technical 

Settings 

  13

7.  

Installation

7.1.1: Installation Safety Instructions   


14


7.1.2: General Safety Instructions


  14

 7.1.3: 

Warning 

Notices 

   15

 7.1.4: 

Maintenance    15

7.2.1: Fitting the Programmable Room Thermostat 


15


7.2.2: Installing the Programmable Room Thermostat  16

 7.2.3: 

Wiring 

Diagram 

   17

8.  

Technical Settings 

(

tEcH

)

8.1  

Quick Comand Guide 


18

8.2  

Menu Technical Settings (

tEcH

  19

9. 

Landlord Service (SEr)


9.1  

Setting the Landlord Service (

SErS

  20

9.2  

Setting the Due Date (

DAtE

)   21

9.3  

Changing the Password (

CODE

  21

Содержание ESRTP5

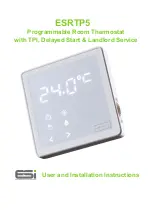
Страница 1: ...ESRTP5 Programmable Room Thermostat with TPI Delayed Start Landlord Service User and Installation Instructions...

Страница 2: ......

Страница 3: ...l 3 1 3 Off Frost Protection 5 3 2 All Day Mode AL 5 3 3 Holiday Mode HOLI 6 4 Main Menu 4 1 Copy Function CoPy 7 4 2 Backlight On Off LIGH 7 4 3 Resetting the Unit rESE 8 5 Programme Settings ProG 5...

Страница 4: ...ructions 14 7 1 3 Warning Notices 15 7 1 4 Maintenance 15 7 2 1 Fitting the Programmable Room Thermostat 15 7 2 2 Installing the Programmable Room Thermostat 16 7 2 3 Wiring Diagram 17 8 Technical Set...

Страница 5: ...me and date will need to be set Use the dial to adjust the hour then press Repeat this to set the minute day date and month date Next set the year by using the dial to adjust the first digit then pres...

Страница 6: ...on mode Off Frost protection mode Manual operation mode Flame symbol when system calling for heat Cancels and returns to the previous menu Either confirms and saves the setting or moves you to next op...

Страница 7: ...1 2 Quick Command Guide 2...

Страница 8: ...nd hold until the display shows tINE then press 2 Turn the dial to adjust the hour then press 3 Turn the dial to adjust the minute then press 4 Turn the dial to adjust to the current day then press 5...

Страница 9: ...range 5o C 35o C Default 21o C N B The temporary set temperature will not replace the original program event s set temperature When the program event ends it will return to the default heating program...

Страница 10: ...e dial to desired temperature then press to confirm and automatically return to the homescreen Press in the homescreen to exit All Day mode and return to Auto mode 3 1 2 MAN Permanent manual override...

Страница 11: ...splay will alternate between HOLI Days Holiday HOLI Current room temperature To adjust the settings in Holiday mode turn the dial to adjust holiday days press to confirm Then turn the dial to adjust s...

Страница 12: ...ress and hold until the display shows tINE Turn the dial until display shows CoPy then press Use the dial to select the day to be copied then press to confirm Use the dial to select the day to be copi...

Страница 13: ...If set permanently ON the light will automatically switch to a lower light setting and be dimmer 4 3 Resetting the Unit rESE Resetting the unit will return the thermostat to default setting The time d...

Страница 14: ...ure settings 9 5 Programme Settings ProG 5 1 Factory Pre Set Programme This unit has been designed to be a simple to use thermostat requiring minimal user intervention with a pre programmed heating pr...

Страница 15: ...ally return to homescreen 10 Choose 5 2 day operation see 5 2 for details Then press Turn the dial to select the days to programme either 1 5 for weekdays or 6 7 for weekends then press Turn the dial...

Страница 16: ...i then press Turn the dial to choose the program P1 P6 Then press to enter time setting Turn the dial to adjust the time 10 minutes increments Then press to enter temperature setting Turn the dial to...

Страница 17: ...Installa on Instruc ons...

Страница 18: ...00 24 00 See 5 1 for details Program event set temperature 5o C 35o C See 5 1 for details Program operation mode 5 2 day 7 day 24hr Default 5 2 day Number of programs 4 or 6 Default 6 Manual mode temp...

Страница 19: ...s Power supply 230VAC 3 1 A SPDT Temperature Sensor Type 1o C at 20o C Total Switch Rating 3 1 A 230 VAC Contact Type SPDT Volt Free changeover contacts Plastic Thermoplastic flame retardant Protectio...

Страница 20: ...ired as the product is double insulated but ensure continuity of earth throughout the system 7 1 2 General Safety Instructions This product complies with the essential requirements of the follow ing E...

Страница 21: ...oom Thermostat The ideal position to locate the Programmable Room Thermostat is about 1 5m above floor level in a location where the thermostat is accessible reasonably lit and free from extremes of t...

Страница 22: ...t 1 Use a flat headed screwdriver to press the fastener at the top of the unit then gently loosen from the unit unhooking from top to bottom Fix the 35mm back box terminals at the top onto a 2 flange...

Страница 23: ...al 4 NC Normally Closed 5 NO Normally Open 17 Route the wires through the back of the wall plate Fit the wires to the wall plate in accordance with the relevant diagram and in accordance with I E E re...

Страница 24: ...8 Technical Settings 8 1 Quick Command Guide 18...

Страница 25: ...nt room tempera ture tPI TPI Default is OFF Use the dial to choose between OFF function disabled 3CYC each hour has 3 heating cycles recommended for oil boilers or 6CYC each hour has 6 heating cycles...

Страница 26: ...due by displaying SER in the screen 30 days before due date The operation of the system will not be affected 2 Reminds the user when the annual service is due by displaying SER in the screen 30 days b...

Страница 27: ...9 1 and use the dial to select CODE then press Use the dial to set the first digit of the new password then press to move to the next digit Repeat this for all 4 digits On the last digit press to con...

Страница 28: ...continuous product improvement we reserve the right to alter designs specifications and materials without prior notice and cannot accept liability for errors WARNING Interference with sealed parts ren...

Страница 29: ......

Страница 30: ......

Страница 31: ......

Страница 32: ...Version 6 9 3 ESi Controls Limited sales esicontrols co uk www esicontrols co uk...

Отзывы: