


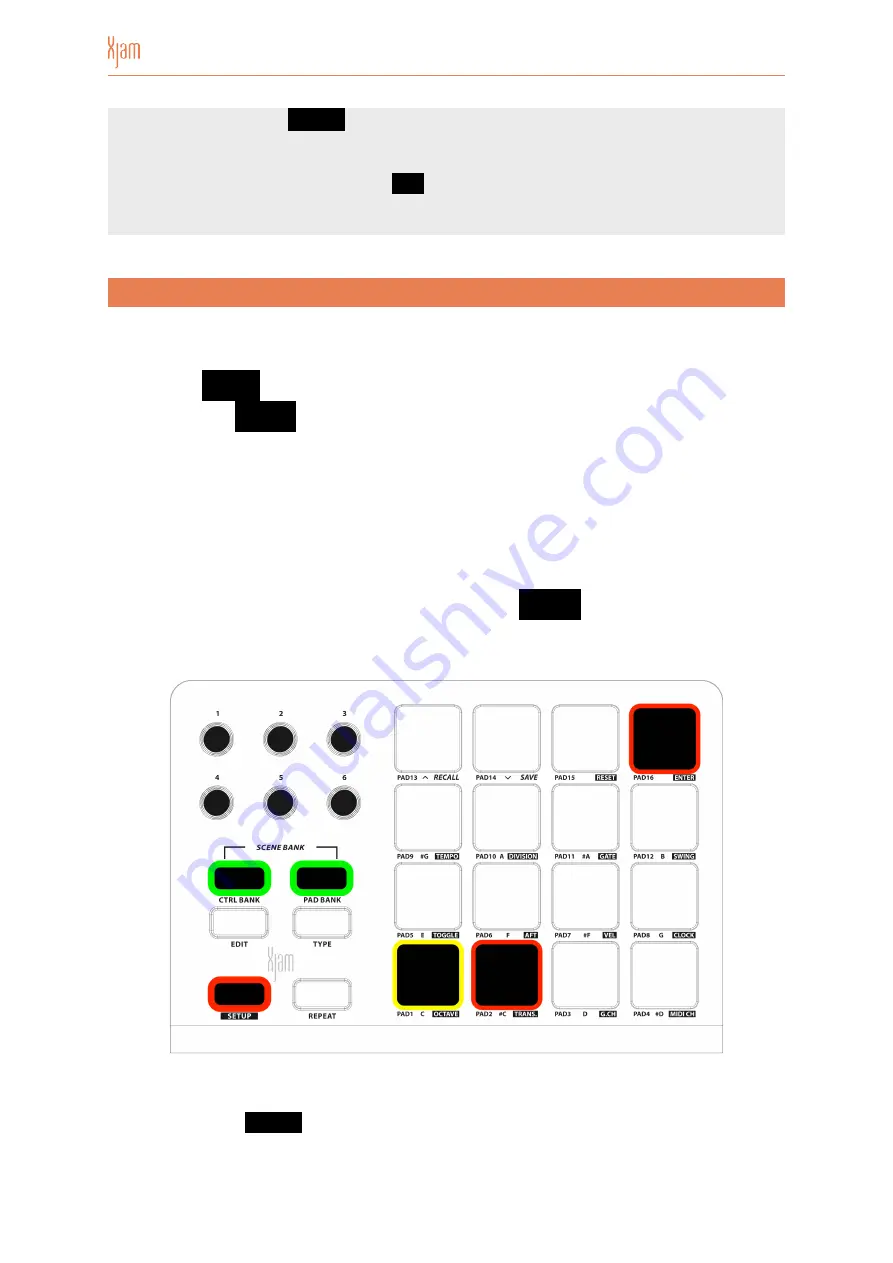
Note:
If you press the
SETUP
button after making adjustments to Xjam’s velocity
settings, you will notice that Xjam shows you information about the current velocity
setting during the 2 seconds SETUP state display. If one of the four user curve
settings has been enabled, Pad 7 /
VEL
will show up YELLOW for two seconds. In
case one of the three fixed settings has been enabled, this Pad would shine RED,
see picture above.
5.4.1 SETUP Repeat Clock Configuration
To set Xjam’s clock configuration:
•
Press the
SETUP
button to enter SETUP mode.
•
Press Pad 8 /
CLOCK
to set Xjam’s clock source (external or internal), which will
determine the rate of its time-related features.
•
Press either Pad 1 (internal) or Pad 2 (external) to set the clock source. The
selected pad will turn YELLOW.
•
When Pad 1 lights RED, (external), Xjam will use your DAW’s tempo. When Pad 1
lights YELLOW (internal), like in the picture below, Xjam will use its own, the
internal tempo, which can be set through Pad 9 /
TEMPO
during the next SETUP
process.
•
Press Pad 16 /
ENTER
to confirm the selection and exit SETUP.
Page of
21
37
Содержание Artesia Pro XJam
Страница 1: ...MIDI Performance Controller USER GUIDE...
Страница 2: ......
Страница 40: ...Manual Version 1 0...


