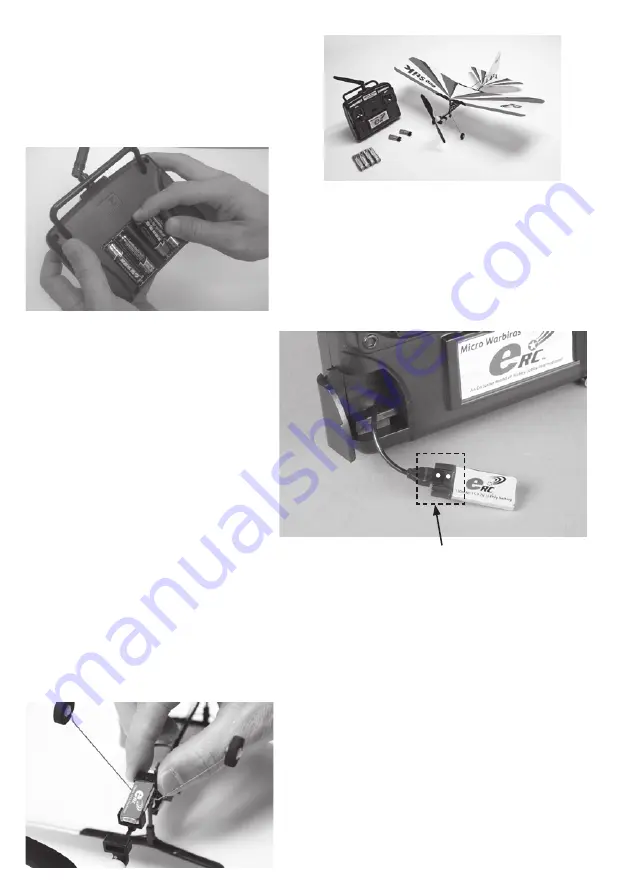
Items Included With Your Model:
Transmitter
AA batteries (4)
Assembled aircraft
Li-Po battery (2)
Streamer
Install the Transmitter Batteries
Open the rear cover of the transmitter.
Insert the four AA batteries noting the
polarity of the batteries molded into the
transmitter case. Replace the cover on
the transmitter.
Charging the Flight Battery
Open the door on the transmitter to access
the charger lead. Connect the lead to the
flight battery making sure the red dots are
aligned.
The transmitter can be in either the ON or
OFF position while charging a battery.
If the battery is charging correctly, a yellow
light on the transmitter face will light. When
charging is complete, the yellow light will
go off.
Transmitter Battery Check
When charging with the power switch in
the ON position, the signal that the AA
transmitter batteries need to be replaced
will be an audible beep. When charging with
the power switch in the OFF position, the
yellow light will become dim when the AA
transmitter batteries are running low.
Note:
If you are flying your model while the
transmitter battery power becomes low, stop
flying immediately and replace the batteries
in the transmitter.
Install the Flight Battery
Once the flight battery has charged, insert the
battery in the battery holder as shown. Make
sure the red dots are aligned.
Make sure the connector on the battery is
aligned properly to the plug in the fuselage.
Take care not to force the battery in the
fuselage.
Use only the supplied battery or
ERC replacement part. Other batteries may
damage the radio system.
Make sure that the coloured dots are lined up on
the battery and charge lead. Plugging the battery in
the wrong way round may damage the pins on the
battery.and is not covered by the warranty.
Содержание Micro Stik
Страница 1: ......


