


59
3.
Select
Wi-Fi Direct
.
4.
Scroll down and select
Start Setup
.
5.
Select
Start Setup
again.
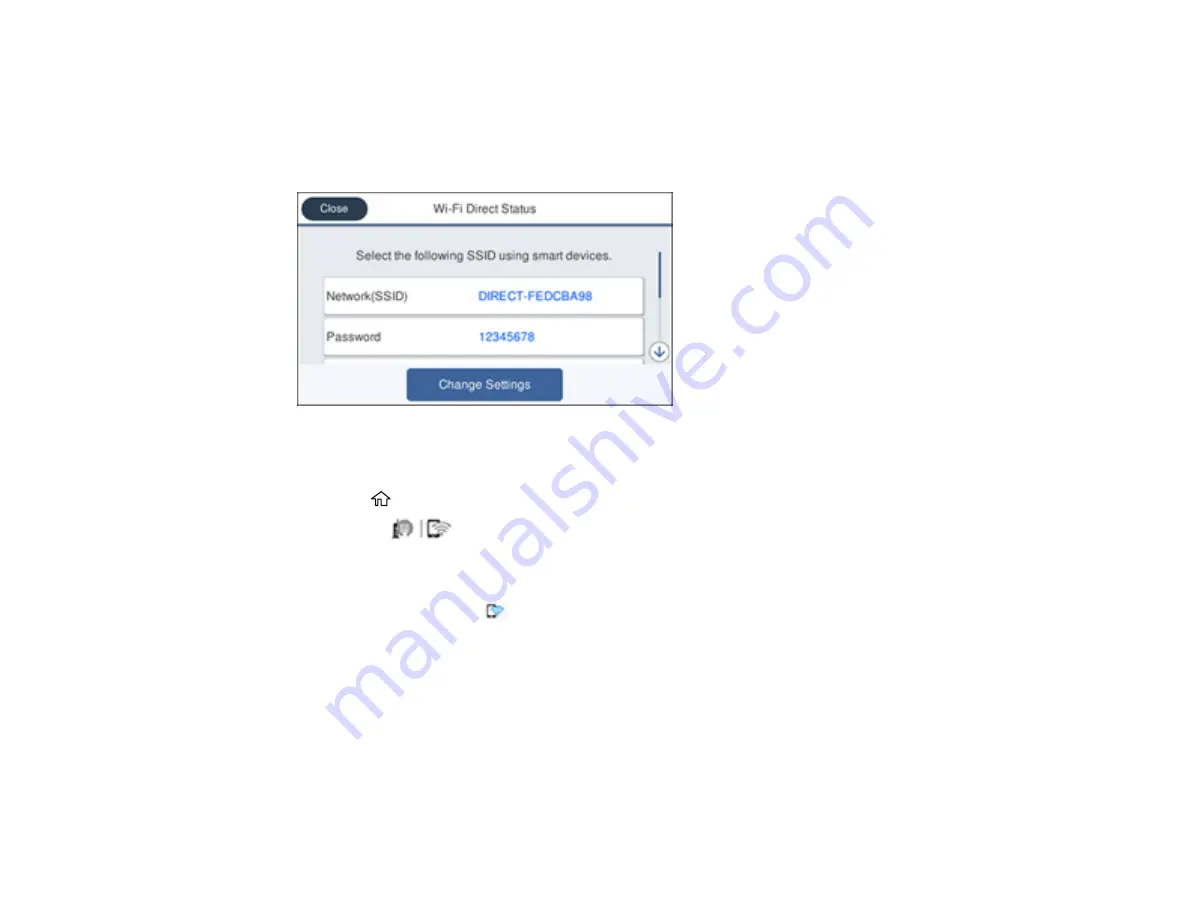
You see a screen like this:
6.
Use your computer or wireless device to select the Wi-Fi network name (SSID) displayed on the
LCD screen, then enter the password shown.
7.
Press the
home button to exit.
You see the
icon on the LCD screen and should be able to connect to your product directly
from your computer or device, and then print. If you are printing from a computer, make sure you
installed the network software as described on the
Start Here
sheet.
Note:
If you don't see the
icon on the LCD screen, you may have selected the wrong network
name or entered the password incorrectly. Repeat these steps to try again.
Parent topic:
Related references
Related tasks
Содержание WorkForce Pro WF-C4810 Series
Страница 1: ...WF C4810 Series User s Guide ...
Страница 2: ......
Страница 14: ......
Страница 34: ...34 Product Parts Inside 1 Document cover 2 Scanner glass 3 Control panel ...
Страница 49: ...49 Related topics Wi Fi or Wired Networking ...
Страница 99: ...99 1 Open the ADF document support 2 Slide the ADF edge guide outward ...
Страница 134: ...134 9 Select the Layout tab 10 Select the orientation of your document as the Orientation setting ...
Страница 173: ...173 You see an Epson Scan 2 window like this ...
Страница 175: ...175 You see an Epson Scan 2 window like this ...
Страница 189: ...189 You see a screen like this 2 Click the Save Settings tab ...
Страница 194: ...194 You see this window ...
Страница 248: ...248 Parent topic Printing Fax Reports ...
Страница 291: ...291 Related tasks Loading Paper in the Cassette ...
Страница 293: ...293 5 Open the document cover ...
Страница 295: ...295 8 Open the ADF cover ...
Страница 322: ...322 3 Open the ADF cover 4 Carefully remove any jammed pages ...


