


58
18. Connect the other end of the USB cable to the port on the back of the auto take-up reel.
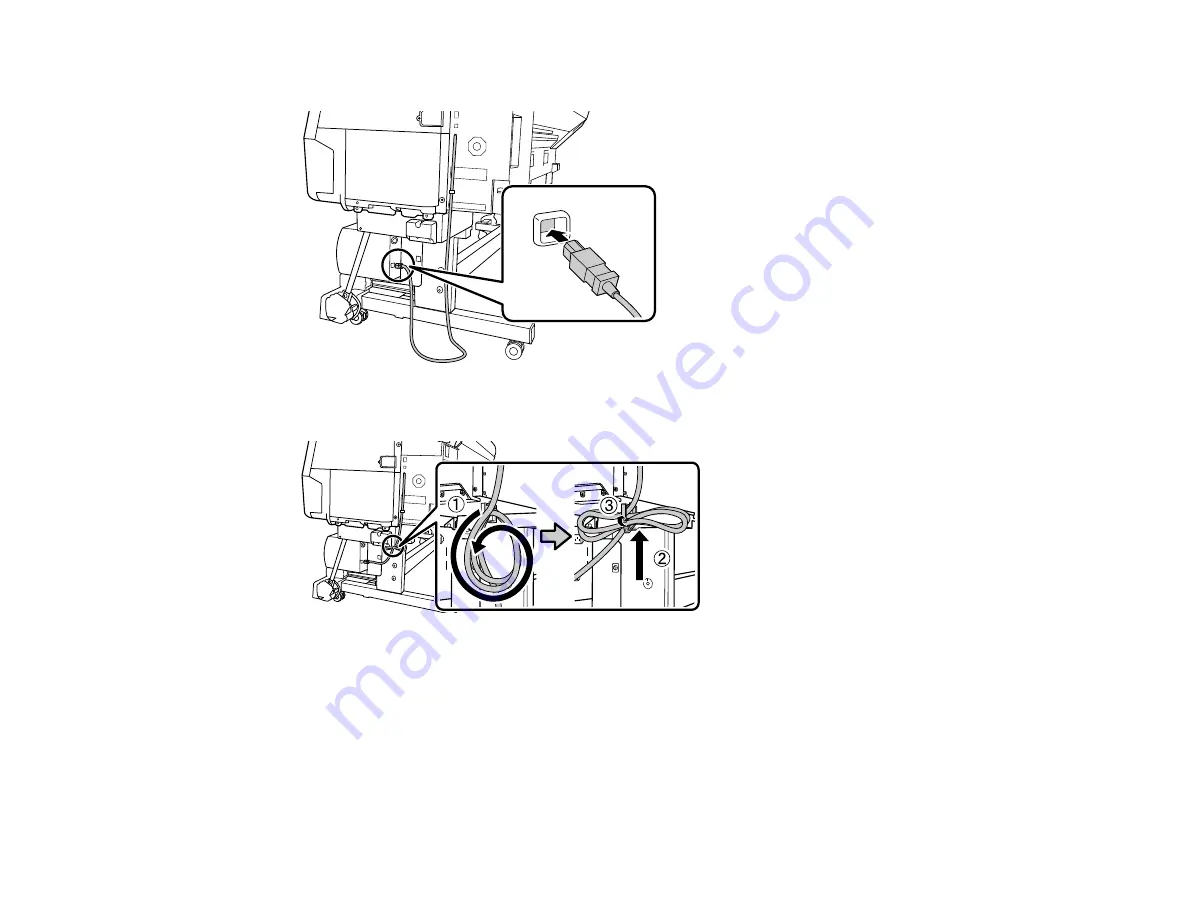
19. Coil the excess cable and secure it using the cable clamp on the bottom of the printer stand.
20. Connect the power cord to the AC inlet on the back of the auto take-up reel and route the cord
through the same cable clamp as the printer's power cord.
21. Plug the auto take-up reel power cord into an electrical outlet.
Parent topic:
Using the Optional Auto Take-up Reel
Attaching the Roll Core to the Auto Take-up Reel
You need to attach the roll core to the auto-take up reel before you can load paper onto the take-up reel.
Содержание SureColor P10000
Страница 1: ...Epson SureColor P10000 P20000 User s Guide ...
Страница 2: ......
Страница 8: ......
Страница 48: ...48 Related references Printable Area Specifications ...
Страница 53: ...53 7 Remove the three thumb screws that hold the sensors in their packing position 8 Remove the sensors ...
Страница 55: ...55 11 Lower the inner take up reel sensor 12 Attach a cable clamp to the bottom of the printer ...
Страница 61: ...61 7 Attach the roll core holder to the paper stop and push it in until it clicks into place ...
Страница 62: ...62 8 Unlock the paper stop and slide it to the left ...
Страница 75: ...75 If you attached media to the roll core with printable side out insert the tensioner as shown here ...
Страница 76: ...76 5 Align the tensioner with the right edge of the paper as shown ...
Страница 80: ...80 Parent topic Using the Optional Auto Take up Reel ...
Страница 94: ...94 You can also place the same print data multiple times as shown here ...
Страница 95: ...95 You can place print data in different sizes and orientations to maximize media usage as shown here ...
Страница 173: ...173 7 Remove the thumb screws ...
Страница 174: ...174 8 Slide the upper cover to the left and remove it ...
Страница 175: ...175 9 Close the ink cartridge cover ...
Страница 176: ...176 10 Use a cleaning stick to clean the front and back edges on the bottom of the print head ...
Страница 178: ...178 12 Open the ink cartridge cover and attach the upper cover ...
Страница 179: ...179 13 Secure the upper cover with the thumb screws and close the ink cartridge cover ...
Страница 180: ...180 14 Open the front cover and use a cleaning stick to clean the top edges of the print head cap ...
Страница 181: ...181 15 Use a cleaning stick to clean the outside of the front print head wipers ...
Страница 200: ...200 4 Cut the paper above the paper feed slot 5 Remove the jammed paper in the direction shown ...


