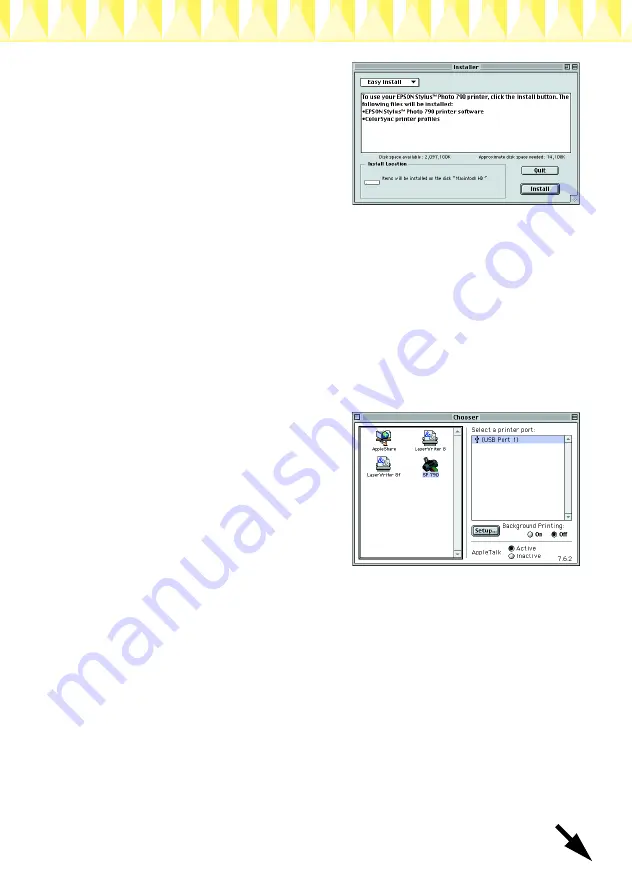
3. At the initial screen, click
Continue
. The Installer dialog
box appears.
4. To install the printer software that
is included on your printer
software CD-ROM, make sure
that the Install Location box
displays the correct drive, then
click
Install
.
5. When a message appears informing you that the installation is
complete, click
Restart
to restart your computer.
Selecting your printer in the Chooser
After you have installed the printer software on your Macintosh, you
need to open the Chooser and select your printer. You must select a
printer the first time you use it or whenever you want to switch to
another printer. Your Macintosh will always print using the last printer
selected. Follow the steps below to select your printer in the Chooser.
1. Choose
Chooser
from the Apple
menu. Then, select the icon for
your printer and the port that
your printer is connected to.
2. Select the appropriate
Background Printing
radio
button to turn background
printing on or off.
When background printing is on,
you can use your Macintosh while it is preparing a document for
printing. In order to use the EPSON Monitor3 utility to manage print
jobs, background printing must be turned on.
3. Close the Chooser.
Installing EPSON PhotoQuicker
1. After the setup is complete, the installer dialog box appears again.
Double-click the
EPSON PhotoQuicker
, then double-click
Installer
icon inside it.
2. The installer dialog box appears. Click
Install
.
3. When a message appears informing you that installation is
complete, click
Quit
.
Содержание Stylus Photo 790
Страница 1: ...4013104 00 xxx ...


