


Preparing the Projector to Present Through a Network
63
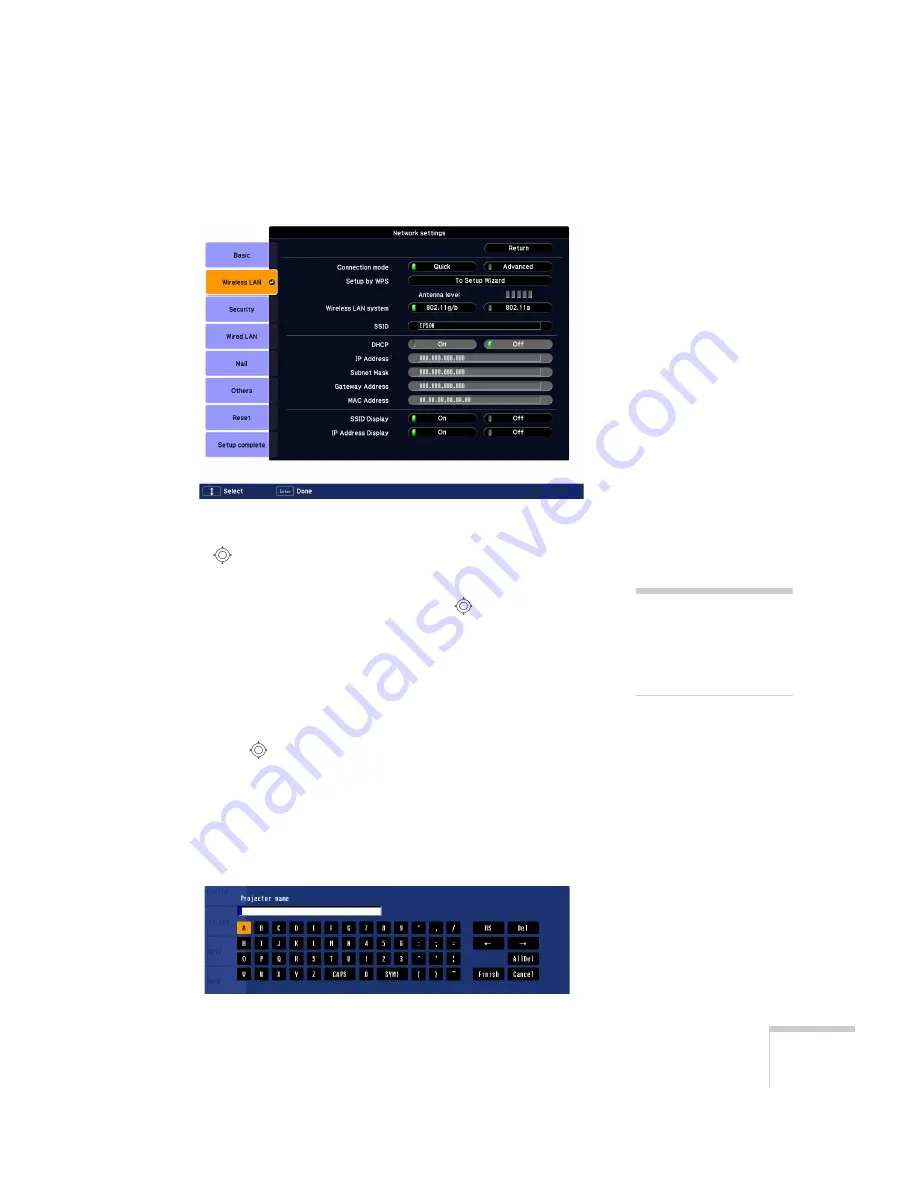
You see this screen:
4. Make sure
Quick
is selected for the Connection mode. If not, use
the
pointer button on the remote control to highlight
Quick
,
then press
Enter
to select it.
5. If your network is using 802.11a, use the
pointer button on
the remote control to highlight
802.11a
, then press
Enter
to
select it.
6. If your computer’s network card supports an SSID (or ESSID)
name (see page 67), highlight the
SSID
text box, press
Enter
, and
enter a name.
Press the
pointer button to select individual letters; then press
Enter
to input a character. To add a blank space or to navigate
backward and forward through the input text, highlight the
arrows and press
Enter
. To toggle symbol settings or capital
letters, highlight the option and press
Enter
. When you’re done,
highlight
Finish
and press
Enter
.
note
If you are using a
WPS-compatible access
point, see page 79 for
connection information.
Содержание PowerLite Pro G5200WNL
Страница 1: ...PowerLite Pro G5150NL G5350NL G5200WNL Multimedia Projector User sGuide ...
Страница 8: ...8 ...
Страница 14: ...14 Welcome ...
Страница 112: ...112 Fine Tuning the Projector ...
Страница 120: ...120 Managing Projectors ...
Страница 132: ...132 Maintaining the Projector ...
Страница 148: ...148 Solving Problems ...
Страница 154: ...154 Projector Installation ...
Страница 164: ...164 Technical Specifications ...
Страница 170: ...170 Notices ...
Страница 177: ......


