background image

Note:

You cannot scan negative slides with Full Auto Mode.
Make sure the white stickers on the back of the film holder and the areas around them are not 

scratched, dusty, or covered in any way. If the areas are obscured, the scanner may have trouble 

recognizing your slides in Full Auto Mode.
Do not cover the small holes on the film holder.

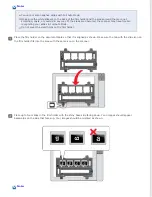
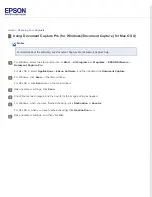
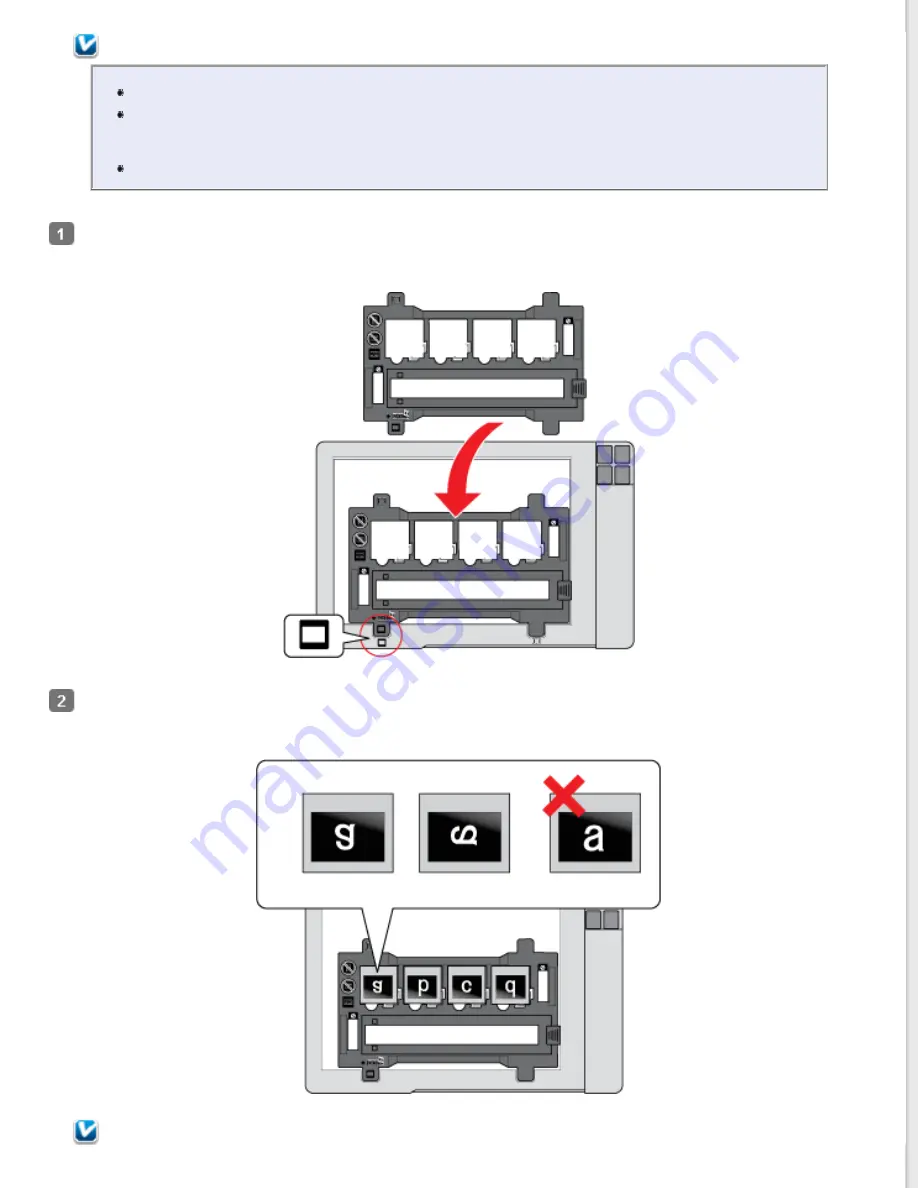
Place the film holder on the document table so that it is aligned as shown. Make sure the tab with the slide icon on 
the film holder fits into the area with the same icon on the scanner.

Place up to four slides in the film holder with the shiny base side facing down. Your images should appear 
backwards on the side that faces up. Your images should be oriented as shown.

Note:

Содержание Perfection V37

Страница 1: ...cuments or photos using any of the available scanning methods Scanning Special Projects Follow the instructions here for specific scanning projects you may need to create Maintenance Follow the guidelines here to maintain and transport your scanner Solving Problems If you have a problem using your scanner or its software check here for solutions Technical Specifications Check here for technical de...

Страница 2: ...Home Guide to the Scanner Parts Guide to the Scanner Parts Check these sections to identify the parts of your scanner Scanner Parts Light and Buttons ...

Страница 3: ...ginals on the Scanner Placing Originals on the Scanner Follow the steps here to place your original documents or photos on the scanner Placing Documents or Photos Placing Film or Slides EPSON Perfection V370 Photo Only ...

Страница 4: ...the step by step instructions here to scan your original documents or photos using any of the available scanning methods Using the Scanner Buttons Using Document Capture Pro for Windows Document Capture for Mac OS X Using Another Scanning Program EPSON Scan Mode ...

Страница 5: ...specific scanning projects you may need to create Scanning to SharePoint or Cloud Service Scanning to a PDF File Using the Scanner as a Copier Scanning Directly to an E mail Assigning a Program to a Scanner Button Converting Scanned Documents Into Editable Text Adjusting the Scanned Image ...

Страница 6: ...Home Maintenance Maintenance Follow the guidelines here to maintain and transport your scanner Cleaning the Scanner Transporting the Scanner Power Off Timer Setting ...

Страница 7: ...ing If you have a problem using your scanner or its software check here for solutions Scanner Problems Scanning Problems Scan Quality Problems Uninstalling Your Scanning Software Where To Get Help Epson Technical Support Other Software Technical Support ...

Страница 8: ...for technical details about your scanner and its accessories System Requirements Scanner Specifications Note Epson offers a recycling program for end of life products Please go to www epson com recycle for information on how to return your products for proper disposal ...

Страница 9: ... allow the AC adapter or the cord to be stepped on or run over Be particularly careful to keep the cord straight at the end and the point where it enters the AC adapter Use only the AC adapter that comes with your scanner Using any other adapter could cause fire electrical shock or injury The AC adapter is designed for use with the scanner with which it was included Do not attempt to use it with o...

Страница 10: ...ode 25249 5 and following Restrictions on Copying Observe the following restrictions to ensure responsible and legal use of your scanner Copying of the following items is prohibited by law Bank bills coins government issued marketable securities government bond securities and municipal securities Unused postage stamps pre stamped postcards and other official postal items bearing valid postage Gove...

Страница 11: ... Software House MediaImpression is a registered trademark and Scan n Stitch Deluxe is a trademark of ArcSoft Incorporated PRINT Image Matching and the PRINT Image Matching logo are trademarks of Seiko Epson Corporation Intel is a registered trademark of Intel Corporation PowerPC is a registered trademark of International Business Machines Corporation EPSON Scan Software is based in part on the wor...

Страница 12: ...CPD 37448R3 ...

Страница 13: ...ws 7 Professional and Windows 7 Ultimate Windows Vista refers to Windows Vista Home Basic Edition Windows Vista Home Premium Edition Windows Vista Business Edition Windows Vista Enterprise Edition and Windows Vista Ultimate Edition Windows XP refers to Windows XP Home Edition Windows XP Professional x64 Edition and Windows XP Professional Macintosh refers to Mac OS X Mac OS X refers to Mac OS X 10...

Страница 14: ...Note The parts described in this section apply to EPSON Perfection V37 and EPSON Perfection V370 Photo scanners unless otherwise noted a scanner cover a document mat EPSON Perfection V370 Photo only b document table c carriage in the document table ...

Страница 15: ...a transparency unit window EPSON Perfection V370 Photo only a USB interface connector b DC inlet ...

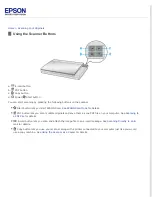
Страница 16: ...N Perfection V370 Photo but the descriptions also apply to the EPSON Perfection V37 a Scan to E mail button b Scan to PDF button c Copy button d Power Start button e Status light Light The Status light is between the Power Start button and the PDF button Color Indicator Status Meaning Green On Ready to scan images Flashing Initializing or scanning Orange Flashing An error has occurred See The Stat...

Страница 17: ...nner on if pressed once Turns the scanner off if held down for 3 seconds while the scanner is on You cannot turn the scanner off when the scanning software is running Start EPSON Scan starts Copy The Copy Utility starts Scan to E mail EPSON Scan automatically scans then the Send File Via E mail window appears Scan to PDF The Scan to PDF window appears See Using the Scanner Buttons Top ...

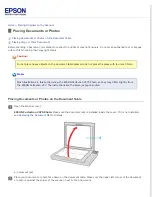
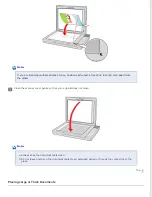
Страница 18: ... much force Note Most illustrations in this section show the EPSON Perfection V370 Photo so they may differ slightly from the EPSON Perfection V37 The instructions are the same except as noted Placing Documents or Photos on the Document Table Open the scanner cover EPSON Perfection V370 Photo Make sure the document mat is installed inside the cover If it is not installed see Replacing the Document...

Страница 19: ... inch 20 mm apart from the others Close the scanner cover gently so that your original does not move Note Always keep the document table clean Do not leave photos on the document table for an extended period of time as they may stick to the glass Top Placing Large or Thick Documents ...

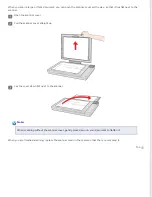
Страница 20: ...o the scanner Open the scanner cover Pull the scanner cover straight up Lay the cover down flat next to the scanner Note When scanning without the scanner cover gently press down on your document to flatten it When you are finished scanning replace the scanner cover in the reverse order that you removed it Top ...

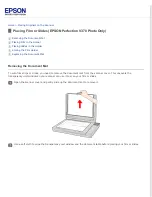
Страница 21: ...he Document Mat Removing the Document Mat To scan film strips or slides you need to remove the document mat from the scanner cover This uncovers the transparency unit window so your scanner can use it to scan your film or slides Open the scanner cover and gently slide up the document mat to remove it Use a soft cloth to wipe the transparency unit window and the document table before placing your f...

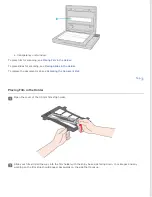
Страница 22: ...n the Holder To replace the document mat see Replacing the Document Mat Top Placing Film in the Holder Open the cover of the 35 mm film strip holder Slide your film strip all the way into the film holder with the shiny base side facing down Your images and any wording on the film strip should appear backwards on the side that faces up ...

Страница 23: ...the areas around them are not scratched dusty or covered in any way If the areas are obscured the scanner may have trouble recognizing your film in Full Auto Mode Do not cover the small holes in the film holder Close the cover and press it down until you hear a click Then press down on all the edges of the cover to secure it Make sure the film strip is placed as shown ...

Страница 24: ...e you removed the document mat See Removing the Document Mat Close the scanner cover To scan your film see Using the Scanner Buttons When you are finished scanning film be sure to replace the document mat before scanning documents or photos See Replacing the Document Mat Top Placing Slides in the Holder You can scan up to four 35 mm slides at a time using the slide portion of the film holder ...

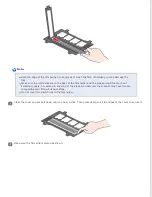
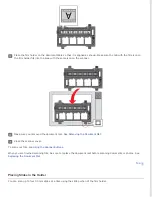
Страница 25: ...ing your slides in Full Auto Mode Do not cover the small holes on the film holder Place the film holder on the document table so that it is aligned as shown Make sure the tab with the slide icon on the film holder fits into the area with the same icon on the scanner Place up to four slides in the film holder with the shiny base side facing down Your images should appear backwards on the side that ...

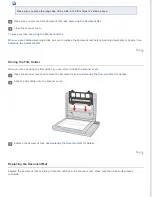
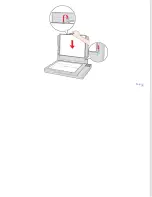
Страница 26: ...ocuments or photos See Replacing the Document Mat Top Storing the Film Holder When you are not using the film holder you can store it inside the scanner cover Open the scanner cover and remove the document mat See Removing the Document Mat for details Slide the film holder into the scanner cover Replace the document mat See Replacing the Document Mat for details Top Replacing the Document Mat Repl...

Страница 27: ...Top ...

Страница 28: ...can Mode for details PDF button lets you scan multiple originals and save them as one PDF file on your computer See Scanning to a PDF File for details E mail button lets you scan and attach the image file to an e mail message See Scanning Directly to an E mail for details Copy button lets you use your scanner along with a printer connected to your computer just like you would use a copy machine Se...

Страница 29: ...nt Capture Pro For Mac OS X select Applications Epson Software and then double click Document Capture For Windows click Scan on the main window For Mac OS X click Scan icon on the main window Make necessary settings click Scan Check the scanned images and then perform the image editing as needed For Windows when you have finished checking click Destination or Save As For Mac OS X when you have fin...

Страница 30: ... Import and select your scanner ArcSoft MediaImpression Click Pictures click Acquire and select your scanner ArcSoft PhotoImpression Windows Click Get Photos click Acquire from Scanner and select your scanner Mac OS X Open the File menu select Get Photo select Camera Scanner and select your scanner ArcSoft Scan n Stitch Deluxe Windows only Select your scanner from Selected Scanner and then click S...

Страница 31: ... settings including color restoration dust removal and backlight correction See the EPSON Scan help for details Office Mode lets you quickly select settings for scanning text documents and check their effects with a preview image See the EPSON Scan help for details Professional Mode gives you total control of your scanning settings and lets you check their effects with a preview image Professional...

Страница 32: ...s window See help for more details on Document Capture Pro Click Destination Settings On the settings window click Add and make destination settings and then click OK Click OK to return to the Transfer Settings window Check the Destination Name and then click OK The image is uploaded For Mac OS X Start Document Capture and scan your document Using Document Capture Pro for Windows Document Capture ...

Страница 33: ...ble in some countries Specifying the number of pages in a single PDF file You can specify the maximum number of pages that can be included in one PDF file For example if you are scanning a 20 page document and specify the page number to be included in one PDF as 4 5 PDF files are automatically created Note You need ABBYY FineReader that came with your scanner to use some of these features If you h...

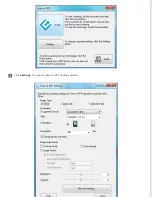
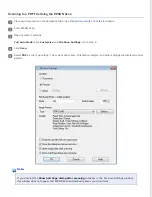
Страница 34: ...Click Settings You see the Scan to PDF Settings window ...

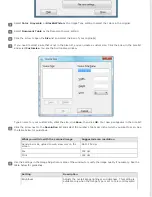
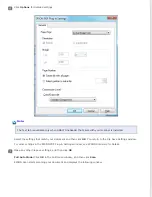
Страница 35: ...Save then click OK Your new size appears in the Size list Click the arrow next to the Resolution list and select the number of dots per inch at which you want to scan See the table below for guidelines What you will do with the scanned image Suggested scan resolution Send via e mail upload to web view only on the screen 96 to 150 dpi Fax 200 dpi Print 300 dpi Use the settings in the Image Adjustme...

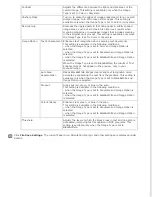
Страница 36: ...age Option is selected When the Image Type is set to Black White the results of Text Enhancement do not appear in the preview only in your scanned image Auto Area Segmentation Makes Black White images clearer and text recognition more accurate by separating the text from the graphics This setting is available only when the Image Type is set to Black White and Image Option is selected Dropout Drops...

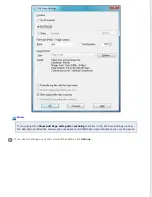
Страница 37: ... Page dialog after scanning checkbox in the File Save Settings window the Add Page Confirmation window does not appear and EPSON Scan automatically saves your document If you need to change any of the current PDF settings click Options ...

Страница 38: ...can to PDF Settings window then click Scan or press the Start button on the scanner EPSON Scan scans your page If you are scanning single page go to step 15 If you are scanning multiple pages replace the first page on the document table with the second page and click Scan or press the Start button again Repeat this step for each page in your document Click Finish or press the scan to PDF button on...

Страница 39: ...ll Auto Mode Click Customize and File Save Settings Go to step 5 Click Scan Select PDF as the Type setting The current Paper Size Orientation Margin and other settings are displayed under Details Note If you deselect the Show Add Page dialog after scanning checkbox in the File Save Settings window this window does not appear and EPSON Scan automatically saves your document ...

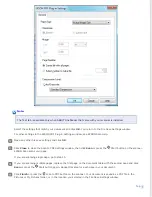
Страница 40: ...ch your document and then click OK You return to the File Save Settings window For other settings in the EPSON PDF Plug in Settings window see EPSON Scan Help for details Make any other file save settings and then click OK Full Auto Mode Click OK in the Customize window and then click Scan EPSON Scan starts scanning your document and displays the following window ...

Страница 41: ...is button when you are ready to finish scanning and save the scanned pages into one PDF without editing them Then go to step 11 You see the Editing Page window displaying thumbnail images of each scanned page Use the tools below the Editing Page window to select rotate reorder and delete pages If you want to include all the document pages in your PDF files as they currently look go to step 13 If y...

Страница 42: ...rther details on the tools in the Editing Page window see EPSON Scan Help When you have finished editing your pages click OK The pages are saved in one PDF file in Pictures My Pictures or the location you selected in the File Save Settings window and you return to the Office Mode window Click Close to exit EPSON Scan Top ...

Страница 43: ...st as you copy Place your original s on the document table See one of these sections for details Documents or photos Placing Documents or Photos Film or slides Placing Film or Slides EPSON Perfection V370 Photo Only Start the Copy Utility in one of these ways Press the Copy button on the scanner Windows Click the Start button icon or Start Programs or All Programs EPSON Software Copy Utility Mac O...

Страница 44: ...Film Color negative film strips Positive Film Color positive slides or positive film strips Click the Output Paper box select the type and size of paper you loaded in your printer and click OK Note If you are printing on certain EPSON printers you see the printer settings window See your printer documentation for instructions on selecting settings If you want to enlarge or reduce your image s as y...

Страница 45: ... your original s or adjust the contrast between them as you copy click the slider beneath the Brightness and or Contrast settings Contrast is only adjustable when the Source Type is Photo Negative Film or Positive Film Click the arrow in the Number of Copies box to select the number of copies you want if necessary When you are ready to scan and print click Copy Note If you want to preview your sca...

Страница 46: ... Slides Perfection V730 Photo Only Press the scan to E mail button on the scanner EPSON Scan starts in Full Auto Mode and automatically scans your image as a JPEG file Note If you want to restore color in or remove dust from your images before scanning click the Pause button to return to the Full Auto Mode window Then click Customize select your options click OK and click Scan to continue If you w...

Страница 47: ...ct Photo Size Note The box at the bottom of the window displays information about the image file s you are attaching to the e mail message Click OK Your e mail program is opened and any scanned images you selected are attached to a new e mail message See your e mail program Help if you need instructions on sending your e mail message ...

Страница 48: ...EPSON Scan automatically scans then the Send File Via E mail window appears Scan to PDF The Scan to PDF window appears Assigning a Project Program in EPSON Event Manager to a Scanner Button You can assign any of the scanner buttons to open a program in the EPSON Event Manager to make scanning your projects even quicker Each scanner button opens a pre selected program when you press it See Using th...

Страница 49: ...ick the arrow in the list next to the button name then select the action you want to assign If you want to add the action click Make Job Settings Click New enter the Job Description and make the necessary Scan Settings and then click OK ...

Страница 50: ...r you finish the job settings go back to step 3 and select the action you set Click Close to close the EPSON Event Manager window Now whenever you press the button you assigned the action you selected opens Note ...

Страница 51: ...ent Manager Help Top Assigning a Program With Windows 7 and Vista Click the Start button icon and select Control Panel Click Hardware and Sound then Devices and Printers Right click your scanner s icon and select Scan Properties or Properties Click Yes or Continue in the User Account Control window Click the Events tab In the Select an event list make sure Start Button is selected ...

Страница 52: ... XP Click Start Control Panel Printers and Other Hardware Scanners and Cameras Right click your scanner s icon and select Properties Click the Events tab In the Select an event list make sure Start Button is selected In the Start this program list choose the program you want to assign Only compatible programs appear in the list Note If you want to be given a choice of programs whenever you press t...

Страница 53: ...nts or text Handwritten characters Items that have been copied from other copies Faxes Text with tightly spaced characters or line pitch Text that is in tables or underlined Cursive or italic fonts and font sizes less than 8 points Place your document on the document table See Placing Documents or Photos for details Do one of the following to start ABBYY FineReader Windows Click the Start button i...

Страница 54: ...gamma levels individually Tone Correction Provides a graphical interface for adjusting tone levels individually Image Adjustment Adjusts brightness and contrast and the balance of red green and blue colors in the overall image Color Palette Provides a graphical interface for adjusting mid tone levels such as skin tones without affecting the highlight and shadow areas of the image Unsharp Mask Shar...

Страница 55: ...adows from photos that have too much background light Dust Removal Removes dust marks from your originals automatically Text Enhancement Enhances text recognition when scanning text documents Auto Area Segmentation Makes Black White images clearer and text recognition more accurate by separating the text from the graphics Dropout color Scan without a certain color You can select from red blue or g...

Страница 56: ...Color Enhance Enhance a certain color You can select from red blue or green See Epson Scan Help for details ...

Страница 57: ...or electronic components This could permanently damage the mechanism and circuitry Do not spray lubricants inside the scanner Never open the scanner case Press the Power button for 3 seconds to turn off the scanner Unplug the AC adapter cord from the scanner Clean the outer case with a cloth dampened with mild detergent and water If the glass surface of the document table gets dirty clean it with ...

Страница 58: ...a transparency unit window Make sure that no dust builds up on the surface of the document table or the transparency unit window Dust can cause spots in your scanned images ...

Страница 59: ...he home position on the right side of the scanner If the carriage is not in the home position turn on the scanner and wait until the carriage moves to the home position Press the Power button for 3 seconds to turn off the scanner then unplug the AC adapter Disconnect the USB cable from the scanner Attach the packing materials that came with the scanner then repack the scanner in its original box o...

Страница 60: ...ease will affect the product s energy efficiency Please consider the environment before making any change Follow the steps below to adjust the time Start EPSON Scan Settings Windows Start All Programs or Programs EPSON EPSON Scan EPSON Scan Settings Mac OS X Select Applications EPSON Software EPSON Scan Settings Click Power Off Timer Adjust the Power Off Timer Setting as necessary and then click O...

Страница 61: ...anner software is fully installed See the Start Here sheet for instructions on installing the scanner software Press the Power button for 3 seconds to turn off the scanner then turn it on again If the Status light is still flashing orange the scanner may be malfunctioning or the scanner light source may need to be replaced See Epson Technical Support for details None Off The scanner is off Top The...

Страница 62: ...icon and the Select Scanner list is displayed make sure you select the model of your scanner For Mac OS X When you start EPSON Scan from the EPSON Software folder in the Applications folder and the Select Scanner list is displayed make sure you select your scanner model If you are using any TWAIN compliant program such as ArcSoft MediaImpression make sure that the correct scanner is selected as th...

Страница 63: ...ick the Hardware tab then click Device Manager Scroll down and double click Universal Serial Bus controllers If a USB Universal Host Controllers and USB Root Hub are listed Windows supports USB Try scanning again If your scanner still is not recognized contact Epson for assistance See Epson Technical Support Top Pressing a Scanner Button Does Not Start the Correct Program Make sure EPSON Scan and ...

Страница 64: ...start EPSON Scanner Monitor in the Epson Software folder in the Applications folder and then press a button to scan Top ...

Страница 65: ...ant to scan See the EPSON Scan help for details If you are scanning a large size document use normal preview and create marquees on the area you want to scan See the EPSON Scan help for details Make sure the Document Type setting Home Mode or Document Type and Film Type setting Professional Mode are correct Click Configuration select the Preview tab and adjust the thumbnail cropping area using the...

Страница 66: ...ch as A4 switch to Office Mode Home Mode or Professional Mode To change the scan mode see EPSON Scan Mode Then use normal preview and create marquees on the area you want to scan Top Scanning Takes a Long Time Try scanning your original at a lower resolution setting to speed up scanning See EPSON Scan Help for details Computers with USB 2 0 high speed ports can scan faster than those with USB 1 1 ...

Страница 67: ... Slides Images EPSON Perfection V370 Photo only Images are Rotated Incorrectly The Edges of Your Original Are Not Scanned If you are scanning in Full Auto Mode or using thumbnail preview in Home Mode or Professional Mode move the document or photo about 6 mm 0 2 inch away from the horizontal b and vertical a edges of the document table to avoid cropping If you are scanning using normal preview in ...

Страница 68: ...straight on the document table Top Your Image Is Distorted or Blurred Make sure the document or photo lies flat on the document table Also make sure your document or photo is not wrinkled or warped Make sure you do not move the document or photo or your scanner while scanning Make sure the scanner is placed on a flat stable surface Check the scanning software settings such as resolution and image ...

Страница 69: ...sure setting to the default See EPSON Scan Help for details Click the Histogram Adjustment icon in Professional Mode to adjust the brightness Check the brightness and contrast settings of your computer monitor Top An Image on the Back of Your Original Appears in Your Scanned Image If your original is printed on thin paper images on the back may be visible to the scanner and appear in your scanned ...

Страница 70: ...mage Check the color matching and color management capabilities of your computer display adapter and software Some computers can change the palette of colors on your screen See your software and hardware manuals for details Use the color management system for your computer ICM for Windows or ColorSync for Macintosh Add a color profile that matches your monitor to improve on screen color matching E...

Страница 71: ...des are placed in the film holder correctly and the film holder is properly positioned on the document table See Placing Film or Slides EPSON Perfection V370 Photo Only for details Rotate the images See the scanning software help for details Top ...

Страница 72: ...r Do one of the following Windows 7 and Vista Click the start button and select Control Panel Windows XP Click Start and select Control Panel Do one of the following Windows 7 and Vista Click Uninstall a program from the Programs category Windows XP Double click the Add or Remove Programs icon Select the software you want to uninstall such as EPSON Scan your scanner s Manual or an application from...

Страница 73: ...ll your product software as described here Note If you find that reinstalling your product software does not solve a problem contact Epson To download the Uninstall Center utility visit the Epson download site U S downloads or Canadian downloads Follow the instructions on the screen to install the Uninstall Center Quit all applications currently running on your Mac Double click the Uninstall Cente...

Страница 74: ...urchase such as a store receipt and date of purchase Computer configuration Description of the problem Then call U S 562 276 4382 6 AM to 8 PM Pacific Time Monday through Friday and 7 AM to 4 PM Pacific Time Saturday Canada 905 709 3839 6 AM to 8 PM Pacific Time Monday through Friday and 7 AM to 4 PM Pacific Time Saturday Days and hours of support are subject to change without notice Toll or long ...

Страница 75: ... Canadian sales Top ...

Страница 76: ...tware Technical Support ABBYY FineReader 408 457 9777 www abbyy com support abbyyusa com ArcSoft MediaImpression and Scan n Stitch Deluxe 510 979 5599 installation issues only 510 979 5555 technical issues fee applies www arcsoft com ...

Страница 77: ... and 24 bit Full Color color Color and tone reproduction are subject to the display capability of your computer system including the video card display monitor and software See your system documentation for details Top Macintosh System Requirements System Macintosh computers running Mac OS X 10 5 8 10 6 x 10 7 x or 10 8 x Fast User Switching on Mac OS X or later is not supported Interface Macintos...

Страница 78: ... mm US letter or A4 size Transparent 35 mm film strip 6 frames at a time 35 mm slides up to 4 slides at a time Scanning resolution 4800 dpi main scan 9600 dpi with Micro Step sub scan Output resolution 50 to 6400 9600 and 12800 dpi 50 to 6400 dpi in 1 dpi increments Image data 16 bits per pixel per color internal 16 bits per pixel per color external maximum Interface One USB 2 0 Hi speed port Ligh...

Страница 79: ... 2 8 kg Top Electrical Note Check the label on the AC adapter or on the back of the scanner for voltage information Scanner Rated voltage DC 13 5 V Rated input current 1 2 A Power consumption 12 0 W Operating 5 5 W Ready Mode 2 9 W Sleep Mode 0 5 W Power off AC Adapter 100 120 V model 220 240 V model AC adapter model A392 UC A392 GB A392 VD A392 AS A392 BS A392 KR A392 AR Rated input voltage AC 10...

Страница 80: ...nary office or home conditions Avoid operating the scanner in direct sunlight near a strong light source or in extremely dusty conditions Top Interfaces USB Interface Interface type Universal Serial Bus Specification Revision 2 0 Electrical standard Full Speed mode 12 Mbits per second and Hi Speed mode 480 Mbits per second of Universal Serial Bus Specification Revision 2 0 Connector type One Type ...

Страница 81: ...Safety UL60950 1 CAN CSA C22 2 No 60950 1 EMC FCC Part 15 Subpart B Class B CAN CSA CEI IEC CISPR22 Class B Top ...
Отзывы: