


Untitled Document
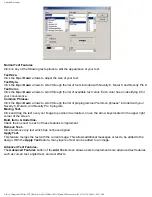
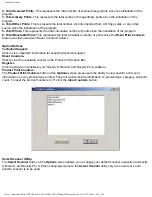
Image Adjustments
Click the
Adjust Image
button to control various image attributes such as brightness, contrast, color balance, and
sharpness.
Brightness-
Click the
Up
or
Down
arrows to increase or decrease the brightness of your image.
Contrast-
Click the
Up
or
Down
arrows to increase or decrease the contrast of your image.
Red-
Click the
Up
or
Down
arrows to increase or decrease the red in your image.
Green-
Click the
Up
or
Down
arrows to increase or decrease the green in your image.
Blue-
Click the
Up
or
Down
arrows to increase or decrease the blue in your image.
Sharpness-
Click the
Up
or
Down
arrows to increase or decrease the sharpness of your image.
Black & White-
Click the
Black & White
button to remove color entirely from your image.
Reset-
Restores your image back to its original state.
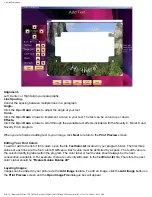
When you are finished making adjustments to your image, click
Next
to return to the
Print Preview
screen.
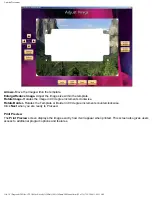
Printing Options
The
Print Options
screen provide users with a host of printing features. Everything from print position to tiled
imaging can be controlled at the
Print Options
screen. Most importantly, the
Print Options
screen shows how the
image will be positioned on the
printed
page.
file:///C|/Program%20Files/CTP,%20Inc/Novelty%20Pro%208%20Demo/V8Manual.htm (31 of 39)7/19/2004 11:09:31 AM


