10. When you see your scanned image on the LCD screen, you can do one of the following:
• To print more than one copy of the photo, press the
+
or
–
button to select the number (up to 99).
• To crop or zoom into your photo, press the
Display/Crop
button.
• If you're copying more than one photo, press the arrow buttons to select the next photo. Then
repeat the selections above.
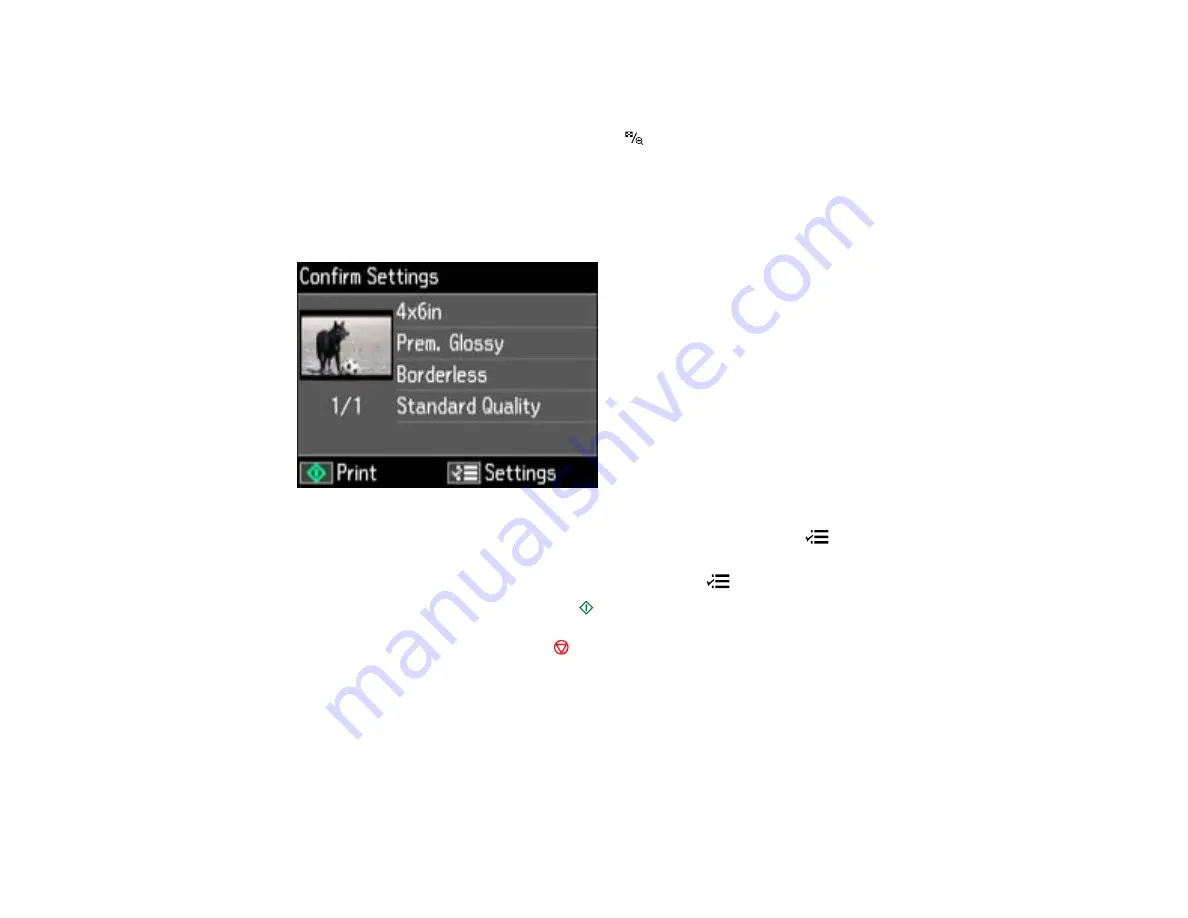
11. Press the
OK
button to continue.
You see a screen like this:
To change any of the settings displayed on the LCD screen, press the
Menu
button, select
Paper and Copy Settings
, press the
OK
button, and select the necessary settings.
12. When you are finished selecting your settings, press the
Menu
button.
13. When you are ready to print, press the
Start
button.
Note:
To cancel printing, press the
Stop/Clear Settings
button.
Parent topic:
Related references
Paper Type Settings - Copying
Paper Size Settings - Copying
Copying Options
48
Содержание Epson Stylus NX530
Страница 1: ...EPSON Stylus NX530 User s Guide ...
Страница 2: ......
Страница 11: ...EPSON Stylus NX530 User s Guide Welcome to the EPSON Stylus NX530 User s Guide 11 ...
Страница 17: ...Product Parts Inside 1 Scanner unit 2 Ink cartridge holder Parent topic Product Parts Locations 17 ...
Страница 24: ...4 Slide the edge guide shown below to your paper size 24 ...
Страница 29: ...2 Pull out the paper cassette 3 Slide the edge guides outward 29 ...
Страница 34: ...2 Pull out the paper cassette 3 Slide the edge guides outward 34 ...
Страница 100: ...100 ...
Страница 106: ... Normal preview Click the Auto Locate icon to create a marquee dotted line on the preview image 106 ...
Страница 110: ...3 Adjust the scan area as necessary 110 ...
Страница 117: ...117 ...
Страница 125: ...3 Adjust the scan area as necessary 125 ...
Страница 131: ...4 Select your scan settings as necessary 131 ...
Страница 175: ...175 ...
Страница 180: ...180 ...
Страница 186: ...186 ...


