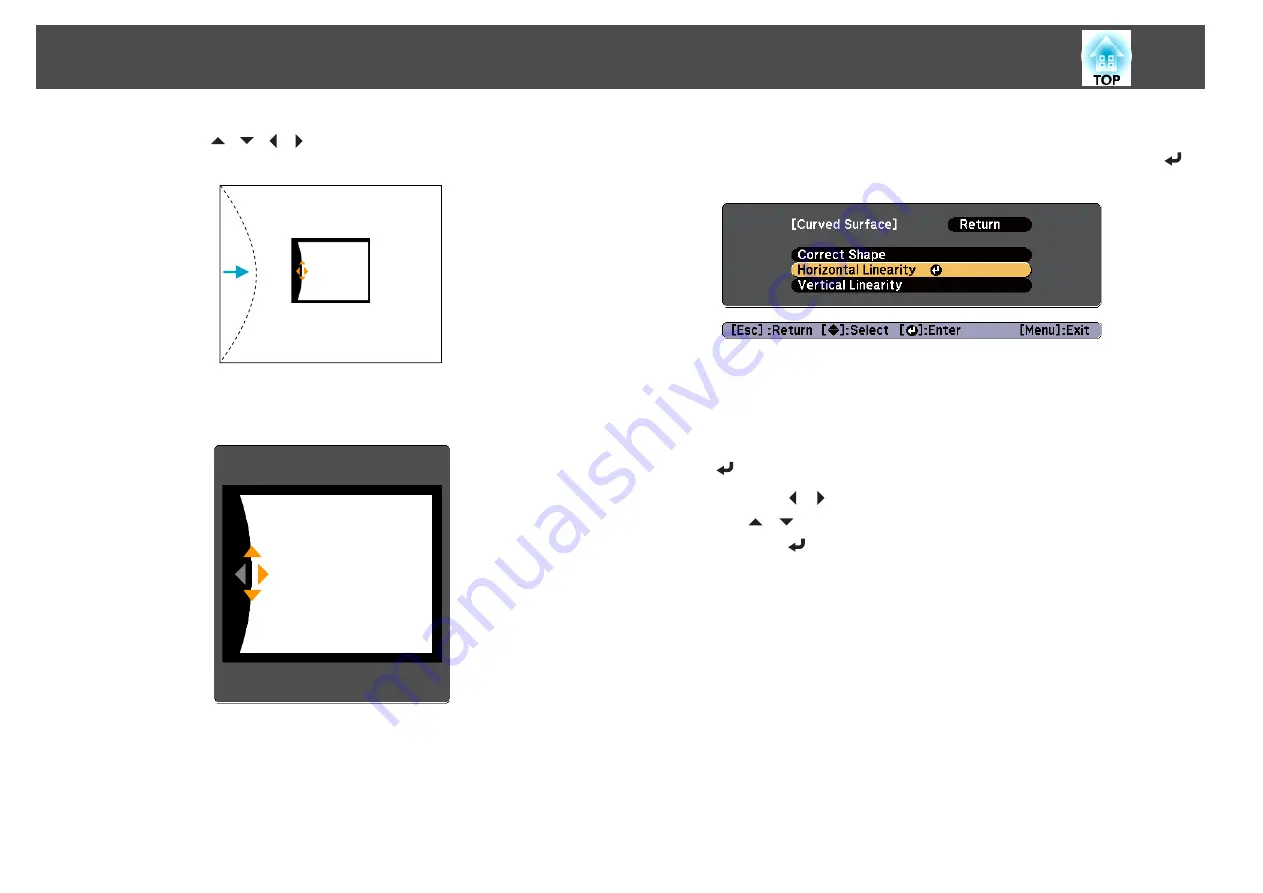
f
Press the [
][
][
][
] buttons to adjust the position of the
sides.
If the triangle in the direction you are adjusting the shape turns gray,
as shown in the screen shot below, you cannot adjust the shape any
further in that direction.
g
Press the [Esc] button to return to the previous screen.
h
Repeat steps 5 to 7 as needed to adjust any remaining parts.
If the image expands and contracts, go to the next step and adjust
the linearity.
i
Press the [Esc] button to return to the screen in step 4. Select
Horizontal Linearity
or
Vertical Linearity
, and then press the [
]
button.
Select
Horizontal Linearity
to adjust the horizontal expansion or
contraction, and select
Vertical Linearity
to adjust the vertical
expansion or contraction.
j
Select the standard line for the adjustments, and then press the
[
] button.
Press the [ ][ ] buttons when selecting
Horizontal Linearity
, and
the [
][
] buttons when selecting
Vertical Linearity
, and then
press the [
] button.
The selected standard line is displayed in flashing orange and white.
Adjusting Projected Images
64
Содержание EB-Z10000U
Страница 1: ...User s Guide ...
Страница 13: ...Introduction This chapter explains the names for each part ...
Страница 24: ...Remote control operating range Part Names and Functions 24 ...
Страница 25: ...Preparing the Projector This chapter explains how to install the projector and connect projection sources ...
Страница 57: ...Basic Usage This chapter explains how to project and adjust images ...
Страница 113: ...Configuration Menu This chapter explains how to use the Configuration menu and its functions ...
Страница 139: ...Troubleshooting This chapter explains how to identify problems and what to do if a problem is found ...
Страница 185: ...Appendix ...
Страница 225: ...A Center of lens B Distance from center of lens to suspension bracket fixing point Units mm Appearance 225 ...
Страница 233: ...Z Zoom 19 37 Index 233 ...


