To continue to move another point, press the [Esc] button to return
to step 4, and then repeat steps 4 and 5.
f
After moving all of the necessary points, press the [Esc] button to
return to step 4, and then press the [Esc] button again. When a
message is displayed, select
Yes
, and then press the [
] button.
The screen from step 3 is displayed.
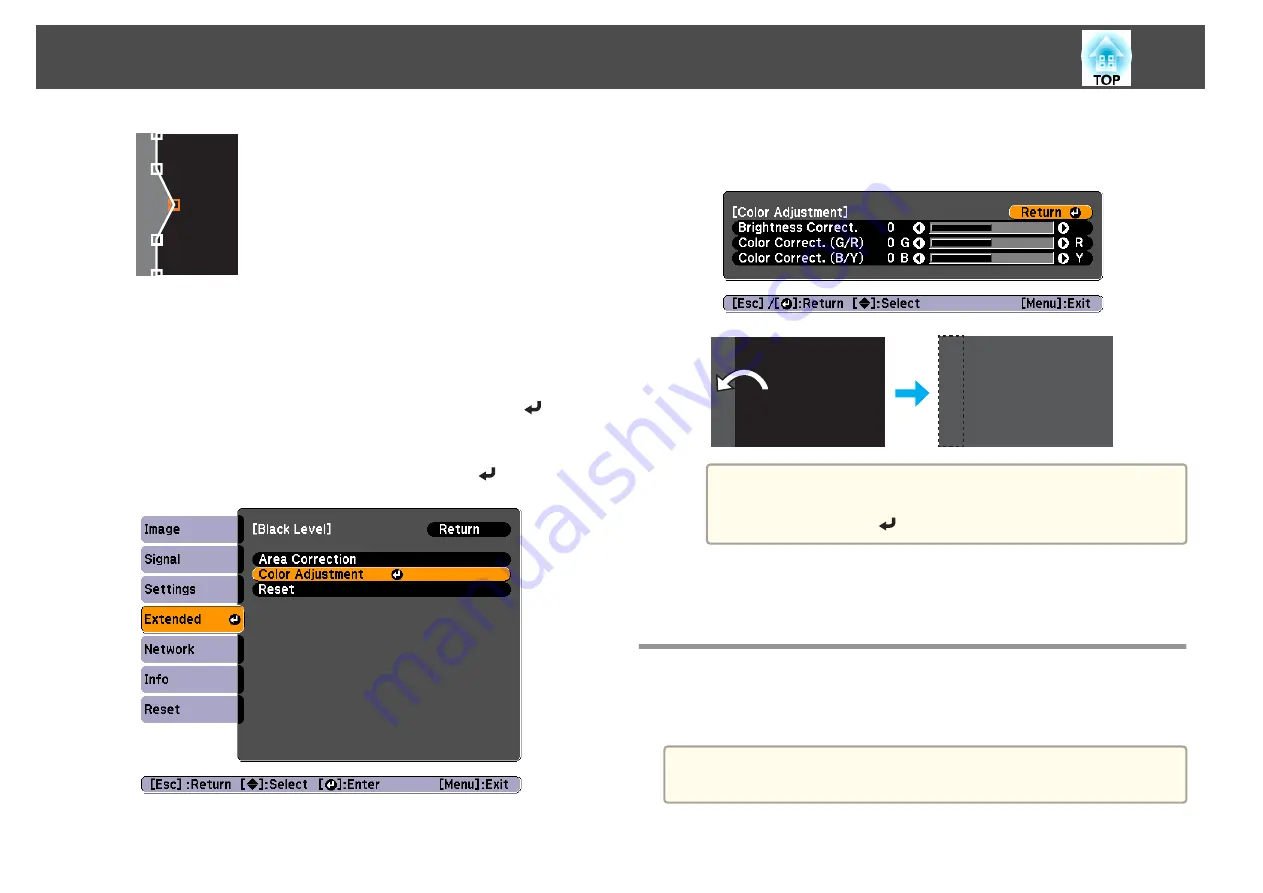
g
Select
Color Adjustment
, and then press the [
] button.
h
Adjust the brightness and tone for the areas that do not overlap
to match the areas that overlap.
a
To return
Black Level
to its default values, press the [Esc]
button to return to the screen from step 7, select
Reset
, and
then press the [
] button.
i
When you are done, press the [Menu] button to exit the correction
menu.
Adjusting to Match Colors
Follow the steps below to adjust the brightness of the projected image and
the color balance that was adjusted by performing edge blending.
a
The brightness and color may not be uniform even after making
adjustments.
a
Press the [Menu] button while projecting.
Multi-Projection Function
63
Содержание EB-G6800
Страница 1: ...User s Guide ...
Страница 7: ...Introduction This chapter explains the names for each part ...
Страница 18: ...c Pull the lens unit straight out as it is released Part Names and Functions 18 ...
Страница 19: ...Preparing the Projector This chapter explains how to install the projector and connect projection sources ...
Страница 39: ...Basic Usage This chapter explains how to project and adjust images ...
Страница 56: ...Useful Functions This chapter explains useful tips for giving presentations and the Security functions ...
Страница 83: ...Configuration Menu This chapter explains how to use the Configuration menu and its functions ...
Страница 103: ...Troubleshooting This chapter explains how to identify problems and what to do if a problem is found ...
Страница 137: ...Appendix ...
Страница 149: ...Air filter ELPAF43 Use as a replacement for used air filters Optional Accessories and Consumables 149 ...


