15
Starting and Stopping Projection
Basic Operations
When the expected images are not
projected
Turning the power off
Installing and removing the cable
cover
When the expected images are not
projected
Turning the power off
Simply pressing or does not stop
electricity consumption.
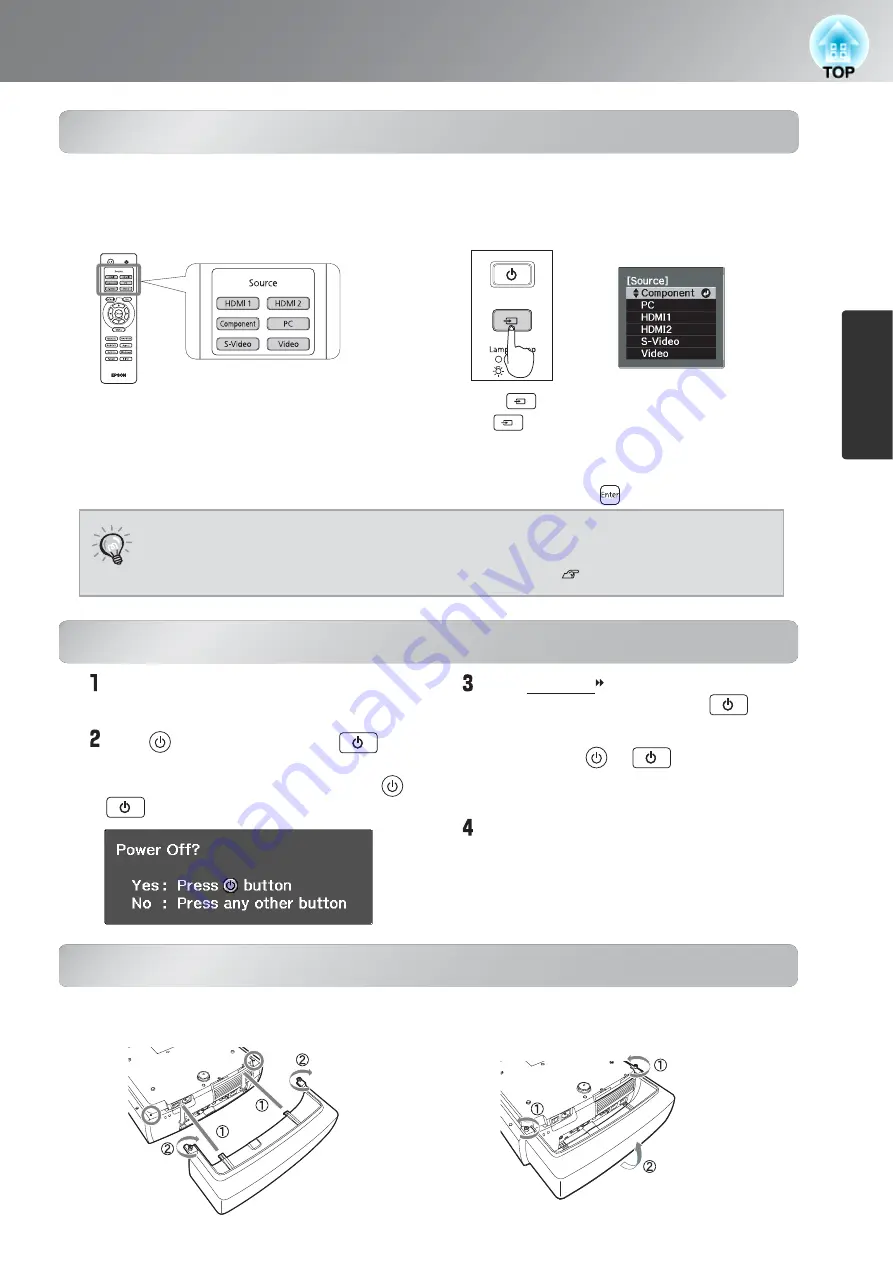
If more than one signal source has been connected, or if no images are projected, use the remote control or the
projector's control panel buttons to select the signal source. For video devices, press the [Play] button on the video
equipment first, then select the signal source.
Using the remote control
Press the button that has the name of the port
on it that the desired signal source is connected
to.
Using the control panel
When you press , the menu is displayed.
Each press of moves the pointer. Move the pointer to the
target input source to select it.
The input source is automatically switched when no operations are
performed about three seconds with placing pointer at the target
input source. You can also press to switch to the target source.
Turn the power off for the signal sources
that are connected to the projector.
Press on the remote control or on
the projector's control panel.
Attach the lens cover.
When cool-down (approximately 16 seconds)
is completed, flashing around the stops
and you can then turn off the main power
switch.
TIP
When the color of the image projected from the [Component] input port is
unnatural, select an appropriate signal according to the signal from the device
connected at "Input Signal" in the Configuration menu. p.37
When the expected images are not projected
Turning the power off
If the projector is suspended from a ceiling and the
lens cover is left removed, the lens cover will still be
needed if the projector is moved anywhere, so keep
it in a safe place.
The following message is displayed, so press or
once more.
When the projector is suspended from a ceiling, you can use the cable cover to improve the appearance.
Installing and removing the cable cover
Installing the cable cover
Removing the cable cover
Содержание Dreamio EH-TW3800
Страница 1: ......


