167
Note:
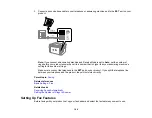
If you leave your product unplugged for a long period of time, you may need to reset the date and
time settings for faxes.
Setting Up Basic Fax Features
Selecting Advanced Fax Settings
Setting Up the Fax Utility - Windows
Setting Up Fax Features Using the Fax Utility - Mac
Parent topic:
Related tasks
Setting Up Basic Fax Features
See these sections to select the basic settings you need to use the product's fax features.
Using the Fax Setup Wizard
Selecting the Line Type
Setting the Number of Rings to Answer
Parent topic:
Using the Fax Setup Wizard
You can setup the product's basic fax settings using the Fax Setting Wizard. This wizard is automatically
displayed when the product is turned on for the first time. You can also change these settings individually
from the Fax Settings menu.
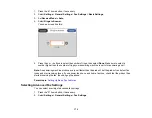
1.
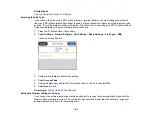
Press the
home button, if necessary.
2.
Select
Settings
>
General Settings
>
Fax Settings
.
3.
Select
Fax Setting Wizard
.
The Fax Setting Wizard screen appears.
4.
Select
Proceed
.
5.
On the Fax Header screen, use the displayed keypad to enter the sender name for your fax source,
such as your name or a business name. You can enter up to 40 characters. Select
OK
when
finished.
Содержание C11CK60201
Страница 1: ...WF 2960 User s Guide ...
Страница 2: ......
Страница 13: ...13 WF 2960 User s Guide Welcome to the WF 2960 User s Guide For a printable PDF copy of this guide click here ...
Страница 17: ...17 Product Parts Inside 1 Document cover 2 Scanner glass 3 Control panel 4 Front cover ...
Страница 52: ...52 Parent topic Changing or Updating Network Connections Related references Status Icon Information ...
Страница 109: ...109 10 Select the Layout tab 11 Select the orientation of your document as the Orientation setting ...
Страница 134: ...134 You see an Epson Scan 2 window like this ...
Страница 136: ...136 You see an Epson Scan 2 window like this ...
Страница 150: ...150 You see a screen like this 2 Click the Save Settings tab ...
Страница 155: ...155 You see this window ...
Страница 267: ...267 2 Squeeze the tabs and remove the rear cover 3 Carefully remove any jammed paper from inside the product ...
Страница 269: ...269 3 Open the ADF cover 4 Carefully remove any jammed pages from beneath the ADF ...

