


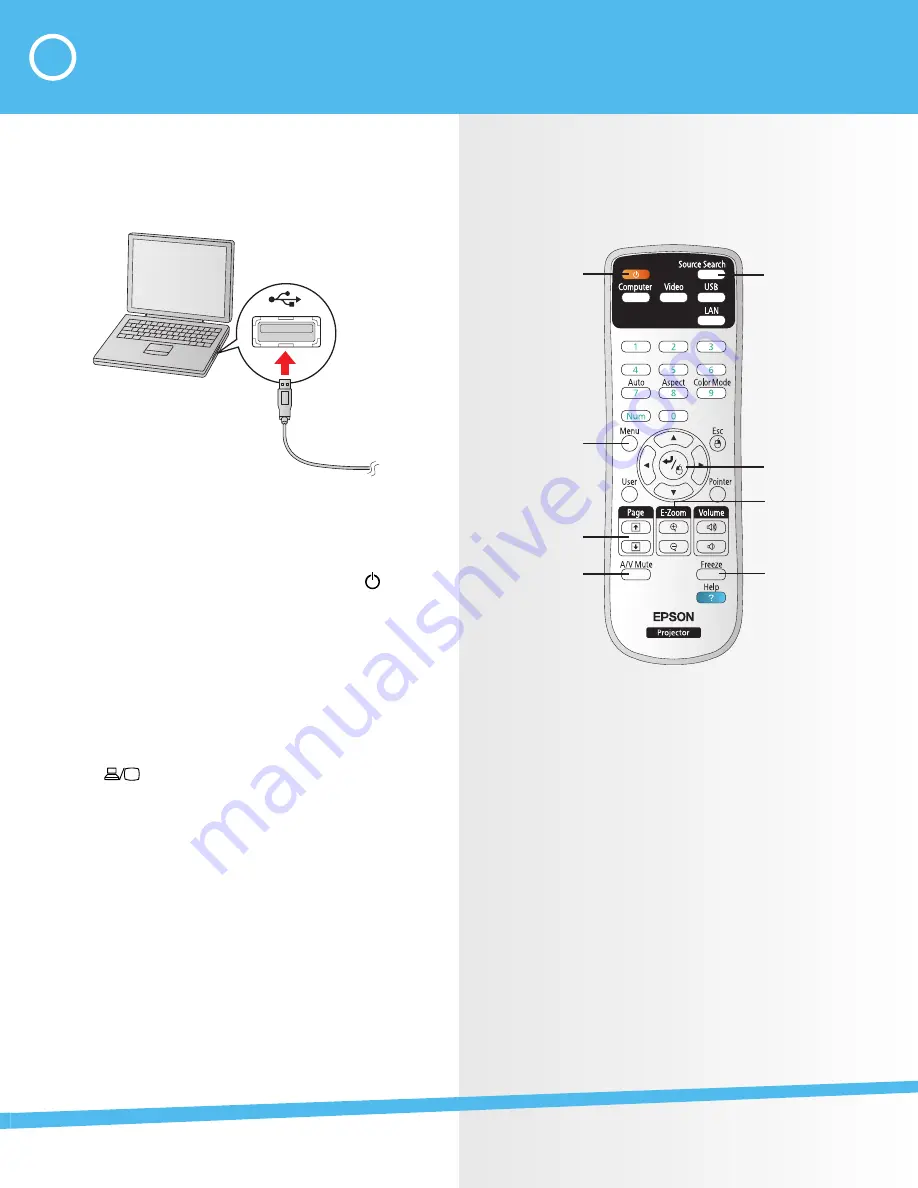
Using the Remote
Control
Select from various
image sources
connected to the
projector
Enter
Zoom in and out
Stop video action
Turn projector
on/off
Access menu
system for
additional
adjustments
Page through
documents
Temporarily
turn off image
For more information about using the remote control and
cool time-saving buttons:
•
See the BrightLink
User’s Guide
on your computer or
on the CD in this Welcome Kit.
•
Go to the training section and watch a video or two at
epson.com/brightlink
(U.S.),
epson.ca/brightlink
(Canada), or
atomiclearning.com
.
Note
: For BrightLink Solo™, the remote control for your
projector will be different.
2
Connect Your Computer and
Turn on the Projector
1
Connect the USB cable from the interactive module
to any available USB port on your computer.
USB cable
2
Connect another cable (USB, HDMI, or VGA cable)
from the projector to your computer.
3
Turn on the projector by pressing the red power
button on the remote control.
4
Display an image from your computer. If the image
doesn’t appear, try one of the following:
•
On some PC laptops, you may need to hold
down the
Fn
key on the keyboard and press
F7
or the function key that lets you display on an
external monitor. It may have an icon such as
, or it may be labelled
CRT/LCD
.
•
On a Mac, you may need to open
System
Preferences
and select
Displays
. Select the
VGA Display
or
Color LCD
option if necessary,
then click the
Arrange
or
Arrangement
tab,
and select the
Mirror Displays
check box.
•
Try pressing the
Source Search
button on the
remote control.


