


3
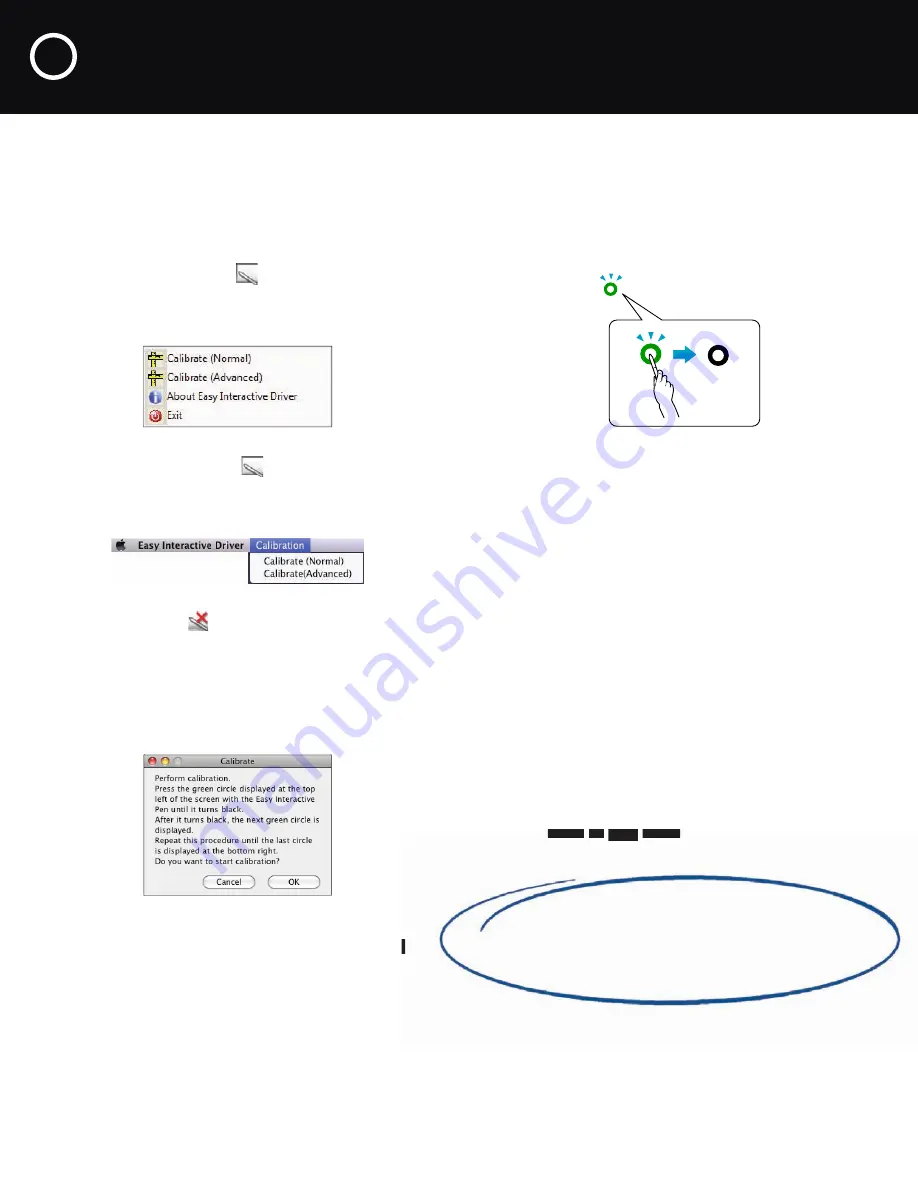
Wait a few moments for the flashing green circle
to appear. Use the interactive pen to touch each
flashing green circle as it appears. Continue until all
the circles stop flashing and turn black.
•
Touch the center of each circle, and make sure
you are not casting a shadow on the pen.
•
Make sure you are not blocking the signal
between the pen and the interactive module.
•
Do not press the button on the pen while
calibrating.
•
If you make a mistake, or if too many circles
appear at the same time, press
Esc on your
computer keyboard and restart calibration.
*
Tip: You don’t have to recalibrate unless you do
one of the following:
•
Connect a different computer that has a different
screen size
•
Change the resolution of your monitor
•
Notice that the pen position is no longer the
same as your cusor
4 Calibrate Your System
Calibration coordinates the positioning of the pen with
the location of your cursor. You can use either pen, and
you only have to calibrate once.*
1
Do one of the following:
•
Windows: click the
pen icon in the system
tray on your taskbar (lower right corner of
your screen), then select
Calibrate (Normal).
•
Mac OS X: click the
pen icon in the Dock,
select
Calibration from the menu bar at the top
of the screen, then select
Calibrate (Normal).
Note: If a red X
appears on the icon, you won’t
be able to calibrate. Make sure the projector is
powered on and the USB cable from the interactive
module is securely connected to your computer.
2
After you read the following message, click
OK.
Note: Advanced calibration is recommended
only if you are projecting highly detailed images.
Congratulations! When you finish calibration, you’re
ready to explore your software options, as described
on the next page.


