background image

10. Print the calibration chart on your color printer.

11. Exit your image editing application.

Note:

To print images on more than one color printer, print the calibration

chart on each printer you’ll use. If you plan to print the image on a

service bureau’s color printer, have them print the calibration chart

on their printer so you can create a calibration profile for it.

Tip:

when you label the printed charts 

to 

help you identify which

printer produced them, don’t write on the chart itself. Write on

the back of the page.

Tip:

If you plan to print your image on a printing press 

that

requires a four-color separation, you’ll need to ask your service

bureau or printer to create a color sample using your

calibration chart. You can then use 

that 

color sample to create

a calibration profile.

You are now ready to scan the printed calibration chart to

create a printer calibration profile.

Creating Printer Calibration Profiles

Follow these steps to create a calibration profile for each color

printer you want 

to 

use:

1. Start EPSON Scan! II, if necessary.

2. Place the printed calibration chart face down on the glass

surface of your scanner and close the cover.

3.

Choose 

Create Calibration Profile 

from the Calibrate menu.

2-6

Calibrating Your System

Содержание ActionScanner II Mac - ActionScanning System II

Страница 1: ......

Страница 2: ...xpenses incurred by purchase or third parties as a result of accident misuse or abuse of this product or unauthorized modifications repairs or alterations to this product Seiko Epson Corporation and its affiliates shall not be liable against any damages or problems arising from the use of any options or any consumable products other than those designated as Original EPSON products or EPSON Approve...

Страница 3: ...een Calibration 2 2 Enabling Screen Calibration 2 3 Calibrating Your Printer to Your Scanner 2 3 Exporting a Calibration Chart 2 4 Creating Printer Calibration Profiles 2 6 Scanning Using Calibration 2 8 Chapter 3 Capturing Images From Within Applications Accessing EPSON TWAIN 3 2 Using the Easy Screen 3 3 Selecting the Document Source 3 3 Selecting the Image Type 3 4 Selecting the Destination 3 4...

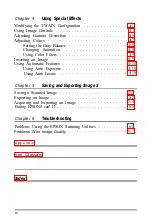
Страница 4: ...r Filters 4 9 Inverting an Image 4 9 Using Automatic Features 4 10 Using Auto Exposure 4 10 Using Auto Locate 4 10 Chapter 5 Saving and Exporting Image 5 Saving a Scanned Image 5 1 Exporting an Image 5 2 Acquiring and Exporting an Image 5 4 Exiting EPSONS can II 5 5 Chapter 6 Troubleshooting Problems Using the EPSON Scanning Utilities 6 1 Problems With Image QuaIity 6 7 A p p e n d i x Icon Glossa...

Страница 5: ...automatic document feeder ADF Take advantage of the text enhancement technology built into some EPSON scanners The EPSON Scanning Utilities are composed of two integrated main programs EPSON Scan II and EFSON TWAIN EPSON Scan II calibrates your scanner with your monitor and color printer to produce images in colors that closely match the originals It can also capture images and then save and expor...

Страница 6: ...oftware 7 0 or higher At least 100MB of free hard disk space for scanner applications and images depending on the size of the images 8ME3 of system RAM 4MB of application RAM Note 8MB is the minimum amount of RAM graphics applications run faster and more efficiently with at least 12MB of RAM A color monitor one with a 24 bit video card is recommended One of the following EPSON scanners ES 300C ES ...

Страница 7: ...se EPSON Scan II to export images Troubleshooting tips are contained in Chapter 6 and default settings are listed in the Appendix This manual also includes two glossariesan icon glossary that describes how each icon works and a term glossary that describes common scanning terms The final section is an index Warnings Cautions Tips and Notes This manual displays important information as follows Warn...

Страница 8: ... current and new products You can purchase printed manuals accessories or parts for EPSON products from EPSON Accessories at 800 873 7766 U S sales only In Canada call 800 BUY EPSON If you purchased your scanner outside the United States or Canada contact your EPSON dealer or the marketing location nearest you for customer support and service If you need help with any software program you are usin...

Страница 9: ...he Epson America Forum on CompuServe If you are already a member simply type GO EPSON at the menu prompt to reach the Forum If you are not currently a member you are eligible for a free introductory membership as an owner of an EPSON product This membership entitles you to An introductory credit on CompuServe Your own user ID and password A complimentary subscription to CompuServe Magazine CompuSe...

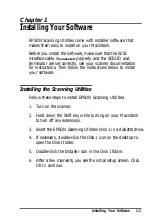
Страница 10: ...nstructions below to install your software Installing the Scanning Utilities Follow these steps to install EPSON Scanning Utilities 1 2 Turn on the scanner Hold down the Shift key while turning on your Macintosh to turn off any extensions 3 4 Insert the EPSON Scanning Utilities Disk 1 in a diskette drive If necessary double click the Disk 1 icon on the desktop to open the Disk 1 folder 5 Double cl...

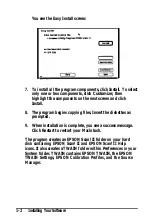
Страница 11: ...ert the diskettes as prompted 9 When installation is complete you see a success message Click Restart to restart your Macintosh The program creates an EPSON Scan II folder on your hard disk containing EPSON Scan II and EPSON Scan II Help icons It also creates a TWAIN folder within Preferences in your System folder TWAIN contains EPSON TWAIN the EPSON TWAIN Settings EPSON Calibration Profiles and t...

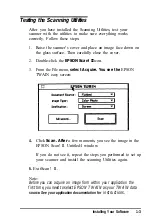
Страница 12: ...I icon 3 From the File menu select Acquire You see the EPSON TWAIN easy screen 4 Click Scan After a few moments you see the image in the EPSON Scan II Untitled l window If you do not see it repeat the steps you performed to set up your scanner and install the scanning Utilities again 5 ExitScan II Note Before you can acquire an image from within your application the first time you need to select E...

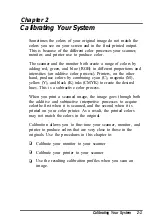
Страница 13: ... black K inks CMYK to create the desired hues This is a subtractive color process When you print a scanned image the image goes through both the additive and subtractive interpretive processes to acquire colorthe first when it is scanned and the second when it is printed on your color printer As a result the printed colors may not match the colors in the original Calibration allows you to fine tun...

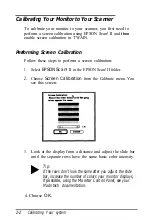
Страница 14: ...Select EPSON Scan II in the EPSON Scan II folder 2 Choose Screen Calibration from the Calibrate menu You see this screen 3 Look at the display from a distance and adjust the slide bar until the separate rows have the same basic color intensity Tip If the rows don t look the same after you adjust the slide bar increase the number of colors your monitor displays if possible using the Monitor Control...

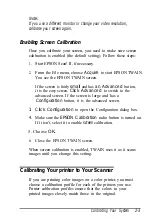
Страница 15: ...n If the screen is large and has a Configuration button it is the advanced screen 3 Click Configuration to open the Configuration dialog box 4 Make sure the EPSON Calibration radio button is turned on If it isn t select it to enable screen calibration 5 Choose OK 6 Close the EPSON TWAIN screen When screen calibration is enabled TWAIN uses it as it scans images until you change this setting Calibra...

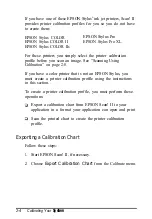
Страница 16: ... page 2 8 If you have a color printer that is not an EPSON Stylus you must create a printer calibration profile using the instructions in this section To create a printer calibration profile you must perform these operations Export a calibration chart from EPSON Scan II to your application in a format your application can open and print Scan the printed chart to create the printer calibration prof...

Страница 17: ...ration chart in the EPSON Scan II folder Exit EPSON Scan II Start your image editing application Open the calibration chart file you just created in the EPSON Scan II folder The calibration chart appears in the application window It contains nine blocks of color gradations some grayscale gradations and a black border on three sides Save the calibration chart file You can use the same name you assi...

Страница 18: ... Tip If you plan to print your image on a printing press that requires a four color separation you ll need to ask your service bureau or printer to create a color sample using your calibration chart You can then use that color sample to create a calibration profile You are now ready to scan the printed calibration chart to create a printer calibration profile Creating Printer Calibration Profiles ...

Страница 19: ...ip If you are creating more than one calibration profile for instance if you have more than one color printer make sure you assign a unique filename to each calibration profile so you can distinguish between them 5 Click Continue You see the EPSON TWAIN advanced screen If you see the easy screen click Advanced Calibrating Your System 2 7 ...

Страница 20: ...ing Save then choose Scan again Always create calibration profiles using these default settings You can now use the calibration profile when you scan images as described in the next section Scanning Using Calibration If you are using one of the pre defined printer calibration profiles such as one of the EPSON Stylus printer profiles or you have created a custom calibration profile for your printer...

Страница 21: ...custom calibration profile for your printer type a unique name for the profile such as COLOR1 PROFILE in the Destination Name field Go to step 5 5 From the Calibration pull down menu select the filename you assigned when you created the profile such as COLOR1 PRINTER 6 Click Save 7 Click OK You see the EPSON TWAIN advanced screen You can now preview or scan your image using the calibration profile...

Страница 22: ...c steps are provided in this chapter If you don t need to preview the image you are scanning and want only to specify the document source if available the image type and the destination you can use the easy screen see page 3 3 If you want to select calibration profiles or add delete or modify an image or destination before you scan you must use the advanced screen see page 3 5 To use the special e...

Страница 23: ... on which was opened last The easy screen allows you to select the type destination and document source if available of your image When you scan with this screen your entire image is captured and scanned The advanced screen lets you select the same basic settings as the easy screen plus it allows you to modify add to or delete these settings The advanced screen also lets you preview and select the...

Страница 24: ...an select the option from the Document Source pull down menu The following table describes the available options Document Source options Source option Function Flatbed Scans the image from the document table Automatic Document I Scans images as they feed through the ADF Feeder multipage scanning Transparency Unit Scans an image from the Transparency Unit Note When the Automatic Document Feeder is ...

Страница 25: ...or Optical Character Recognition from both the Image Type and Destination pull down menus Leave the settings for these options at their defaults listed in the Appendix If you have a scanner that supports Text Enhancement Technology see Using Text Enhancement Technology on page 3 9 for additional OCR instructions Selecting the Destination You must also select the appropriate output destination for ...

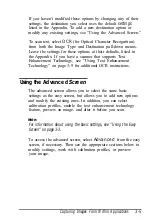
Страница 26: ...ext Enhancement Technology on page 3 9 for additional OCR instructions Using the Advanced Screen The advanced screen allows you to select the same basic settings as the easy screen but allows you to add new options and modify the existing ones In addition you can select calibration profiles enable the text enhancement technology feature preview an image and alter it before you scan Note For inform...

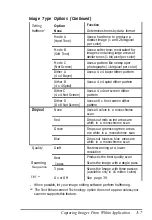
Страница 27: ...Black White Uses a data format of 1 bit pixel to produce black and white images I 16 Grays Uses a data format of 4 bits pixel to produce 16 shades of gray 256 Grays Uses a data format of 8 bits pixel to produce 256 shades of gray 8 Colors Uses a 1 bit pixel per color data format to produce B color images 16 Million Colors 256 Colors Uses an 8 bits pixel per color data format to produce 256 color i...

Страница 28: ...attern Uses a 4 x 4 net screen dither pattern Uses an 8 x 8 net screen dither pattern Uses all colors in a monochrome scan Red Drops out reds so red areas are white in a monochrome scan Green Blue Draft Best 1 pass 3 pass On or Off Drops out greens so green areas are white in a monochrome scan Drops out blues so blue areas are white in a monochrome scan Faster scanning at a lower resolution Produc...

Страница 29: ...D 8 x 8 Net Screen Dropout 16 Gray 256 Gray 1 pass 1 pass 8 Color None Mode A Hard Tone Made B Soft Tone Mode C Net Screen Dither A 4 x 4 Bayer Dither B 4 x 4 Spiral Dither C 4 x 4 Net Screen Dither D 8 x 8 Net Screen 256 Color 16 Million Colors None Red Green Blue None Red Green Blue None Red Green Blue Scanning Sequence 1 pass 1 pass 1 pass 1 pass 3 pass l Dither options are not available for th...

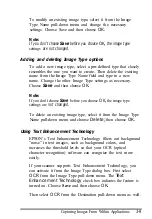
Страница 30: ...K the image type settings are not changed To delete an existing image type select it from the Image Type Name pull down menu and choose Delete then choose OK Using Text Enhancement Technology EPSON s Text Enhancement Technology filters out background noise in text images such as background colors and increases the threshold levels so that your OCR optical character recognition software can recogni...

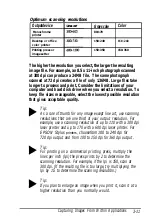
Страница 31: ...he Destination click the Destination button You see the following dialog box Selecting resolution settings Use the Resolution pull down menus to select resolutions that produce the best results for your image type and output device You can select one resolution for line drawings and halftones and a separate resolution for photographs The best resolution setting for your image depends on the type o...

Страница 32: ...cceptable quality Tip As a rule of thumb for any image except line art use scanning resolutions that are one third of your output resolution For example use a scanning resolution of up to 110 with a 300 dpi laser printer and up to 170 with a 600 dpi laser printer For EPSON Stylus printers choosefrom 100 to 240 dpi for 720 dpi output and from 100 to 150 dpi for 360 dpi output Tip For printing on a ...

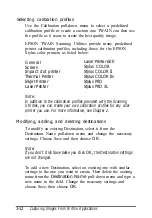
Страница 33: ...ibration profiles provided with the Scanning Utilities you can create your own calibration profiles for any color printer you use For more information see Chapter 2 Modifying adding and deleting destinations To modify an existing Destination select it from the Destination Name pull down menu and change the necessary settings Choose Save and then choose OK Note If you don t click Save be e you clic...

Страница 34: ...d the Zoom Preview icon Preview icon Zoom Preview icon Click the Preview icon to preview the entire document table in the preview window Click the Zoom Preview icon to see a full size preview in the selected area See the next section for instructions on selecting the preview area Note If you click the Zoom Preview icon before you select an area the preview includes the entire document table Tip If...

Страница 35: ...edge of the rectangle to the new location You can also move the position of the selected area Place the mouse pointer inside the selection rectangle the mouse pointer changes to a hand Hold down the mouse button and drag the selection rectangle to a new location To select the entire image area click the Auto Locate icon Auto Locate icon See Using Automatic Features in Chapter 4 for more informatio...

Страница 36: ... applications convert the image to fu11 24 bit data so the actual size of the image may be larger than the value displayed in Size The Scale field displays the amount by which an image is enlarged or reduced during a scan You can use this setting to scan the image from half its normal size 50 to twice its normal size 200 To change this value move the slide bar or type the value you want in the fie...

Страница 37: ...the easy screen TWAIN automatically selects the entire image and scans it If you are scanning from the advanced screen and have not previewed the image or selected a preview area for it be sure to click the Auto Locate icon before choosing Scan Otherwise the entire document table is scanned When you close the TWAIN screen you can further modify your image using the features of your image editing s...

Страница 38: ...sing that software However if you don t have image editing software EPSON TWAIN allows you to create a broad range of special effects using these options TWAIN configuration options Image control settings Gammacorrection C Color adjustments Invert image feature Automatic features Modifying the TWAIN Configuration When you choose the Configuration button on the TWAIN advanced screen you see the fol...

Страница 39: ...ns folder or if 3 Pass scanning is selected in the Image Type dialog box you cannot select the Apple Colorsync feature in the Configuration dialog box TWAIN can only display using ColorSync if Monitor is set to thousands or millions of colors in the Control Panel In the Configuration dialog box you can select the number of samples that will simultaneously display in the preview area either 3 or 5 ...

Страница 40: ...tting is Black White and the Halftone setting is None in the Image Type dialog box When Threshold is available the other image control settings are not available Note The ES 300C scanner does not support Contrast Highlight Shadow Sharpness and Threshold settings Follow these steps to use the Image Controls 1 From the advanced screen click the preview icon to display your image in the preview windo...

Страница 41: ...n samples using different settings In the preview window click the sample that most closely reflects the image you want That sample is then highlighted and placed in the middle position Click the sample again it appears alone Highlight and Shadow Color b u t t o n s Click the Color button below the slide bar The mouse pointer changes to an eyedropper so you can select the color you want to represe...

Страница 42: ...ontrols icon Adjusting Gamma Correction Adjusting the gamma levels lets you change the pixel brightness in the midtones highlights and shadows of an image without dramatically changing it This modifies the contrast in image tones so they reproduce with greater detail on a printer or monitor The Gamma Correction setting is not selectable if you chose the Line Art Image Type setting Note Gamma Corre...

Страница 43: ...se by choosing the Save button You see the following screen Type the name you want to assign to the setting in the Gamma Correction Name field and choose Save Then choose OK Now the name for the new setting is available in the pull down menu so you can select it whenever you want to use it You can also delete an existing gamma correction setting by selecting it from the Gamma Correction Name pull ...

Страница 44: ...ettings in the Color Adjustment dialog box as described in this section Gray Balance Saturation Color Filter You can return the Gray Balance and Saturation options to their default settings by holding down the Option key and clicking the option s slide bar To reset all the Color Adjustment options to their defaults click the Reset button just below the Color Adjustment icon Using Special Effects 4...

Страница 45: ... Gray Balance value field shows the setting for the selected color or you can type a specific value in the field Changing Saturation Changing the saturation levels of a color increases or decreases the amount of color in a specific hue Less saturated colors are more pale while saturated colors are richer You can change the saturation levels in the image by adjusting the Saturation slide bar You ca...

Страница 46: ...he Comparison icon for Color Filter you can select from a series of comparison samples of the image using different color filters Note Color filters are ignored during 3 pass scanning Inverting an Image The Invert icon creates a negative of an image You can use this feature to turn a positive image into a negative or to create a positive image from a negative Note To scan a negative image and inve...

Страница 47: ...Exposure After you preview an image click the Auto Exposure icon to automatically adjust the brightness and contrast in an image Note Auto Exposure is not available for the ES 300C Using Auto Locate After you preview an image click the Auto Locate icon to crop out everything on the document table except the image If a document contains more than one image you can roughly define the scan area using...

Страница 48: ...pplication can open as described in this chapter Saving a Scanned Image Before you export an image you need to save it in its original EPSON Scan II format Otherwise you will not be able to retrieve it again in EPSON Scan II Follow these steps 1 Start EPSON Scan II if necessary 2 Select Acquire from the File menu 3 Select Scan to scan your image 4 Choose Save AS from the File menu You see the foll...

Страница 49: ... an Image EPSON Scan II allows you to export an image in a file format your application software can use For information on the file formats your software can open see your software manual Note Your application software cannot import images saved in the EPSON Scan II file format and EPSON Scan II cannot open an exported image file Always save an image in EPSON Scan II before exporting Follow these...

Страница 50: ...ick the Compression checkbox to turn this feature on and off Compression makes the resulting PICT file smaller If you selected the TIFF6 0 JPEG or JPEG format or you selected the PICT format and turned on Compression EPSON Scan II allows you to choose the image quality Since JPEG uses a Lossy compression scheme selecting higher quality gives you less compression To change the image quality move th...

Страница 51: ...ON Scan II cannot open an image file once if is exported Follow these steps 1 Start EPSON Scan II if necessary 2 Choose Acquire Export from the File menu You see the TWAIN screen If you see the easy screen click Advanced 3 Choose Scan You see the following dialog box 4 In the pull down menu at the top select the folder to which you want to export the file 5 Type a filename for your image in the Ex...

Страница 52: ...EG format or you selected the PICT format and turned on Compression EPSON Scan II allows you to choose the image quality Since JPEG uses a Lossy compression scheme selecting higher quality gives you less compression To change the image quality move the Quality slide bar to the desired setting Caution If you turn on Compression do not select Poor on the Qualify slide bar you may lose data in file 9...

Страница 53: ...hapter 1 for instructions Nothing happens when you select Acquire Make sure your scanner is turned on and the cables are connected properly EPSON TWAIN may not be selected as the TWAIN data source in your application You ll usually find the Select TWAIN Source option under the File menu The EPSON TWAIN data source may not be installed correctly Reinstall the EPSON Scanning Utilities from your inst...

Страница 54: ...ware You may have more than one TWAIN screen open at once Reset your Macintosh and use only one active TWAIN screen Your scanned image may be too big Reset your system and reduce the size of the scanned image If you see an insufficient memory error message you may not have enough memory allocated to the application to use it with EPSON TWAIN Use the Finder Get Info window to increase the memory al...

Страница 55: ...preview window The scan is not the full width you selected in the preview area The EPSON ES 300C and ES 600C scanners restrict the scan width to 4096 pixels at high resolutions Choose a lower resolution for a wider scan After scanning and opening several scanned images your application software fails and your scanned image is lost Save and close the scanned images before scanning a new one The siz...

Страница 56: ... select these as your Document Source You are using Adobe Photoshop 2 5 1 and the Color Drawing and Color Halftone options are grayed out in the Image Type pull down menu This is because Photoshop 2 5 1 can scan only in 1 8 or 24 bits per pixel so you cannot use these M bit per pixel Image Types The Preview icon is grayed out when the Automatic Document Feeder is selected under Document Source The...

Страница 57: ...on t meet your specific scanning requirements You can define your own settings see Chapter 3 The Halftone setting in the Image Type dialog box is grayed out Halftone and dither settings on most EPSON scanners are only available when the Pixel Depth setting is set to Black White or 8 Colors 1 or 2 bits per pixel per color The application software displays an error message freezes or fails after sca...

Страница 58: ...pace on your hard disk to scan After scanning with an image editing application the scanned image disappears Make sure you close the TWAIN screen before switching to your application software The rows in the screen calibration window do not match closely enough Try adjusting your monitor s brightness and contrast settings The TWAIN screen changed its color settings after a preview scan Increase th...

Страница 59: ...e to clear the partial image After selecting a part of an image to scan the image did not scan correctly Scan the whole image instead of a portion of it Problems With Image Quality This section tells you how to fix problems with image quality that may occur when you scan or print images The entire image is distorted or blurred Make sure that the document is placed flat against the document table Y...

Страница 60: ...s very thick or warped at the edges the edges of the image may be discolored Cover the edges of the original with opaque paper to avoid having outside fight interfere If part of the original is outside the document table the edge may not be in contact with the document table and may be discolored Change the position of the original The image is faint or out of focus Make sure the document is place...

Страница 61: ...as the original Make sure you have performed the calibration procedures and selected the correct printer profile see Chapter 2 Try different combinations of scanner settings Check that your software is correctly installed If you are importing an image file into your application software see if the file format is acceptable for your software Also check that the settings of your application and your...

Страница 62: ...tings such as Pixel Depth Gamma Correction and Color Adjustment or try a different combination of settings The printed color seems different from that of the originals Check that you have correctly performed the printer calibration process in EPSON Scan II using the correct printer calibration profile Recalibrate and try again The colors in a printed image may not match the colors of the original ...

Страница 63: ... Also depending on your scanner some features may not be available Set the Brightness Highlight or Gamma Correction options to darker settings and scan the image again If you selected Line Art as the Image Type setting and any setting other than Screen as your Destination setting try increasing the Threshold setting to a higher value Moiré interference patterns appear in the scanned image Moiré pa...

Страница 64: ...does not match the previewed image Select Color Photo as the Image Type and try scanning again Select 16 Million Colors for the Pixel Depth setting and try scanning again The image looks corrupted Check your printer driver settings If the paper size is set larger than Letter or A4 select a smaller paper size or the maximum paper size your scanner can support See your scanner documentation for more...

Страница 65: ...and 1 pas scanning tine Art OCR Black end whiie draft quality and 1 pas scanning Black and white draft quality 1 pass scanning and Text Enhancement Technology On Default Destination settings Destination Impact Dot Printer Default settings 360 dpi resolution for line drawings and halftone images 120 dpi resolution for photos and calibration for lmpact Dot printers Thermal Printer 360 dpi resolution...

Страница 66: ...nd halftone images 240 dpi resolution for photos and calibration for Stylus COLOR Printers 800 dpi resolution for line drawings and halftone images 240 dpi resolution for photos and calibration for Stylus Pro XL Printers 800 dpi resolution for line drawings and halftone images 240 dpi resolution for photos and calibration for stylus Pro Printers 800 dpi resolution for line drawings and halftone im...

Страница 67: ...height and file size on the screen Previewing also allows you to see the effects of changes you make to your image Zoom Preview Allows you to select a specific area of an image in the preview window and preview it again so that only the selected portion of the image is shown Use the mouse to select the part of the image you want to preview Invert Allows you to change negative images into positive ...

Страница 68: ...mage The default setting is unlock Image Controls Opens the Image Controls dialog box which contains settings described below Brightness Comparison Allows you to compare three or five image samples of varying brightness The middle sample reflects the current setting Contrast Comparison Allows you to compare three or five image samples of varying color contrast The middle sample reflects the curren...

Страница 69: ...g black and white contrast The middle sample reflects the current threshold setting Gamma Correction and Gamma Correction Comparison Opens the Gamma Correction dialog box which contains settings for adjusting gamma levels when you want to alter the midtones highlights and shadows in an image This lets you more accurately modify an image to reflect the tones in the original and bring out the detail...

Страница 70: ...the most neutral gray Saturation Comparison Allows you to compare three or five image samples of varying color saturations so you can select the paleness or richness you want in an image Three pass scanning ignores saturation settings Color Filter Comparison Allows you to compare three or five image samples of varying col s so you Can select the specific color effect you want in an image Three pas...

Страница 71: ...itors have on the image Calibration produces a final output that more closely reflects the original Color Correction A method of adjusting the color image data for a particular type of device so that the reproduction results are close to the original colors Color Filter An EPSON TWAIN setting that lets you modify the color of an entire image Color Separation A process to convert full color images ...

Страница 72: ...such as a monitor printer or scanner Dithering A process in which software or an output device simulates continuous tones with repeating patterns of dots DPI Dots per inch A unit of measurement for resolution The higher the value the higher finer the resolution Dropout A scanner software setting which lets you instruct your scanner to ignore a color EPS Encapsulated PostScript An industry standard...

Страница 73: ...e lightest portion of an image Image Type The way an image will be scanned or reproduced EPSON TWAIN provides Pixel Depth Halftone Dropout and Quality settings to adjust the scanned image you are creating You can also define your own image type settings Interface The connection between or among computer devices JPEG Joint Photographic Experts Group JPEG is standard file format for Lossy data compr...

Страница 74: ... data is transmitted between devices Resolution Indication of how finely an image is resolved into pixels Measured in dots per inch dpi pixels per inch ppi or sometimes samples per inch spi RLE Compression Run Length Encoding A type of data compression Saturation The amount of color in a specific hue Unsaturated colors tend to be pale Saturated colors tend to be rich and vibrant scaling Reducing o...

Страница 75: ...stry standard file format supported by many applications TIFF6 0 JPEG Tagged Image File Format version 6 0 with JPEG compression TIFF and JPEG are industry standard file formats supported by many applications Transfer Curve A Gamma correction graph which shows the contrast ratio between the input original image and output image data in image processing Transparency Unit A scanner accessory which a...

Страница 76: ...rofile see Calibration profile screen 2 1 to 2 3 4 2 system 2 1 to 2 10 Calibration profile creating 2 6 to 2 8 enabling 4 2 EPSON Stylus printers 2 4 2 9 3 12 exporting chart 2 4 to 2 6 modifying 3 12 scanning using 2 8 to 2 9 selecting 3 12 Capturing images 3 1 to 3 16 Cautions Intro 3 CMYK 2 1 Color adjustment 4 7 to 4 9 6 6 6 10 buttons 4 4 4 8 correction 4 7 to 4 9 filters see Color Filters o...

Страница 77: ...ervice Intro 5 Customer Care Centers Intro 4 electronic support Intro 4 to Intro 5 EPSON Scan II acquiring and exporting images 5 4 to 5 5 calibrating with see Calibration exiting 5 5 exporting images 5 1 to 5 5 file format 5 1 to 5 2 installing 1 1 to 1 2 introduction Intro 1 to Intro 2 problems 6 1 to 6 7 requirements system Intro 2 saving images 5 1 to 5 2 testing 1 3 EPSON TWAIN see TWAIN Erro...

Страница 78: ...J JPEG 5 3 5 5 L Line Art 3 11 4 5 6 11 Lock setting 3 15 Lossy compression scheme 5 3 5 5 M Macintosh requirements Intro 2 6 2 Manual how to use intro 3 Measurement units 3 14 Memory 6 2 to 6 3 Moire patterns 6 11 Monitor calibration see Calibration Monitor Control Panel 2 2 3 13 4 2 6 4 6 12 Multipage scanning 3 3 6 7 N Net screen options 3 7 to 3 8 Notes Intro 3 Number of comparison samples opt...

Страница 79: ... 8 3 pass sequence 3 7 to 3 8 4 2 4 8 to 4 9 6 6 6 11 advanced screen 3 5 to 3 15 easy screen 3 3 to 3 4 special effects 4 1 to 4 10 using calibration 2 8 to 2 9 Scanning Sequence setting 3 7 to 3 8 Scanning Utilities EPSON see EPSON Scan II and TWAIN Screen calibration see Calibration SCSI problems 6 1 6 3 settings 1 1 Selection matrix 3 8 Service bureau printer 2 6 Service EPSON Intro 4 to Intro...

Страница 80: ...t settings A 1 to A 2 easy screen see Easy screen installing 1 1 to 1 2 introduction Intro 1 to Intro 2 problems 6 1 to 6 7 requirements system Intro 2 scanning using 3 16 special effects 4 1 to 4 10 testing 1 3 U Units measurement 3 14 Utilities EPSON Scanning see EPSON Scan II and TWAIN V Variations between samples option 4 2 Video display 3 13 6 10 6 12 w Warnings Intro 3 Width setting 3 14 to ...

Отзывы: