109
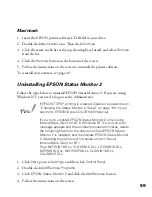
3. Type
A:\SETUP
and click
OK
.
4. Close any open programs and click
Next
. A screen appears asking where you want
to install Status Monitor 2.
5. Click
Next
to accept the default directory or choose a different directory and click
Next
.
6. If you are using Windows 98 or Windows 95 and you have TCP/IP installed, you
see a screen asking you if you want to enable EPSON TCP/IP printing.
Select
Yes
if you want to print with TCP/IP, and then click
Next
.
TCP/IP Printing: Yes_______ No_______
7. Select the type of printer(s) you want to monitor and click
Next
.
Monitor:
EPSON TCP/IP printers_______ Windows shared printers_______
NetWare printers_______ local printers_______
8. Select
Monitor
to monitor EPSON network printers that do not have drivers
installed in your computer. Select
Do not monitor
if network traffic is a problem.
Then click
Next
.
Printers: Monitor_______ Do not monitor_______
9. If you’re using NetWare, set the number of hops (0 to 15) and click
Next
.
Number of hops:_______
If you have dial-up routers in a NetWare environment, they
may automatically dial up the next hop and you may be
charged for the line connection depending on the number of
hops you set. To prevent this and to keep network traffic to a
minimum, set hops carefully.
10. Check the current settings and click
Next
to install the software. When the
installer prompts you, insert the second diskette.
11. When you see the Setup Complete screen, select
No
and click
Finish
.
12. Insert the Status Monitor 2 for EPSON Stylus COLOR 900N, diskette 1, in your
drive.
diskette.fm Page 109 Friday, February 19, 1999 4:03 PM
Содержание 900N
Страница 1: ...Epson America Inc Stylus COLOR 900N User s Guide ...
Страница 17: ...10 ...
Страница 25: ...18 ...
Страница 61: ...54 ...
Страница 65: ...58 ...
Страница 95: ...88 ...
Страница 109: ...102 ...
Страница 119: ...112 ...


