User Manual
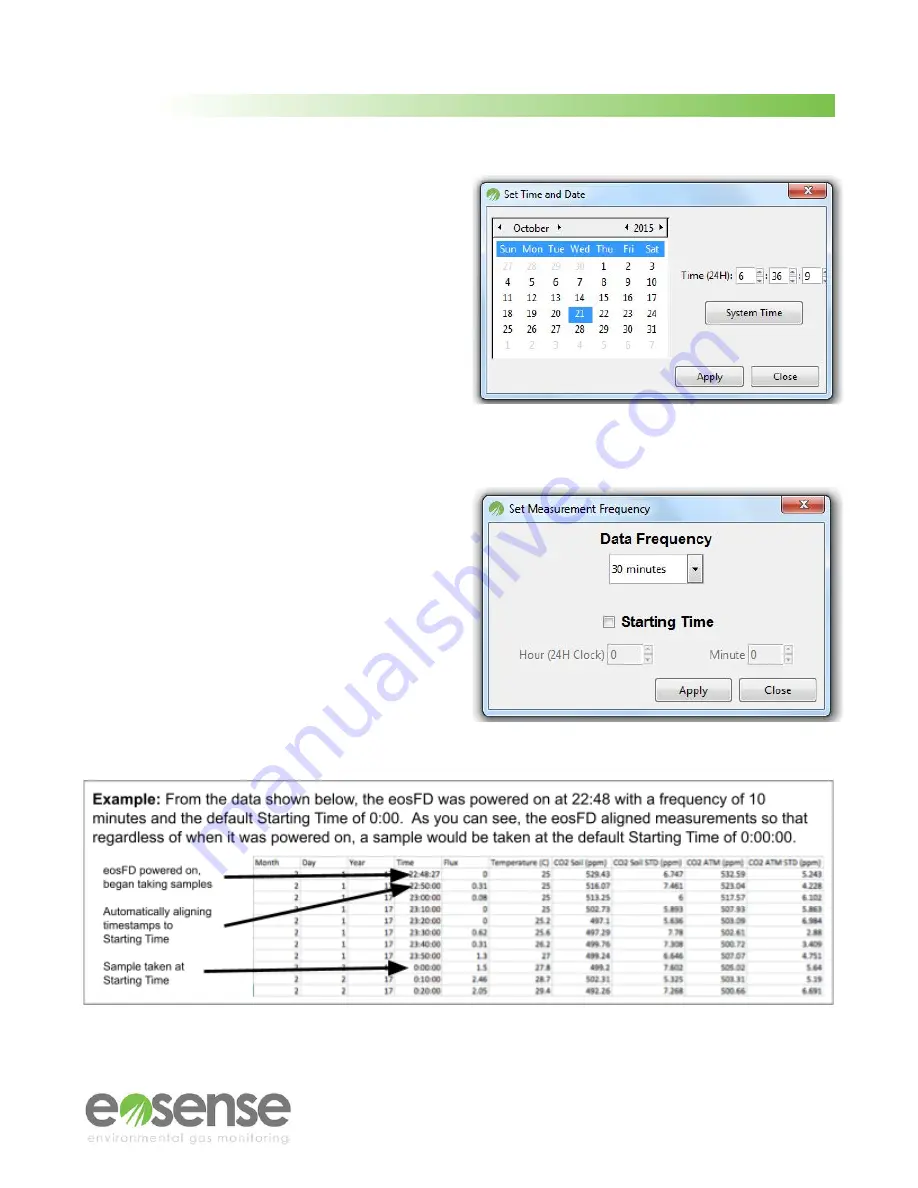
Button 2 - Set Time
: This option allows the user to
change the clock setting on the eosFD’s internal
data logger. Clicking this button opens a window
that allows the user to choose a time and date to
update the eosFD’s on-board clock. The timestamp
used in the logged data file will correspond to the
eosFD’s internal clock, so ensure that this time is
set correctly. The date is chosen using a small
calendar, while the time is set by entering the
current time in a 24-hour format (e.g. 6:30 PM
would be 18:30:00). To sync the eosFD clock with
the connected PC, click the
System Time
button in
the upper right, then click
Apply
.
Figure 21
The Set Time and Date window
Button 3 - Frequency
: This command allows the
user to change the frequency of data logging by
changing the amount of time that elapses between
the beginning of measurements in minutes
(minimum of 5 minutes, maximum of 1440 minutes
or 1 day). The user may also choose the starting
time, which is used to align the starting point for
measurements. For example, if the desired
measurement frequency is twice an hour, at :00
and :30, then the user would select a
Data
Frequency
of 30 min. and a start time with 0 for
min. Please note that the start time
does not
prevent the eosFD from recording data before this
time is reached.
Figure 22
The Set Measurement Frequency window
22
m
© Eosense Inc.


