16
Mounting the EWS330AP
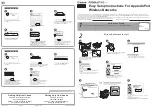
Attaching the EWS330AP to a ceiling :
1. Slide the ceiling mount base into the slot of this Access
Point.
2. Hold the Access Point with one hand to reach the other
hand over the T-rail side of the bracket. Then hook the
stationary end of the ceiling mount bracket on to the
T-rail.
Attaching the EWS330AP to a wall :
3. Continue from A, determine the where the Access Point
to be placed and mark location on the surface for the
two mounting holes. Use the appropriate drill bit to
drill two 8.1mm diagram and 26mm depth holes in the
markings and hammer the bolts into the openings.
4. Screw the anchors unto the holes until they are flush
with the wall; screw the included screw into the achors.
5. Place the Access point against the wall with the
mounting screw heads
Note: Mounting hardware kit are included 15/16in
(2.38cm) and 9/16in (1.43cm). If extra space is required
to accommodate drop ceiling tiles, use the provided
spacers and long screws.
Содержание EWS330AP
Страница 1: ...User Manual Business Solutions Dual Band AC1300 Indoor Access Point EWS330AP version 1 3...
Страница 4: ...4 Chapter 1 Product Overview...
Страница 10: ...10 Chapter 2 Before You Begin...
Страница 17: ...17 6 Use the bracket screw provided to secure the AP to the bracket...
Страница 18: ...18 Chapter 3 Configuring Your Access Point...
Страница 20: ...20 Chapter 4 Building a Wireless Network...
Страница 23: ...23 Chapter 5 Overview...
Страница 28: ...28 Chapter 6 Network...
Страница 31: ...31 Chapter 7 2 4 GHz 5 GHz Wireless...
Страница 43: ...43 Chapter 8 Management...
Страница 59: ...59 Appendix...


