background image


~47~

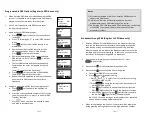
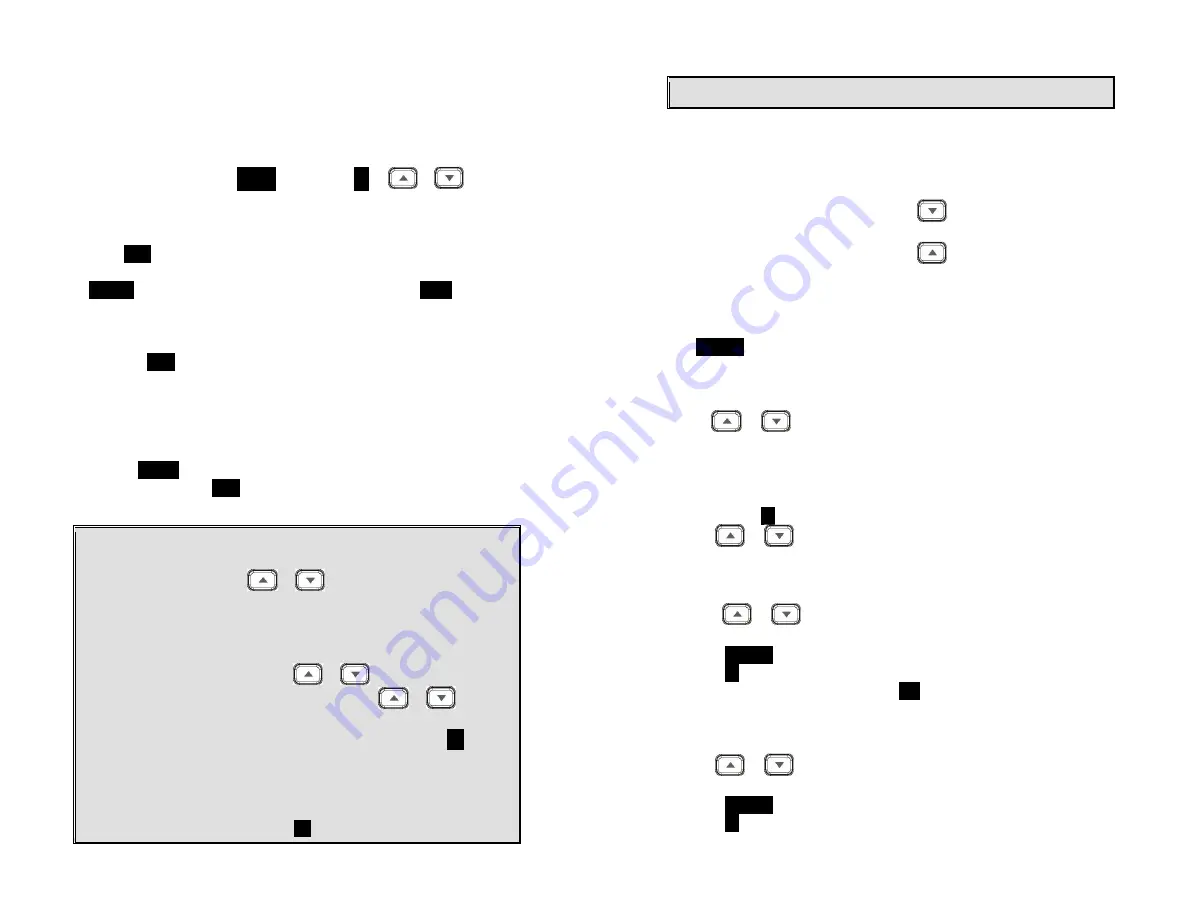
contain a phone number or handset ID (up to 28 digits) and a 
name (up to 14 characters). 
Re: For DuraWalkie, each entry can store 2 digits handset ID or 
Group ID.  


2.  To access phonebook, press 

MENU

 followed by 

 2 

 or 

or 


scrolling key when handset in standby mode. 


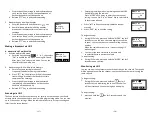
3.  To add a new entry: 
  a.  Press 

ADD

 soft key. 

  b.  Enter a phone number when LCD prompts “Number?”  Use 

DELETE

 soft key to delete the last digit entered.  Press 

SAVE


when completed.  

  c.  You will then be prompted to enter a name for the phone 

number just entered.   


(1)  Press 

SAVE

 key to enter a phone number without a name.  All 

records without a name will be placed on top of the list, in the 
order they are entered. 


(2)  To enter the name, press the corresponding keypad number 

one or more times according to the order of the character on 
the key.   


(3)  Use 

DELETE

 soft key to delete the last character entered.  When 

completed, press 

SAVE

 soft key to confirm your selection. 


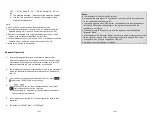
Notes:


1.


When entering a phone number, the cursor automatically advances to 

the next digit field.  Use 

 or 

 scrolling key to move the cursor 

backward or forward to insert or delete. 

2.


When entering a name, the cursor automatically advances to the next 
character field if you press a different key for the next character.  If you 
need to enter consecutive characters from the same key, you can wait 

for the cursor to advance or use 

 or 

 scrolling key to move the 

cursor backward or forward manually.  Also use 

 or 

 to move 

the cursor to insert or delete. 

3.


By default, all letters are entered in the upper case.  Use the 


  key to 

toggle between upper and lower cases.   

4.


A “Pause” entry represents a 2.8 second delay in dialing the following 
digits, which is useful when calling a sequence of segmented numbers 
(e.g., access code, credit card number, auto-attendant entries, etc.)  
Pause is entered by pressing the 


  key twice (LCD displays P).  Entering 


~48~

pause twice (PP) will result in 5.6 seconds pause in the dialing. 

 
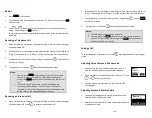
4.  The entries are alphabetically sorted and stored as a list in an 

ascending order (A to Z) from the top of the list. 


a.  If the phonebook is entered from the menu, the first entry 

displayed is from the top of the list. 


b.  If the phonebook is entered using the 

, the first entry 

displayed is from the top of the list. 


c.  If the phonebook is entered using the 

, the first entry 

displayed is from the bottom of the list. 


5.  The first line of LCD display shows name and the 2

nd

 line shows 

the phone number.  If the phone number is longer than 14 digits, 
press 

OPTION

 soft key and select Option 3 to view the complete 

number. 


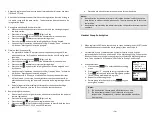
6.  To search for a record: 
 

a.  Use 

 or 

 scrolling key to enter the Phone Book 

mode.  


b.  Press a key that corresponds to the first character of the 

name you are looking for. 


c.  For example, you are looking for “EnGenius”, and then press 

the number 

 3 

 once.  


d.  Use  

 or 

 scrolling key to locate the exact record you 

are looking for. 

 
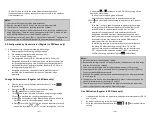
7.  To erase phonebook entry: 
 

a.   Use  

 or 

 scrolling key or the alphabetical search 

method to locate the record to be erased. 


b.  Press 

OPTION

 soft key to enter editing menu. 


c. 

Press 

 1 

 to erase the designated phone entry.  


d.  LCD shown “Are you sure?”  Press 

YES

 to double confirm 

your change. 


8.  To edit phonebook entry: 
 

a.  Use 

 or 

 scrolling key or the alphabetical search 

method to locate the record to be edited. 


b.  Press 

OPTION

 soft key to enter editing menu. 


c. 

Press 

 2 

 to edit the designated phone entry.  

Содержание DuraFon UHF

Страница 1: ...19 Charger Illustration 20 Charger Features 21 Getting Started 22 Handset and Charger Installation 22 Basic Operations 23 Operation Modes 23 A Base Operation Modes 23 B Handset Operation Modes 23 Menu Tree Register to PRO base only 24 Making a Telephone Call 25 Making an 2 Way Intercom Call 25 A Handset to Handset Calls 26 Making a Broadcast via 900MHz 26 A Handset to Handset Calls 26 Making a Bro...

Страница 2: ...void the risks of fire electric shock injury to person and damage to property General Safety Instructions 1 When using your wireless phone ensure your safety and the safety of others a Always watch where you are walking and standing b Don t let a phone call distract you from working safely c If power goes out it won t work Recommend backup power 2 In an emergency a If an emergency occurs dial the ...

Страница 3: ...y expose you to dangerous voltages electrical currents or other risks Incorrect reassembling of the product may cause electric shock when the product is subsequently used 13 Avoid using the product during a storm There may be a risk of electric shock from lightning 14 Do not place the product where persons can step trip or fall on it 15 Do not place conductive objects over or near the antenna 6 16...

Страница 4: ...cept any interference received including interference that may cause undesired operation IMPORTANT NOTE FCC Radiation Exposure Statement This equipment complies with FCC radiation exposure limits set forth for an uncontrolled environment This equipment should be installed and operated with minimum distance 20cm between the radiator your body This transmitter must not be co located or operating in ...

Страница 5: ... for satisfying RF exposure compliance To maintain compliance with FCC RF exposure compliance requirements please follow operation instruction as documented in this manual This transmitter must not be co located or operating in conjunction with any other antenna or transmitter Industry Canada statement This device complies with RSS 247 of the Industry Canada Rules Operation is subject to the follo...

Страница 6: ... ion Battery x 1 d Charger x 1 e Charger AC DC Adaptor x 1 f Clip Fastener x 1 g Belt Clip x 1 h Quick Guide and Warranty Card 12 Handset Illustration Soft key Display Mode Scan End Dialing key Intercom Antenna Receiver Earpiece Talk Flash Speakerphone Monitor Soft key Microphone Up Down Knob Power Volume USB Connector Walkie LED ...

Страница 7: ...FF Hook Indicates if phone line mode is active 3 Intercom in progress Indicates if Intercom mode is active 4 Handset ID Displays a handset icon and a 2 digit Handset ID 5 Channel number in Walkie Indicates the Channel 1 5 selected 6 Two Digit Address Index Shows address index when viewing contents of the call logs 7 Line Indicator Indicates the number of the line being accessed by the handset 8 Sp...

Страница 8: ...ng via UHF band or 900MHz band b Press the Mode key repeatedly to set the desired channel 1 5 in advance Re PTT operation should be limited to 50 duty cycle 7 Left Right Soft Keys Make menu selection 16 8 Up Down Scrolling Keys a Scroll through records and menu selections b Adjust receiver voice volume when in Talk mode 9 END Key a Ends a call b Leaves current menu operation up one level 10 MODE K...

Страница 9: ...0 entries each stores a phone number or handset ID up to 28 digit and name up to 14 character b Alphabetically sorted display and search 18 c Dial from display d During the stand by mode you can enter the phone book by pressing scrolling key e Phone book transfer via air i Transfer specific phonebook to one handset or all registered handsets ii Transfer all phonebooks to one handset or all registe...

Страница 10: ... 2 Administrator programmable Flash key timing For DuraFon PRO only a From an administrator handset Handset 10 or 11 press MENU 9 1 enter base ID 00 07 2 to select flash key timing b 9 level 100 ms 900 ms timing selections default 300 ms c The default value 300 ms works in most areas Changing this setting may result in Flash function not working Change only when you are certain the new value will ...

Страница 11: ...re first use 2 Both handset and spare batteries can be charged at the same time 22 Getting Started Handset and Charger Installation 1 Plug the transformer end of the Charger AC DC adaptor into a standard AC electric power outlet plug the other end into the DC In jack on the back of the Charger 2 Install battery pack onto the handset 3 Install handset antenna 4 Place handset onto the charger front ...

Страница 12: ...beep tone and see LCD and backlight to indicate it is ON To turn the handset off the On Off Volume knob counterclockwise c The idle screen display custom name can be edited d The 2 dight number represents the handset ID 2 Menu mode a Press the Right soft function key to activate MENU mode b In MENU mode the handset settings and information contained in memory can be changed c The functions availab...

Страница 13: ...28668 ADD OPTION 26 A Handset to Handset Calls 1 Press key followed by a two digit handset ID or Group ID 2 Press key to end the call 3 During the call press the key the speakerphone is active Notes 1 Intercom calls can be made regardless if the Base Station is present 2 If a Group ID is entered the first handset belonging to that group that answers will establish a link with the caller See Handse...

Страница 14: ...desired to scan in walkie programming mode You can scan up to 5 channels as settings When the radio detects activity it stops scanning and locks it on the active channel 11 PA paging to Ext 12 10 PA paging to Ext 12 10 1 DuraFon PRO REDIAL MENU 28 1 Enter programming mode via pressing and hold MODE key while turning the radio on Press MODE key 6 times to enter the scan channel setting You can use ...

Страница 15: ...one company Receiving an Intercom Call 1 When an intercom call arrives the ringer will ring or vibrate unless the ringer has been turned off Press to answer the intercom call 30 2 If the handset is on the charger cradle ringer will be temporarily switched to Ring if it has been set to Vibrate lift the handset and start conversation 3 If the handset is not on the cradle press any key except and the...

Страница 16: ...soft key 10 1 You have a Call on hold UNHOLD OPTION 10 Sounds 1 Ring Volume 2 Ring Tone 10 Ring Volume Off SAVE 32 Key Guard 1 To prevent accidental dialing you can press MENU Right soft key then press 1 to select KeyGuard option The handset keypad is locked No key entry is accepted except the power on off key 2 To unlock the keypad press UNLOCK Left soft key then within 2 seconds press the digit ...

Страница 17: ...nnel 1 5 Up Down or numbers To select Frequency number 1 56 Up Down or numbers To select Code 0 121 MODE MODE 2 10 End PTT To save and exit Mic Gain 2 1 3 MODE MODE Up Down or number To select microphone gain 3 High sensitivity 2 Medium sensitivity default 1 Low sensitivity for noise enviornments 2 10 VOX Off End PTT To save and exit Up Down To select VOX sensitivity Off Deactivate VOX default Hig...

Страница 18: ...e base station The handset ID is 00 before registering to the base station 36 2 In certain situations you may want to change a handset s ID For example you want to change a particular handset from a user to an administrator ID 10 or 11 or vice versa Or in some rare occasions you find another handset having the same Handset ID 3 Registration a Press MENU 6 to enter the registration mode b Press and...

Страница 19: ...andset desiring a specific ID to ensure that the ID is not taken by another handset 5 Remotely register Handset a If base install in ceil or higher location administrator handsets can perform remote registration b Press administrator handset MENU Right soft key c Press the number 6 this will enter registration mode d Press number 3 this will replace the procedures to press hold the base REG button...

Страница 20: ...igit Handset ID to call another handset extension b After the second handset answers press the CONF Left soft 40 key c Two handsets and one phone line can now talk simultaneously Any one party can drop out of the 3 way conferencing leaving the remaining two parties still connected 5 3 Way Conferencing with a Second Phone Line a Press number 1 and enter a phone number to call another phone line b A...

Страница 21: ...2 for all your lines and not subscribe to the Call Waiting feature Auto Attendant AA Register to PRO base only 1 When enabled by the administrator an automated attendant would greet a telephone line incoming call 2 The caller will be prompted by the greeting message to enter a two digit extension number Handset ID or press for operator 3 The greeting message is user programmable The Handset ID tha...

Страница 22: ...separately for each phone line by using or to scroll through Line 1 to Line 44 4 and press On or Off softkey to turn AA On Off If turning off the AA may be useful when The line is not used by a group of people External answering machine is to be attacked to the line v Press 5 and select from the following two options to set Operator for AA Handset assign a specific handset as operator by entering ...

Страница 23: ...meters that can be changed by the administrator clear de register handset ID and set the next handset ID to be assigned by the base 46 2 From an administrator handset Handset 10 or 11 press MENU Right soft key 3 Press number 9 this will enter the administration menu 4 Press number 1 handset enters System setting menu a Dial tone Press 1 to set up the dial tone to be either Tone or Pulse Press 1 to...

Страница 24: ...cases 4 A Pause entry represents a 2 8 second delay in dialing the following digits which is useful when calling a sequence of segmented numbers e g access code credit card number auto attendant entries etc Pause is entered by pressing the key twice LCD displays P Entering 48 pause twice PP will result in 5 6 seconds pause in the dialing 4 The entries are alphabetically sorted and stored as a list...

Страница 25: ...ring phonebook transferring LCD shows Sending and 2 digit countdown on the LCD to indicate the phonebook numbers which are waiting for sending c For phonebook receiving party press 2 to enter receiving mode i When entering the receiving mode LCD shows Ready ii Start to receive phonebook LCD shows Get phonebook from Ext xx iii A beep emitted when receiving each phonebook iv When the phonebook recei...

Страница 26: ...D OPTION 10 00 00 16 Volume 4 OPTION HOLD 11 1 PBX Transfer 0 Mute 52 Notes 1 This feature would be useful if the DuraFon PRO base unit is adjunct to a PBX system 2 Only Mute function will be displayed if you have not preprogrammed any PBX features into the system 3 The DuraFon PRO s Programmable PBX Options may not function with all PBX Key systems due to the diversity of various proprietary syst...

Страница 27: ...istration is same as the multi base which can be performed by administrator handset Handset 10 and 11 3 From an administrator handset Handset 10 or 11 press MENU 7 to enter the BC INT Type menu setting 4 Press or key to select Repeater Mode then press SAVE Left softkey to confirm the selection Re When setting to Repeater mode the handset to handset calls will always via repeater 5 Enter the base n...

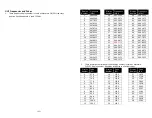
Страница 28: ...5 36 466 0875 37 466 1125 38 466 1375 Display Number Frequency MHz 39 466 1625 40 466 1875 41 466 2125 42 466 2375 43 466 2625 44 466 2875 45 466 3125 46 466 3375 47 466 3625 48 467 7875 49 467 8375 50 467 8625 51 467 8625 52 467 9125 53 469 4875 54 469 5125 55 469 5375 56 469 5625 2 These intererence eliminator codes display number is same as Motorola CLS CPL Display number 0 disables interferenc...

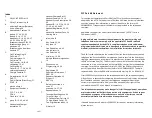
Страница 29: ... 99 503 100 506 101 516 102 532 103 546 104 565 105 606 106 612 107 624 108 627 109 631 110 632 111 654 112 662 113 664 114 703 115 712 116 723 117 731 118 732 119 734 120 743 121 754 58 Menu Operations Register to PRO base only Main menu Sub menu 1 KeyGuard 2 PhoneBook 1 Dialed 2 Received 3 Missed 1 Ring Volume 2 Ring Tone 3 Key Volume 4 Key Tone 1 Dial Prefix 2 Group Select 3 Base Select 4 Clear...

Страница 30: ...ervice is required from your local phone company in order to receive phone numbers names and time stamps on incoming calls The Received and Missed Call Logs will register no incoming calls if Caller ID service is not available 3 The Caller ID feature may not be supported by all PBX or Key systems analog ports check with your equipment provider 5 Press 4 to set sound related settings a Press 1 to s...

Страница 31: ...ions to other handset s Re To transfer PBX Options both parties have to enter the PBX Option mode firstly by following below For sending party press 1 to enter sending mode Either press TX ALL left softkey to transfer all PBX options to another handset s 62 Or press TX ONE right softkey to transfer a specific entry to another handset s Press 2 digit handset ID or group ID then select all PBX optio...

Страница 32: ...ting 64 Technical Specifications General Specifications Phone Mode Walkie Talkie Mode Frequency Range 902 928 MHz 461 469 5 MHz Channel Number Capacity 50 4 Channel Spacing 400 kHz 12 5 kHz Number of System ID 65 535 NA PL Codes NA 38 DPL Codes NA 83 Multiple Access Frequency Hopping TDMA FDMA Duplex Time Division Duplex TDD Half Duplex Frequency Hopping Rate 100 per second NA TDD Frame Length 10 ...

Страница 33: ...must be provided to the telephone company Applicable connector jack Universal Service Order Codes USOC for the Equipment is RJ11C A plug and jack used to connect this equipment to the premises wiring and telephone network must comply with the applicable FCC Part 68 rules and requirements adopted by the ACTA A compliant telephone cord and modular plug is provided with this product It is designed to...

Страница 34: ...conditions suivantes 1 le dispositif ne doit pas produire de brouillage préjudiciable et 2 ce dispositif doit accepter tout brouillage reçu y compris un brouillage susceptible de provoquer un fonctionnement indésirable Radiation Exposure Statement The product comply with the Canada portable RF exposure limit set forth for an uncontrolled environment and are safe for intended operation as described...

Отзывы: