~35~
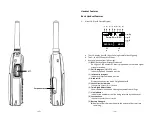
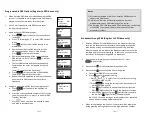
1. To enter programming mode, press and hold MODE key while turning the
radio on.
a. Press Up/Down key to scroll the channel selection, Channel 1 to 5 used for
UHF band, channel 6 used for digital band.
b. Press Mode key to enter the desired frequency number setting. You can
enter number key directly (1~56), or use up/down key to scroll the
frequency number.
c. Press Mode key to enter the desired Code number setting. You can enter
number key directly (0~121), or use up/down key to scroll the code
number.
d. Press Mode key to program total 1~5 channels used.
5= Five channels available (default)
e. Press Mode key to set the desired microphone gain setting. Use up/down
key to scroll the gain level(1-3).
3= High sensitivity
2= Medium sensitivity (default)
1= Low sensitivity, for noisy environments
f.
Press Mode key to select VOX sensitivity setting which is only used for
headset only. Use up/down key to scroll the VOX activate gain level(1-3).
3= High sensitivity
2= Medium sensitivity
1= Low sensitivity, for noisy environments
Off= Deactivate VOX(default)
g. Press Mode key to enter the scan channel setting
Use up/down key to scroll the desired channel.
Use left key to activate/deactivate the scan. “Off” display on the right side
means to deactivate the scan (default).
h. Press Mode key to activate compander setting. When activated (default),
transmitted signal are compressed before being sent and received signal
are expanded when they arrive.
Use up/down key to deactivate/activate the compander.
I.
Press Mode key to select the squelch level setting. Default value 1 is
minimum level. Each step is to increase 3 dB threshold level.
2. Press “End” or “PTT” key to store and exit the Walkie-Talkie programming
mode
Advanced Operations
Handset Registration (Register to PRO base only)
1. When 1
st
time using the handset, you need to register the handset to the base
station (The handset ID is 00 before registering to the base station) .
~36~
2. In certain situations, you may want to change a handset’s ID. For example,
you want to change a particular handset from a user to an administrator (ID 10
or 11), or vice versa. Or in some rare occasions, you find another handset
having the same Handset ID.
3. Registration
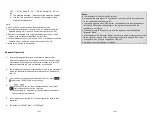
a. Press MENU-6 to enter the registration mode
b. Press and hold the base’s Registration (
REG
) button for 2 seconds until the
L1, L2, L3, and L4 LED come on.
c.
Press handset key “1”, this completes the registration process. The base
station will assign a handset ID between 10 and 99. The assigned ID will
be displayed on the handset LCD, indicating successful registration.
d. Repeat above steps for all additional handsets.
e. The first two handsets registered will be given ID 10 and 11, which gives
them administrator privileges.
Re : Base 00 is a primary base. All handsets must register to Base 00.
4. De-registration:
a. You can de-register a handset from a base. De-registration will reset the
Handset ID to 00, erase the system security code, and free up the old ID
for future registration.
b. After deregistration, the handset will not be able to use the base to make
or receive phone calls, nor can it use the intercom to reach other
handsets.
c.
Press handset
MENU
(Right) soft key.
d. Press the handset number key
6
, this will enter the handset registration
menu.
e. Press and hold the base’s
REG
button for 2 seconds until L1, L2, L3, and L4
LED come on
f.
Press the handset number key
2
, this completes the de-registration
process. Upon successful de-registration, the handset will show ID “00”.
Notes:
1.
The base has a 30 second registration timeout starting from pressing
the
REG
button. The handset has a 12 second registration timeout
starting from the time registration or de-registration option has been
selected. The base and handset will automatically exit registration
mode after timeout.
2.
Repeat registration or de-registration process if unsuccessful.
Advanced Registration (Register to PRO base only)

