48
5.2.4 Operation
5.2.4.1 Live Monitor
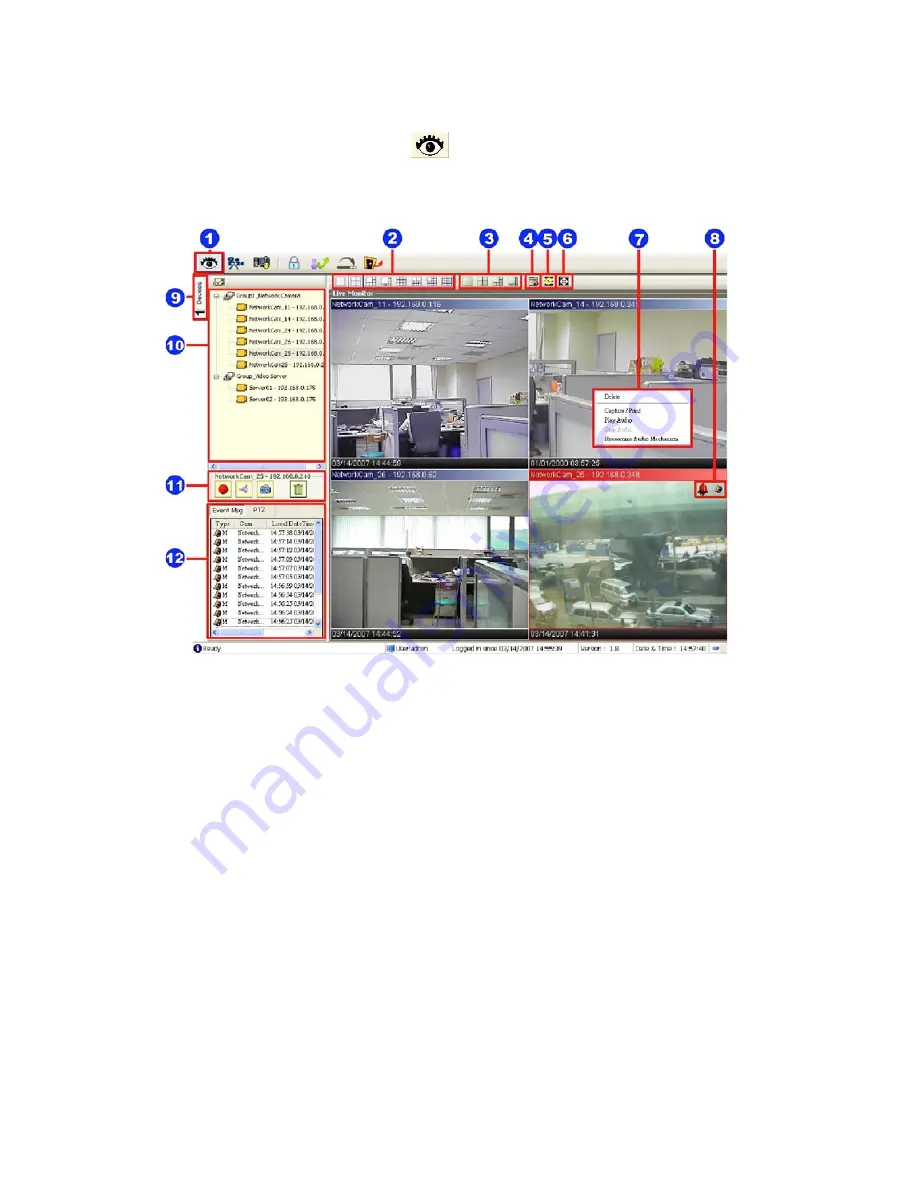
Once the connection has been established, click the
button to enter the Live Monitor window.
(See the sample screen below.) On the left side of the window is the connected device that has been arranged when
you established the connection.
.
The Live Monitor icon:
• Add a camera video onto the Live Monitor area:
() Click on the title of the camera that was connected.
() Hold down the right mouse button and drag onto the droppable Live Monitor area. The video from the new
camera will be displayed.
(3) In the Live Monitor area, if you want to exchange the videos of different cameras, you can drag the video and
drop it where you want to locate the video.
.
The Split-Screen display function bar:
This allows you to display the connected device in the single channel and
multi-format screens.
3.
The Sequence configuring button:
Press to enter the sequential jumping mode, each multi-screen, and one
sequence; the picture will sequentially switch to different channels according to the Sequence Views setting
(refer to 6..4.3).
NOTE: One can’t use the common icon (#11) in the Sequence displaying mode or drag the video and drop it as
s/he likes. For the further settings of each channel, please select the device title on the left side and
click the right mouse key to operate.
4.
The Circle configuring button:
Click this button to see the following channels.
5.
The Group Circle button:
Click this button to change the different group of display.
6.
The Full Screen button:
Click this button to show the full screen for surveillance. If you want to return to the
previous mode, please click the Normal Screen button.


