


Digital Video Recorder
21
Highlight the
Settings
box beside
Check Alarm-In
and press the
button. You can select the interval that you want
the DVR to run self-diagnostics on Alarm Inputs. You can select from
1 hr.
to
30 days
or
Never
.
Highlight the
Settings
box beside
Disk Almost Full
, and press the
button. Select the percentage level of disk usage
at which you want the DVR to trigger an alert. Percentage levels range from 80% to 99%.
Highlight the
Settings
box beside
Disk Bad
, and press the
button. Select percentage level of bad disk sectors at
which you want the DVR to trigger an alert. Percentage levels range from 10% to 90%.
Highlight the
Settings
box beside
Disk
Temperature
, and press the
button. Select the temperature of hard disk
drive at which you want the DVR to trigger an alert if the temperature exceeds the defined threshold. Refer to the hard
disk drive manufacturer’s documentation for the correct temperature setting.
The DVR can be set to react to system events. Highlight the
Actions
box beside the desired event and press the
button. System events can be associated with an Alarm-Out connector, sound the DVR’s internal buzzer, and/or notify
a number of different devices.
NOTE:
Alarm-Out
action cannot be set to
System
and
Panic
Record
events.
notify is the only option available for the
System
event.
For the Notify action to work, the DVR should be registered in the RAS (Remote Administration System).
Recording Setup
General
Highlight
General
and press the
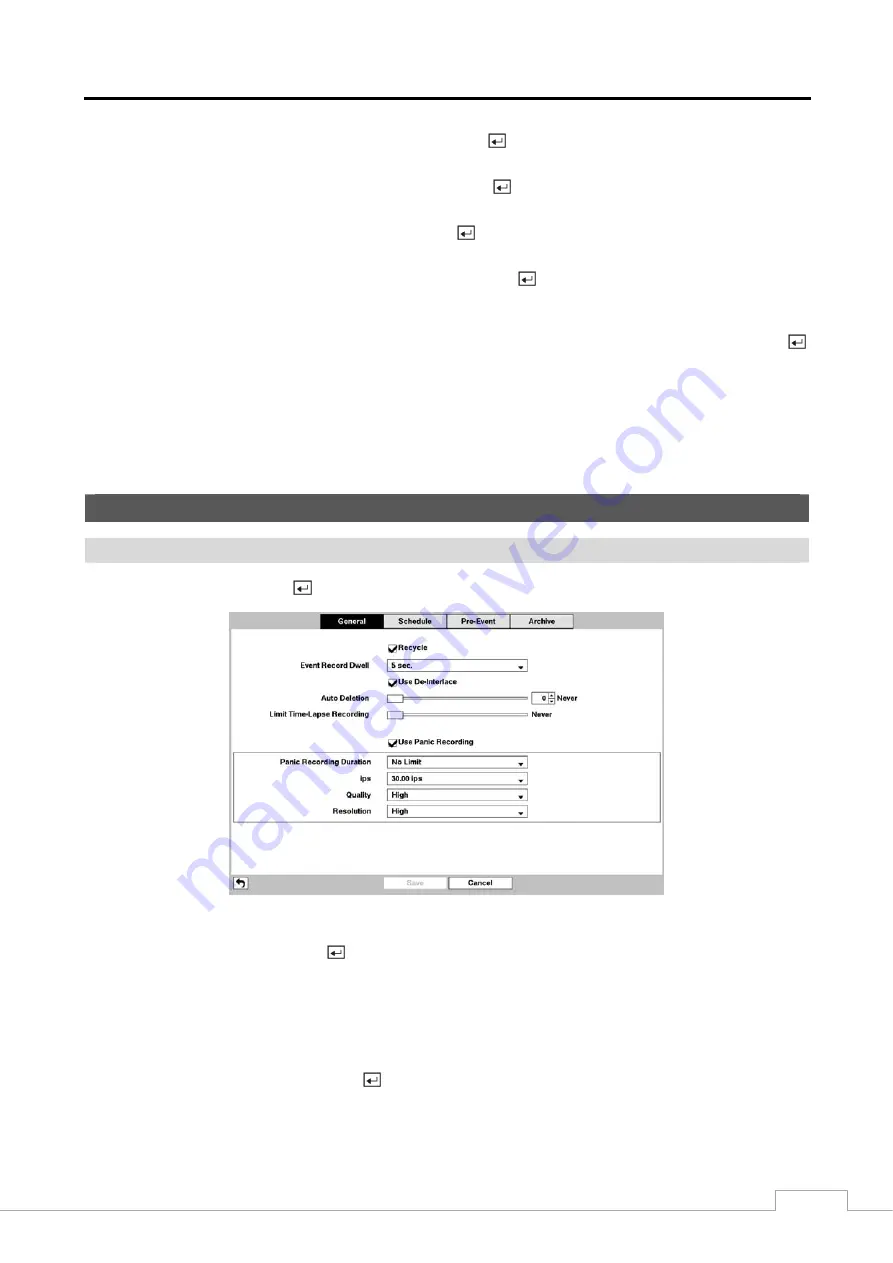
button, and the General setup screen appears.
Figure 13 : Record – General setup screen.
Highlighting
Recycle
and pressing the
button toggles between On and Off. In the Recycle mode, the DVR records
over the oldest video data once all available storage space has been used. When Recycle is turned off, the DVR stops
recording once all available storage space has been used.
Highlight the
Event Record Dwell
box and set the length of time you would like to record for the associated event.
You can set the dwell from 5 seconds to 15 minutes. Refer to
Event Actions
screen in this chapter for information
regarding event recording.
Highlighting
De-Interlace
and pressing the
button toggles between On and Off. When set to
On
, the DVR will
turn the de-interlace filter on while recording video with Very High (D1) resolution.
Содержание DMR-5008/500
Страница 2: ......
Страница 85: ...Digital Video Recorder 77 Map of Screens ...


