Encore Knobby Скачать руководство пользователя страница 1


Knobby/Slidemate 

    MIDI Controller 
    User’s Manual


Encore Electronics ©2001   

          www.encoreelectronics.com

 
Thank you for purchasing an Encore Electronics product.  This manual 
depicts images of the Knobby®, but it applies exactly the same to the 
Slidemate®. The two products are functionally and electrically 
equivalent with the exception of the control style (knobs versus sliders) 
 
This manual will cover installing and launching the software, learning 
about various file types, and the stuff you want to know to get up and 
running fast. It is not a repeat of the online help. Please read that when 
you get a chance. What we thought would be appropriate for a user’s 
manual is to end it with several examples for setting up various 
instrument profiles. 
 
You should have received these items in the Knobby package: 
 
1 – Knobby 
1 – Power supply (9volts AC) 
1 – Floppy disk 
1 – User’s Manual 


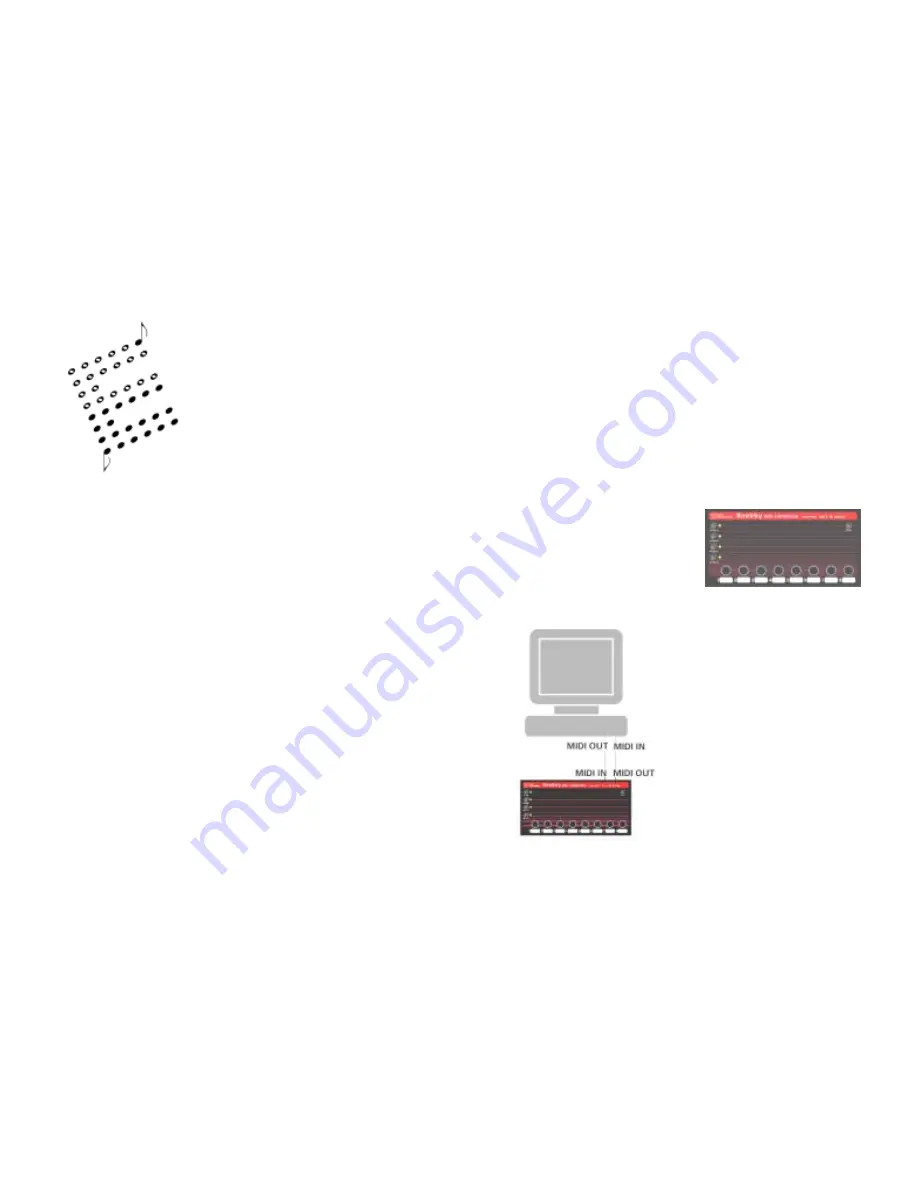
Depending on your specific equipment, there are many, many ways to 

connect the Knobby to your system.  If 
you plan on using the Knobby with 
software synthesizers only, this would be 
a typical connection. (

Figure 1

Using a pair of MIDI cables, connect the 
Knobby to your computer’s MIDI ports.  
 
Also connect the power supply to the 
Knobby and plug it in the wall. The 
power supply is not shown in the 
following diagrams. 


Figure 1 


Содержание Knobby

Страница 1: ...t of the online help Please read that when you get a chance What we thought would be appropriate for a user s manual is to end it with several examples for setting up various instrument profiles You s...

Страница 2: ...computer The can be accomplished with a direct connection as shown in Figure 1 or through a MIDI patch bay or other hardware Figure 3 Next you need to load the included application onto your computer...

Страница 3: ...rogramming For instance you could set GroupA to be 8 parameters for VCO1 GroupB to be 8 parameters for VCO2 GroupAB to be 8 parameters for the VCF etc You can think of the group buttons as giving you...

Страница 4: ...of each name is a graphic letter denoting whether it s a controller C NRPN N RPN R or sysex S message KnobbyEd can read two types of files a KNL binary file and an INI text file The INI file is what y...

Страница 5: ...The following pages are the real hands on tutorial of the manual These examples should help clarify some of the programming issues when creating instrument profiles Each example will describe the basi...

Страница 6: ...es are defined in the section The designator must begin with one of the following strings Sysex Controllers NRPN The designator can then be followed by any text separated from the first word by a spac...

Страница 7: ...mbers are the minimum and maximum and commas separate them If a third number is not present the parameter will default to a step size of one 3 The ordered list of the parameters doesn t have to be spe...

Страница 8: ...rBytes 2 ByteOrder 0 MsbLocation 7 ParameterLocation 5 DeviceIdLocation 2 DeviceIdMask 127 DeviceId 127 1 Osc 1 Octave 16 112 12 2 Osc 1 Semitone 52 76 Notice the first entry has three number that fol...

Страница 9: ...e 3g is where the Device ID is hidden as represented by the g In this instrument the byte is typically 30 If it is necessary to change the ID of the message the DeviceIdLocation and DeviceIdMask instr...

Страница 10: ...interface Another possibility is another application has enabled MIDI echo This is common with sequencers Q A friend wants a program I created How do I transfer it into their Knobby A you cannot dire...

Отзывы: