4
14 – max/min indoor temperature and
humidity
15 – indoor temperature
16 – heat index – smiley face
17 – station batteries low
18 – indoor humidity trend
19 – indoor humidity
20 – summer time
21 – moon phase
22 – day of the week
23 – alarm no. 1, 2 activation
24 – day
25 – time
26 – month
27 – outdoor humidity trend
28 – outdoor humidity
29 – high heat index
30 – DCF signal reception
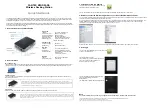
Back and Top of the Weather Station (See Fig. 2)
1 – MODE button
CH button
SNOOZE/LIGHT button
UP button
DOWN button
ALARM button
2 – hole for hanging
3 – stand
4 – battery compartment
5 – indoor temperature and humidity sensor
6 – power adapter socket
Sensor Description (See Fig. 3)
A – LED of signal transmission from the
sensor
B – sensor screen
C – hole for hanging
D – battery cover
E – battery compartment
F – CH button (sensor channel number setting
– 1/2/3)
G – °C/°F button
H – wired temperature probe (1 m)
Attention
Only use 1.5 V alkaline batteries of the same type; do not use rechargeable 1.2 V batteries.
The lower voltage may cause both of the units to not function.
Getting Started
1. Connect the power adapter to the weather station and insert the batteries (3× 1.5 V AAA). Then
insert batteries into the wireless sensor (2× 1.5 V AAA). Make sure the polarity is correct when
inserting the batteries to avoid damaging the weather station or sensor.
2. The pressure unit icon on the weather station‘s screen will start flashing – set it using the UP/
DOWN buttons and confirm by pressing SNOOZE/LIGHT.
3. The pressure value will start flashing – set it using the UP/DOWN buttons and confirm by
pressing SNOOZE/LIGHT.
4. The weather forecast icon will start flashing – set it using the UP/DOWN buttons and confirm
by pressing SNOOZE/LIGHT. The setting process will be automatically cancelled if you do not
press any button for 20 seconds.
5. The icon for wireless communication with sensor
will start flashing, indicating that the
weather station is searching for signal from the outdoor sensor. Place the two units next to
each other. If outdoor temperature does not appear within 3 minutes, the weather station will
stop searching for signal, the icon for wireless communication with sensor will stop flashing and
outdoor temperature/humidity will be displayed as --. If signal from the sensor is not detected,
repeat the process from step 1.
We recommend placing the sensor on the north side of the house. The range of the sensor may
decrease substantially in areas with a large number of obstacles. The sensor is resistant to dripping
water; however, it should not be exposed to sustained rain. Do not place the sensor on metal objects
as these would reduce transmission range.
The sensor can be placed vertically or hung on a wall.
A sensor with a wired probe can be placed in 2 ways:
1. The sensor is located in a room and the wired probe is led to the outside through a gap in the
window. In that case, the sensor measures outdoor temperature and indoor humidity.
2. The sensor and the wired probe are located outside. In that case, the sensor measures outdoor
temperature and humidity.
Содержание E5111
Страница 2: ...2 2 1 5 2 3 6 4 1 1 2 3 4 5 6 7 15 16 17 18 19 20 21 22 23 24 25 26 27 28 29 30 8 9 10 11 12 13 14...
Страница 93: ...93 7 8 9 10 11 12 12 24 15 20 70 100 12 7 12 24 1 2 3 4 5 6 1 2 3 4 1 C 5 1 C 6 1 C...
Страница 94: ...94 C EMOS spol s r o E5111 2014 53 http www emos eu download...
Страница 95: ...95...


