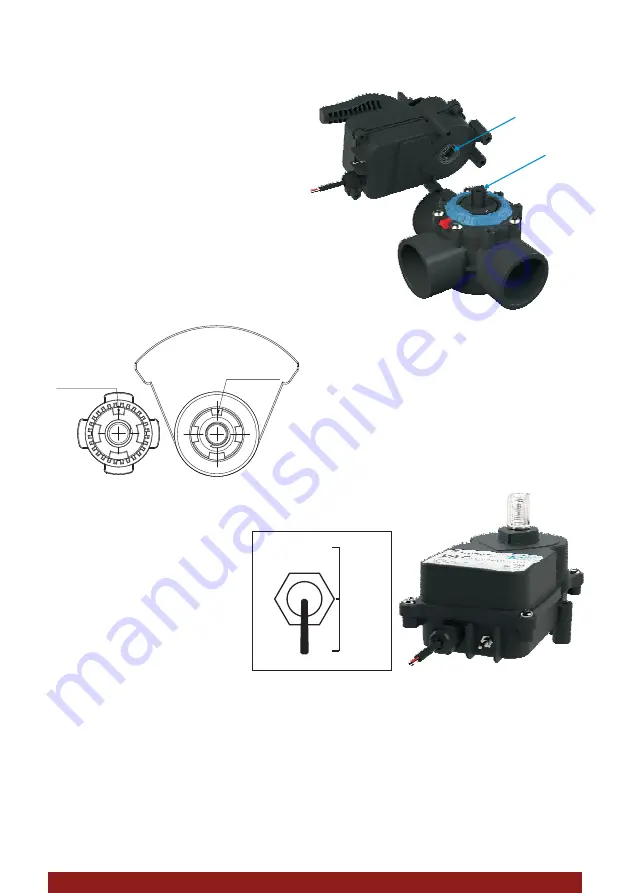
P5 MOUNTING INSTRUCTIONS
3.2 Mounting Instructions
1. Remove the knob and handle from the valve
2. Refer to
to determine which four screws
to remove.
3. Place the valve handle on the actuator shaft
and tighten the knob.
4. Align the smallest tooth on the actuator shaft
with the smallest slot on the valve diverter.
5. With the two shafts engaged, rotate the
actuator until the holes on the actuator align
with the screw holes on the cover.
6. Using the 4 long screws (M6x55) provided to
secure it in place.
.
Fig.1
Do not over-tighten
Procedure:
smallest tooth
smallest slot
Fig. 3
smallest tooth
smallest slot
Actuator Shaft
Valve Diverter
Factory default is matched with standard
mount. If the valve is connected in a standard
installation, there is no need to perform a cam
adjustment.
Note:
3.3 Toggle Switch
ON1 - Diverter rotate
clockwise
OFF - Stop
ON2 - Diverter rotate - clockwise
counter
ON 1
OFF
ON 2
3.4 Advanced Cam Setting
1. Move the toggle switch to OFF (Centre) position.
2. Remove the knob and the handle from the actuator shaft.
3. Remove four screws on the actuator and open the cover.
4. The cams are located under the cover bushing and on the actuator shaft. Slide the cams off the shaft
splines and rotate them to the desired position. Refer to the chart in Basic Cam Settings for determining
the position of the cam.
Fig. 4


