background image

Quick start guide Eltako GFVS-Safe II 

17 


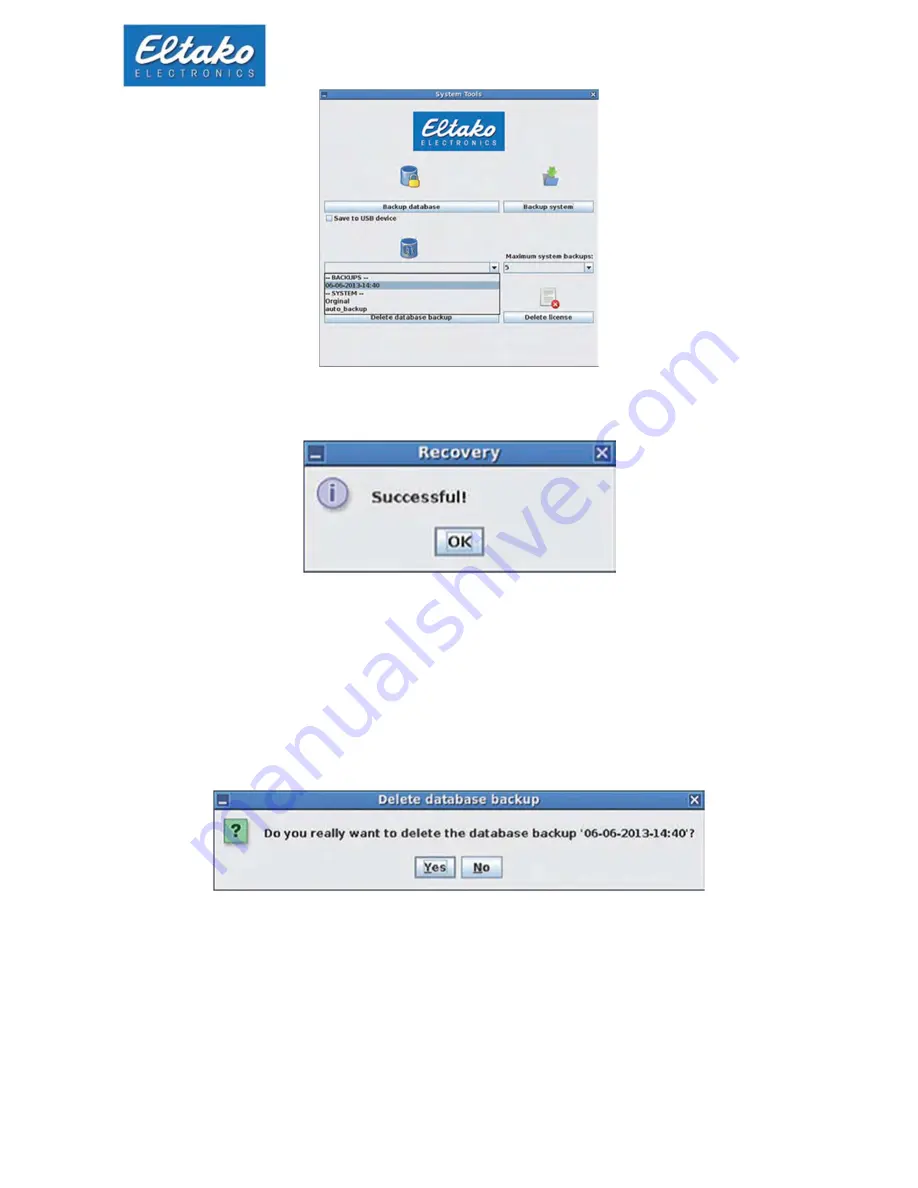
Figure 27: restore database 

Once you have selected a database, press the button “restore database“. 


Figure 28: recovery successful 

The successful recovery of the database is confirmed with a dialog. Click “ok“. 

To delete a created database backup, select the appropriate database from the drop-down menu, then 
press “delete backup database“ with a click on the button. 


Figure 29: delete backup 


In the following dialog you are asked, if you want to delete the database. Confirm with “yes“ to delete 
the selected database or “no“ to cancel the operation. 

7.1.2


System backup 

Click on the button “backup system“ and a backup of your system is created. 

Содержание GFVS-Safe II

Страница 1: ...Quick start guide Eltako GFVS Safe II...

Страница 2: ...settings 9 5 10 Presets 10 5 10 1 License 10 5 10 2 Database 10 5 10 3 Network 10 5 11 GFVS Update 10 6 Eltako quickcon technology 11 7 System tools 15 7 1 GFVS tools 15 7 1 1 Backup restore or delete...

Страница 3: ...or switching states and consumption data plus the control of actuators 2 Scope of delivery Eltako GFVS Safe II External power supply and cables 2 x Ethernet connection cable 2m RJ45 therefrom 1 x Cros...

Страница 4: ...k start guide Eltako GFVS Safe II 4 Power consumption without GSM Modem 11 W with GSM Modem 13 W Dimension 199 x 180 x 39 mm 4 Connections of the Eltako GFVS Safe II Figure 1 Front view Figure 2 Backs...

Страница 5: ...figure the software connect a monitor to the VGA or HDMI Port keyboard and mouse to the USB ports Alternatively you can connect the Eltako GFVS Safe II with a remote controlled PC via network to confi...

Страница 6: ...ches automatically after switching on Figure 4 Start of the Eltako GFVS 3 0 software Eltako GFVS 3 0 Software is running Figure 5 Eltako GFVS 3 0 software has been started The task bar is located on t...

Страница 7: ...ako GFVS 3 0 Software is launched via the menu item GFVS 3 0 A detailed manual is available under the menu item manuals Eltako GFVS 3 0 manual 5 3 PCT 14 Since Version 3 8 3 0 the PCT14 Version 6 is a...

Страница 8: ...change the language Figure 8 Language selection 5 6 Network settings Via the menu item system settings network settings the configuration of network adapter can be adjusted Figure 9 Network settings T...

Страница 9: ...P 192 168 168 100 5 8 BSC BAP Finder The BSC BAP finder is used for configuration of BAPs BIERS and IPG170 P and can be opened via menu item system tools BSC BAP finder A detailed manual is available...

Страница 10: ...required an Eltako GFVS 3 0 license key is attached 5 10 2 Database For data storage a PostgreSQL database is established 5 10 3 Network The interface is configured to operate in a network with DHCP 5...

Страница 11: ...ional costs depending on the mobile phone contract Download the Eltako GFA App from the app store of your mobile radio system iPhone iTunes Android Google Play and install Figure 14 Use encrypted conn...

Страница 12: ...ftware using configuration security client Eltako GFVS 3 0 mobile Figure 16 create a mobile client GFA Client Enter the name of the smartphone or tablet Figure 17 name the mobile client Note The devic...

Страница 13: ...mobile All generated profiles are displayed in the drop down box Figure 19 Assigning a profile Click on the button key in the Eltako GFVS 3 0 Software to open the dialog for entering the password You...

Страница 14: ...his on the device sticker or in the Eltako GFVS 3 0 menu info about Eltako GFVS 3 0 Alternatively you can also enter the IP address or DynDNS address of the GFVS server in the server address box Figur...

Страница 15: ...m tools GFVS 3 0 tools you access a dialog to save or restore the system and or database Figure 22 Menu system tools The following dialog appears Figure 23 Eltako GFVS 3 0 system tools For a backup ab...

Страница 16: ...backup database is executed As soon as the backup is finished a new dialog appears Confirm with ok Figure 26 successful database backup After each restart of the Eltako GFVS II an automatic backup of...

Страница 17: ...Click ok To delete a created database backup select the appropriate database from the drop down menu then press delete backup database with a click on the button Figure 29 delete backup In the follow...

Страница 18: ...ow many backups of your system are stored 7 1 3 Reset license for license issues The button delete license deletes your Eltako GFVS 3 0 license A click opens a window for entering the password Passwor...

Страница 19: ...FVS 3 0 license is saved in the background every hour If the license has been damaged by a power failure or similar it can be restored using this menu item Figure 34 restore license 7 3 Code MeterCC S...

Страница 20: ...kground images and custom icons from an USB stick to the Eltako GVFS Safe II Note The following folder structure has to be set up on an empty USB stick hc_import pictures Otherwise the images are not...

Страница 21: ...an USB stick Therefore put a check next to export directory and then click export Note The following folder structure has to be set up on an empty USB stick hc_export export Otherwise the log files ar...

Страница 22: ...f 10 Restore system backup To restore a system backup click on the menu power restart in recovery mode The Eltako GFVS II shuts down and starts in recovery mode Note in recovery mode the network adapt...

Страница 23: ...m Via the button restart system exit the system without a system backup restore The button restore factory default backup resets the Eltako GFVS Safe II back to its factory condition In this case all...

Страница 24: ...Eltako GFVS Safe II 24 11 Technical support For support please contact ELTAKO GmbH Hofener Stra e 54 70736 Fellbach Germany Tel 0162 2575 124 125 126 127 Fax 49711 5183740 or via E Mail to Technik Be...

Отзывы: