Page 12
Chapter 3 Basic Operation
Note
:
Grayed out button means the function is not supported
3.1 Turn Power On
Connect the unit to a suitable power outlet before turning on the power switch on the
rear panel. Power indicator light is on and DVR starts booting. When the booting is
finished, a “beep” is heard. Multi-screen is the default video output mode. If the unit is
turned on within the scheduled recording time period, the system will start scheduled
recording automatically. Recording indicator on the corresponding channel turns on. The
system works normally.
Note:
1. Before turning on the power, make sure the mains voltage matches sliding switch of the unit and
the power cord is connected correctly.
2. External power supply requires 220V±10% /50Hz.
We recommend the use of power supply with stable voltage and less ripple interference.
Whenever possible, consider the use of UPS for power backup.
3.2 Turn Power Off
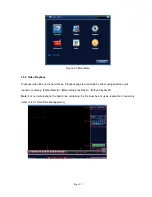
The unit can be turned off using softswitch and “hardswitch”. Softswitch, Select
【
Turn
Off
】
in
【
Main Menu
】
>
【
Shutdown System
】;
Hardswitch
,
Press the power switch on the
rear panel to turn off the power.
Instructions:
1. Power failure recovery
If the DVR is shut down unexpectedly during recording, after the unit is rebooted it
will automatically save the data before the shutdown and return to where it was.
2. Replacing hard drives
You must turn off the rear panel power switch before replacing the hard drive.
3. Replacing batteries
Save the configuration information and turn off the rear panel power switch before


