


041217 DR
4
www.eliteproav.com
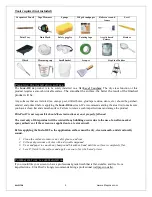
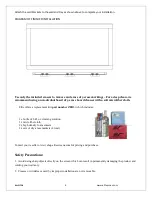
Glue Powder Compound Method for dry-wall (porous surfaces) installations
In s t a l l at i o n
We strongly recommend three or more people for this installation.
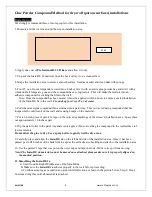
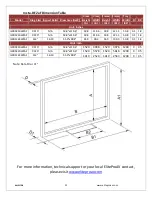
1. Measure and draw a line around the screen installation area.
2. Apply one coat of
Professional R-35 Primer
and allow it to dry.
3. Un pack the Insta-DE 2a material from the box and lay it on a clean surface.
4.Scrape the installation area to assure a smooth surface. Sand as needed and clean dust with sponge.
5. Pour 25 oz. of room temperature water into a bucket, mix it with an entire glue powder bag and stir it with a
whisk until all lumps are gone and the compound has a syrup texture. This will make the mixture into an
adhesive compound for sticking the film to the wall.
Note: Once the compound has been mixed, it must be applied within 4 hours to ensure a sealed installation
of the Insta-DE 2a to the wall.
Use one bag for every 25 oz. of water
.
6. Pour the mixed glue compound thru a strainer into a paint tray. This is to avoid using compound that has
lumps which could result on the wall and causing bumps on the material.
7. Put a 3-4-inch piece of painter’s tape on the outer edge markings of the screen’s installation area. Space them
out approximately 18 inches apart.
8. Dip the paint roller in the paint tray and evenly apply a thin coat of the glue compound to the wall surface in 5
feet increments.
Do not allow the glue to dry. Use a spray bottle to gently wet the dry areas.
9. Carefully place and align the
Insta-DE 2a
on the left-hand side of the installation area. Once it has been
placed, peel off18 inches of the back film to expose the self-adhesive backing and attach to the installation area.
10. Use the painter’s tape that was put on the outer edge and tape the Insta-DE 2a to keep it from moving.
Note: The Insta-DE 2a material cannot be moved once attached, please make sure it is properly aligned on
the marked position.
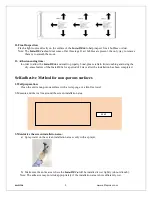
11. Smoothing the Insta-DE 2a
a)
Start from the Right-Middle area of the Insta-DE2a.
b) Make sure the
Insta-DE2a
adheres properly to the wall before proceeding.
c) Continue scraping as needed in an up/down/left direction as shown in the picture below, Step-2, Step-3.
Continue doing this until all material is attached.
Wall


