01032020JA
2
www.elilteproav.com
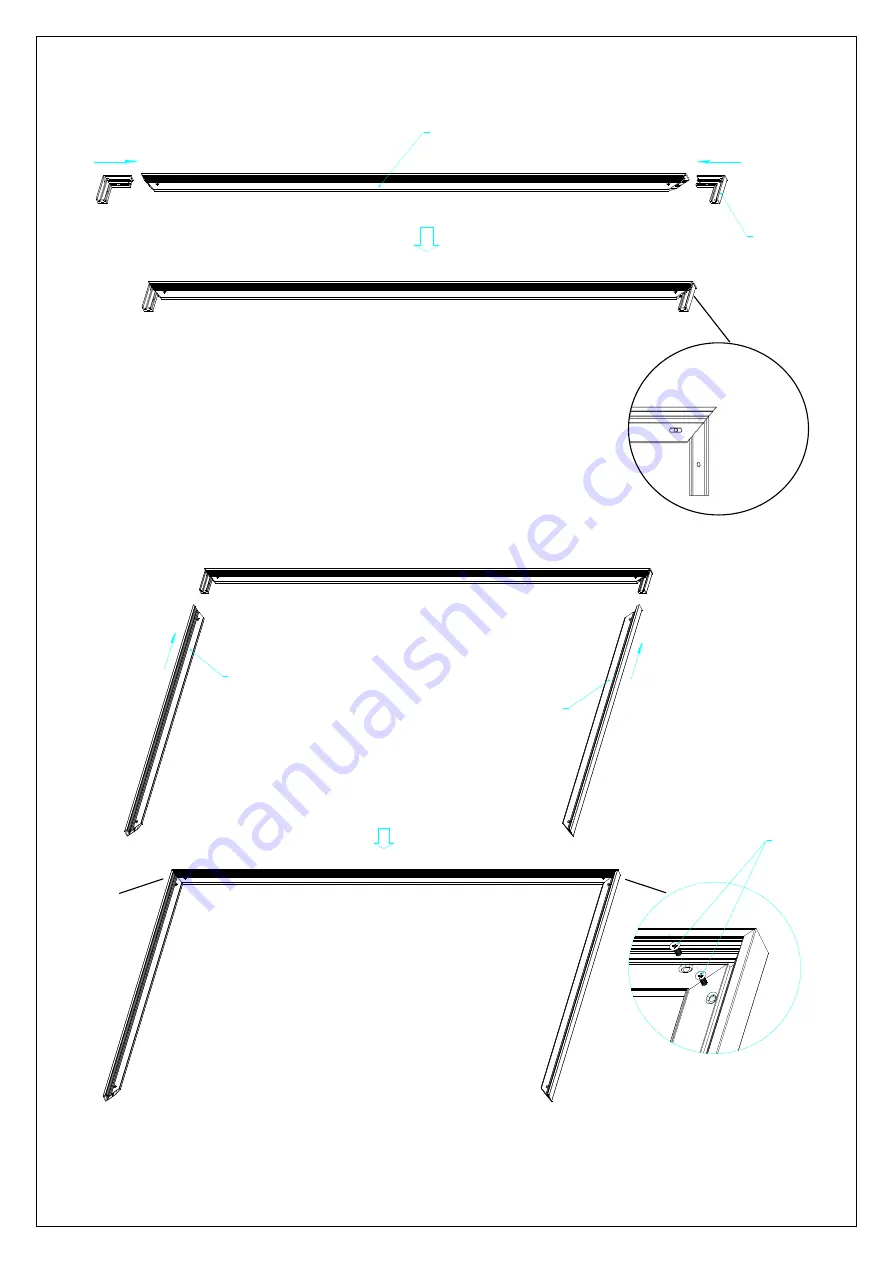
Push
Short frame
3. Insert both
elbow joint
connectors into the long horizontal frame
(fig.1)
.
Joint
Long frame
( fig.1)
Screw
( fig.3)
M5x15 Screws
(Fig.1.1)
(Fig.1.2)
Страница 1: ...iner x 2 4 pcs depending on model size 5 Center joints x 2 pcs 12 Fix Plates x 30 90 pcs depending on model size 6 Elbow Joints x 4pcs 13 Rubber hammer mallet x 1 pc 7 Wall brackets x 2 4pcs 14 Screw...
Страница 2: ...ww elilteproav com Push Push Short frame Short frame 3 Insert both elbow joint connectors into the long horizontal frame fig 1 Push Push Joint Long frame fig 1 Screw fig 3 M5x15 Screws M5x15 Screws Fi...
Страница 3: ...ctangle fasten the four angles together by using the x8 joint screws included fig 2 ATTACHING THE SCREEN MATERIAL TO THE FRAME_ 1 Unroll the screen material and lay it down on a clean surface Then ins...
Страница 4: ...e push plate Fig 5 Fig 6 2 Begin by securing the four corners in the following sequence A B C D Fig 7 3 Insert the fix the plates as shown on Fig 5 Fix plate is about 10cm away from the frame s corner...
Страница 5: ...s to complete attaching the screen material Fig 12 Tip for attaching the last corner D 1 Position yourself left of location 2 Pull the material to the corner of the frame with your hand while your lef...
Страница 6: ...re in alignment with the groove see Fig 17and Fig 18below for details Diagonal models 135 1 x Center Support Bar Remove push Center Support Bar Interval markings reveal the best points for inserting t...
Страница 7: ...brackets with the drilled holes on the installation location and screw them in using a Phillips screw driver Note Use 2 top wall brackets on diagonal sizes below 135 and use 3 top wall brackets on dia...
Страница 8: ...home improvement specialist for the best advice on installation 3 Frame parts are made of high quality velour surfaced aluminum and should be handled with care 4 When not in use cover over the screen...