background image

28

- Frequency (only for some Amplifiers)

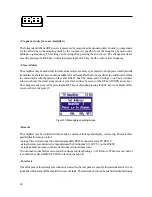
The forward and reflected RF powers is measured by means of a directional coupler. In order to compensate

for the effect due to the sampling made by the coupler, it is possible to set the frequency by menu entry

Settings

 Frequency. The setting can be changed by pressing the arrow keys. The changes made are

saved by pressing the RET key or discarded pressing the ESC key. Set the video carrier frequency.

- Slave Address

The amplifier may be used either in stand-alone mode or as a slave of a master in a high power multiple units

transmitter. In the latter case an unique address for each amplifier has to be specified, in order for all of them

to communicate with the master on the same  RS485  bus. The  menu  entry  Settings        Slave Address

allows to choose the stand-alone mode or set a slave address by means of the UP and DOWN arrow keys.

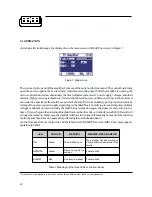
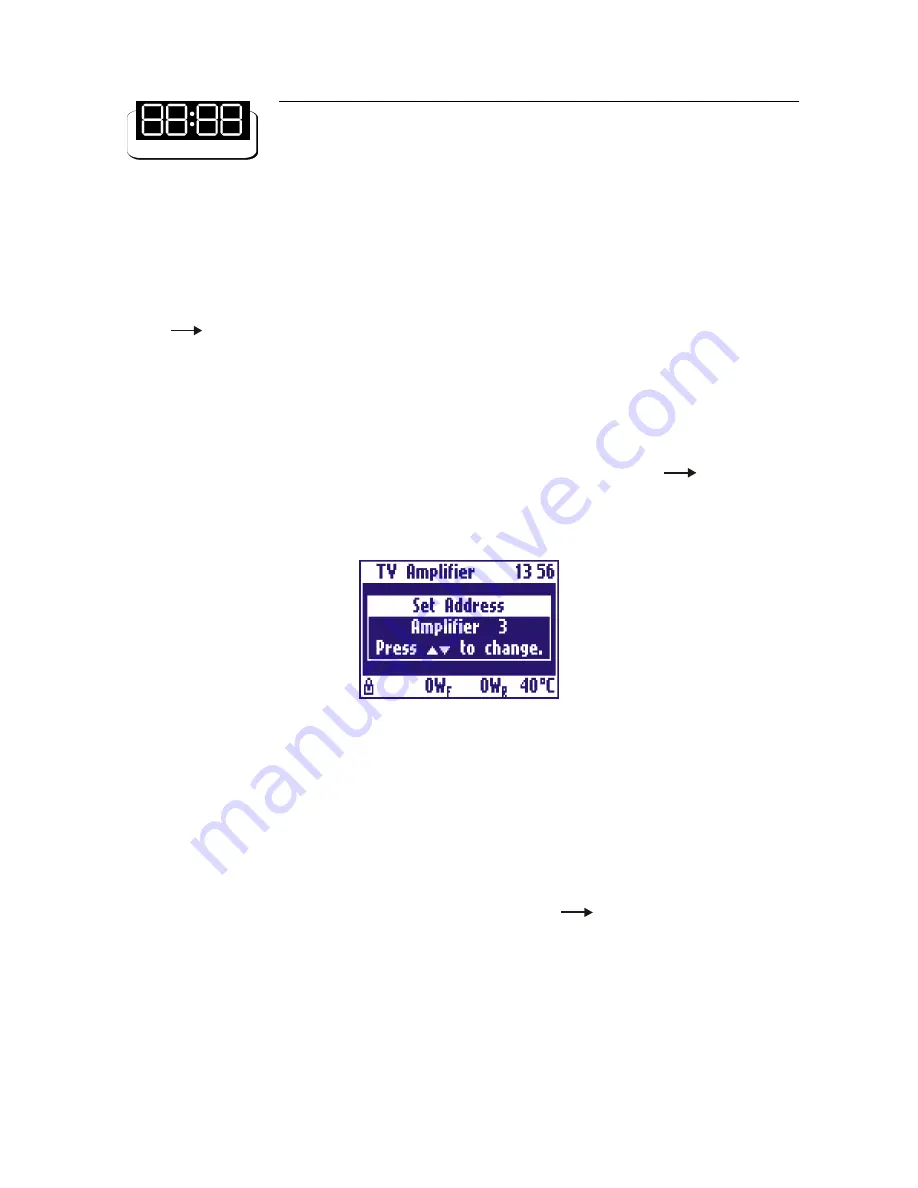
The changes made are saved by pressing the RET key or discarded pressing the ESC key. An example of this

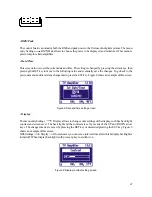
screen is shown in Figure 10.

Figure 10:Slave address setting screen

- Remote

The amplifier may be controlled either locally, by means of the keys and display, or remotely. There are three

possibilities for remote control:

- using a direct serial connection between amplifier RS232 connector and a PC RS232;

- using the remote control device manufactured by Elettronika S.r.l. (RCU), on the RS485;

- using a general-purpose control system connected to telemeasures.

You can enable / disable remote control choosing menu item Settings

Remote. When remote control

is enabled, the yellow REMOTE LED on the front panel is lit.

- Interlock

One of the pins of the telemeasure connector, located on the rear panel, is used for the interlock alarm. It is an

input line which turns off the amplifier in case of alarm. The interlock check can be enabled or disabled using

Содержание AUTV/1000LD

Страница 1: ...AUTV 1000LD LDMOS UHF TV Solid State Amplifier User s manual CODE APT148B TITLE AUTV 1000LD REV 0 DATE 11 03 05 ...

Страница 2: ... 96 Km 113 70027 Palo del Colle Ba ITALY Tel 39 0 80 626755 Fax 39 0 80 629262 E mail elettronika elettronika it Web site http www elettronika it Registration number IT 17686 Registration number IT 24436 ...

Страница 3: ...the description and the type normally used The Elettronika S r l though reserves the right to use or supply as spare parts components with equivalent characteristics but of a different type assuring anyway the optimal work of the apparatus in accordance with the specifications The enclosed monographs are solely owned by Elettronika S r l The use of anything enclosed in this technical manual withou...

Страница 4: ...factory pack or equivalent which if needed may Desclaimer of consequential and incidental damages You are not entitled to recover from us any consequential or incidental damages resulting from any defect in our product This includes any damage to another product or products resulting from such a defect Warranty alterations No person has the authority to enlarge or modify this warranty The warranty...

Страница 5: ... the apparatus remember to read carefully the general safety information contained in this section follow the instructions for the installation and set up of the apparatus read all the remaining sections of this manual in order to know well the apparatus and learn how to obtain the best of its characteristics CONTENTS OF THE MANUAL The chapter composing this manual contain all the information conc...

Страница 6: ...g due care Elettronika S r l shall not be responsible for injury or damage resulting from improper procedures or from the use of improperly trained or inexperienced personnel performing such tasks During installation and operation of this equipment local building codes and fire protection standards must be observed WARNING Always disconnect power before opening covers doors enclosures gates panels...

Страница 7: ...f not breathing begin artificial breathing Tilt head pinch nostrils make airttght seal 4 quick full breaths Remember mouth to mouth resuscita tion must be commenced as soon as possible C CIRCULATION Check carotid pulse If pulse absent begin artificial circulation Approx 80sec 1 rescuer 15 compressions 2 quick breaths Approx 60sec 2 rescuers 5 compressions 1 breath NOTE DONOTINTERRUPTRHYTHMOFCOMPRE...

Страница 8: ... clothing or apply any salve or ointment treat victim for shock as required arrange transportation to a hospital as quickly as possible if arms or legs are effected keep them elevated NOTE If medical help will not be available within an hour and the victim is conscious and not vomiting give him a weak solution of salt and soda 1 level teaspoonful of salt and 1 2 level teaspoonful of baking soda to...

Страница 9: ...9 LDMOS UHF TV AMPLIFIER AUTV 1000LD User s manual ...

Страница 10: ...10 This page is intentionally blank ...

Страница 11: ...11 _______________________________________________________________________________________________ Section 1 Information Contents 1 1 Description 1 2 Technical characteristics ...

Страница 12: ...ation and maintenance procedures The amplifiers modules employ all solid state LDMOS technology in order to obtain high gain wide band performances very good linearity reliability and high efficiency The equipment design allows the soft degradation RF power loss for several transistor faulty in fact the outputcombinerusesRFpowerresistorsforunbalancingpowerdissipation Theunitisenclosedinacabinet fo...

Страница 13: ...put connector 7 16 GENERAL Power supply 230Vac 10 50 60Hz Power consumption 3000VA at black level RS232 Socket DB9 Connector on front panel RS485 Socket DB9 Connector on rear panel Telemeasuring socket DB9 Connector on rear panel AGC Socket DB9 Connector on rear panel Power factor 0 9 Ambient temperature 5 to 45 C Relative humidity 20 90 Altitude Up to 2 500 meters Cooling Forced air Cabinet Rack1...

Страница 14: ...14 This page is intentionally blank ...

Страница 15: ...__________________________________________ Section 2 Installation Contents 2 1 Operating environment 2 2 Preliminary operations 2 3 Telemeasuring socket connections 2 4 RS232 RS485 and AGC socket connections 2 5 Preventive maintenance Front panel Rear panel ...

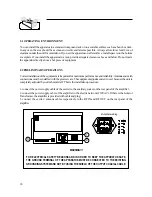
Страница 16: ...usinarack provideadequateclearanceaboveandbelow Donotlocate the apparatus directly above a hot piece of equipment 2 2 PRELIMINARY OPERATIONS Correctinstallationoftheequipmentisimportantformaximumperformanceandreliability Antennaandearth connectionsmustbeinstalledwiththegreatestcare Theequipmentadjustmentisn tneed becausetheunitis completelyadjustedbyourtechnicalstaff Thisistheinstallationprocedure...

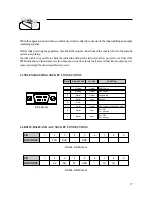
Страница 17: ...is 0 the output power can be slowly increased At maximum output power some watts might be shown as reflected power 2 3 TELEMEASURING SOCKET CONNECTIONS DB9 Socket 2 4 RS232 RS485 AND AGC SOCKET CONNECTIONS PIN N SIGNAL TYPE IN OUT FUNCTION 1 Analog Output FWD Power 2 Analog Output REF Power 3 Digital Output Temperature 4 Digital Input Interlock 5 GND 6 7 Digital Output Free contact closed when ala...

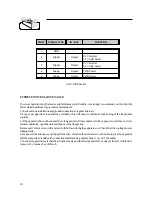
Страница 18: ...ill ensure continuous functioning of the front panel controls 3 if the apparatus has not been used for a long period of time combined with exposure to extreme environ mentalconditions opentheunitandmakeavisualinspection Remove salt water or ice with a moist cloth before turning the apparatus on Check that the cooling fans are runningfreely 4 for general maintenance and top performance call an auth...

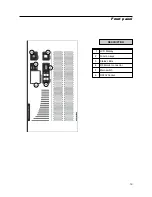
Страница 19: ...19 Front panel 1 2 3 4 5 6 DESCRIPTION 1 LCD Display 2 Function keys 3 Status LEDs 4 RF Monitor connector 5 Main switch 6 RS232 Socket ...

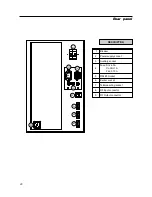
Страница 20: ...1 2 3 4 5 6 9 8 7 DESCRIPTION 1 Breaker 2 Power supply socket 3 Auxiliary socket 4 Fuse Drive 5A Control 1A Fan 3 15A 5 RS485 Socket 6 Exciter socket 7 Telemeasuring socket 8 RF Input connector 9 RF Output connector ...

Страница 21: ...21 _______________________________________________________________________________________________ Section 3 Operation Contents 3 1 Operation 3 2 Display 3 3 Menu ...

Страница 22: ...blem to trigger a definitive protection status the failed block is turned on again after some seconds for up to five times Ifitgoesbeyondtheprotectionthresholdformorethanfivetimes itisdeclaredasFAILEDanditwill nolongerbeturnedon Inthiscase theamplifierwillhavetobeturnedoffmanuallybymeansoftheswitchon thefrontpanel thenturnedonagainafterperformingtheneededmaintenance On the front panel there are al...

Страница 23: ...ayedincaseofalarm Itblinksiftherehasbeenanalarmwhichhasended but has not yet been seen by the user It stops blinking once the Log has been checked Theinterlocksymbolisdisplayedonlywhenthisfunctionisenabled Itmaybeeitheracloselock asinFigure 3 when there is no alarm interlock chain closed or an open lock in case of alarm interlock chain open Since the status bar is always showed on the display rega...

Страница 24: ...ngtheRETkey Menu entries with an arrow on the right open sub menus when chosen Thus there is a hierarchical structure as in Figure 5 Togo back from a sub menu to the previous menu press the ESC key If the ESC key is pressed in the main menu the RF powers screen is accessed Figure 5 Hierarchical menu structure Allmenuitemsaredescribedindetailbelow ...

Страница 25: ...n Figure 6 Power supply screen Log Alarms ThecontrolboardisprovidedwithanexternalEEPROMandaclock Anyalarmorswitchingeventwiththe time at which it occurred is saved in the EEPROM The Log Alarms sub menu allows to manage this log It is possible to see the events stored in the log by selecting Log Alarms View Log Alarms All events canbescrolledbypressingtheUPandDOWNkeys Forexample theeventshowninFigu...

Страница 26: ...yworking ThemenuentryWorkingTimer ViewTimerallowstocheckthehours for which the timer has been enabled Working Timer Timer Reset resets the timer Thresholds This is a screen showing the alarm threshold of each signals monitored by the control board The list can be scrolled by means of the UP and DOWN keys EVENT DESCRIPTION Local ON Amplifier turned on by means of the local switch Local OFF Amplifie...

Страница 27: ...menu and discard any change made press the ESC key Figure 8 shows an example of this screen Figure 8 Date and time setting screen Display ThemenuentrySettings Display allows to change some settings of the display such has back light contrast and screensaver The back light and the contrast are set by means of the UP and DOWN arrow keys The changes made are saved by pressing the RET key or discarded...

Страница 28: ...ws to choose the stand alone mode or set a slave address by means of the UP and DOWN arrow keys ThechangesmadearesavedbypressingtheRETkeyordiscardedpressingtheESCkey Anexampleofthis screen is shown in Figure 10 Figure 10 Slave address setting screen Remote Theamplifiermaybecontrolledeitherlocally bymeansofthekeysanddisplay orremotely Therearethree possibilitiesforremotecontrol using a direct seria...

Страница 29: ...se if the interlock chain is closed no alarm or open if it is open alarm Firmware Release ThemenuentrySettings Firmware Release allows to display the firmware version number and the hardwarereleaseoftheamplifier Serial Number ThemenuentrySettings Serial Number allows to display the serial number of the apparatus ...

Страница 30: ...30 This page is intentionally blank ...

Отзывы: