background image

Programming

GB-35

Technical data/Battery replacement/Cleaning 

GB-36

FUNCTION (only when the operating device is disconnected, only for
qualified electricians)
INITIAL OPERATION, RELAY, TOTAL RUNNING TIME

(Date of initial operation, relay switching rate, total running time)

O K

O K

See
previous page

EXPERT
MODE
OFF / ON

INITIAL

OPERATION

RELAY

TOTAL 

MAIN MENU

OK

OK

OK

OK

+/—

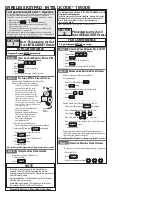
You have confirmed the ALARM SIGNAL ON/OFF.
EXPERT MODE OFF/ON will appear.

1. You can select the required setting using the 

+/-

button.

2. Confirm your selection by pressing 

OK

.

INITIAL OPERATION will appear.

3. Confirm by pressing 

OK

. RELAY will appear.

(RELAY denotes the relay switching rate.)

4. Confirm by pressing 

OK

. TOTAL RUNNING TIME will appear.

(TOTAL RUNNING TIME denotes the overall running time of the
timer.)

5. Confirm your selection by pressing 

OK

.

6. Press the 

MENU

button to switch to operating mode.

GB

Nominal voltage

230-240 V AC / 50-60 Hz

Switched current

5 A /250 V AC for cos 

j

=1

Battery type

CR 2032

System of protection

IP 20

The protection class II is guaranteed only after a correct
installation.

Permissible ambient temperature 0 to +55 °C

Type of installation

Concealed 

l

58 mm 

wall-mounted
Exposed in appropriate 
exposed casing

Technical data 

Battery replacement

1. Disconnect the operating device.

2. Remove the battery.

3. Insert the new battery properly.

4. Reset the time.

CR2032

Note:

The values set are still

saved.

Cleaning

Clean the device with a damp cloth only. Do not use a cleansing
agent since this could damage the plastic.

Содержание AstroTec

Страница 1: ...c 309022 00 elero Bedienungsanleitung Bitte bewahren Sie die Bedienungsanleitung auf Uhr ist voreingestellt Operating instructions Please keep these instructions in a safe place Timer is preprogrammed...

Страница 2: ...witch inputs Expert mode GB 18 Programming menu Overview of menu GB 19 Date and time settings GB 19 Astro function for week block individual Idle period v b GB 20 Astro evening function for week block...

Страница 3: ...rack Keep children away from controls Always comply with national stipulations Dispose of used batteries properly Replace batteries with identical type CR 2032 only If the system is controlled by one...

Страница 4: ...hbutton Central Individual 2 Lumo 1 6 4 3 5 N 1 AstroTec N L L PE Mains C To other control devices astrotec 230 V 50 Hz 3 Replace the protective caps on the power supply unit 4 Secure the power supply...

Страница 5: ...PERT MODE OFF Note Press the RESET button with a ballpoint pen or similar object to restore the factory settings of the AstroTec Exception Function menu language selection and city selection GB pushbu...

Страница 6: ...inputs for more than 5 seconds signifies an alarm signal Group control Group control refers to the control of several drives at the same time The chosen group is controlled by executing a control com...

Страница 7: ...me 05 00 Time Close 19 00 Time 22 00 Time 16 00 Time Dec Jan Feb Mar Apr Jun May Jul Aug Sept Oct Nov Dec Sunset Sunrise Astro function Winter time Summer time Summer time Winter time Winter time Summ...

Страница 8: ...switching times for Monday Friday 1 5 Block 2 sets the switching times for Saturday and Sunday 6 7 INDIVIDUAL Using the INDIVIDUAL menu you can set separate switching times for every day of the week I...

Страница 9: ...OWN button twice in rapid succession to move to the intermediate position When the system is in venetian blind mode it is also possible to pro gramme a reverse position In this case this command will...

Страница 10: ...inputs are always switched off EXTERNAL ON group inputs are always switched on EXTERNAL group inputs are switched on in auto mode SWITCH switched off in manual mode GB EXPERT MODE If selecting the cit...

Страница 11: ...pressing OK 5 Repeat the above procedure for the settings YEAR MONTH and DAY TIME DATE appears 6 Press the MENU button to switch to operating mode K O OK TIME DATE TIME YEAR MONTH DAY OK OK OK OK OK T...

Страница 12: ...OK 1 Press the MENU button 2 To select the PROGAMME menu press the button until PROGAMME appears 3 Confirm by pressing OK PROG1 appears GB 4 Confirm by pressing OK ASTRO EVENING appears 5 Confirm by p...

Страница 13: ...the BLOCK menu level BLOCK 1 1 5 BLOCK 2 6 7 All further entries now refer to BLOCK 1 1 5 and BLOCK 2 6 7 Confirm by pressing OK INDIVIDUAL Press for the INDIVIDUAL menu level 1 2 3 4 5 6 7 All furthe...

Страница 14: ...e MENU button to switch to operating mode PROGRAMME PROG 2 OFFSET e g shutters are lowered to ventilation position in the evening GB OK OK OK PROGRAMME PROG 2 OFFSET OFFSET min b PROGRAMME OK OK OK OK...

Страница 15: ...sing the SETTING menu SETTING INTERMEDIATE POSITION VENTILATION REVERSE PROG 1 END LIMIT Time position programming See previous page INTERMEDIATE POSITITION VENTILATION REVERSE PROG1 END LIMIT OK PROG...

Страница 16: ...set Please read on for further programming options using the SETTING menu GB See previous page TEST MODE ON OFF ENGLISH GB ASTRO SHIFT v OK See next page OK OK OK ASTRO SHIFT b Note The TEST MODE men...

Страница 17: ...atitude Note These dialog windows LONGITUDE LATITUDE TIME ZONE are only displayed when the EXPERT MODE in the function menu is ON 3 You can set the degrees LONGITUDE using the button 4 Confirm by pres...

Страница 18: ...sing the button DRIVE CONROL DEVICE GROUP CONTROLLER 7 Confirm by pressing OK RUNNING TIME will appear 8 You can set the required running time using the button Default setting 120 seconds 9 Confirm by...

Страница 19: ...Confirm by pressing OK TOTAL RUNNING TIME will appear TOTAL RUNNING TIME denotes the overall running time of the timer 5 Confirm your selection by pressing OK 6 Press the MENU button to switch to oper...

Страница 20: ...e 3 Holiday function is 3 Switch holiday switched on function off 4 Astro shift is set 4 Adjust astro shift The AstroTec does not The sliding switch Move the sliding carry out the is set to HAND switc...

Отзывы: