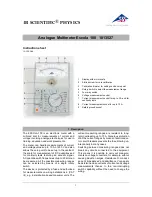
5-3. How to Make a Measurement
(1) DC/AC Voltage Measurement
1. Connect the black test lead to the “COM” socket and the red test lead to
the “V
W
Hz” socket.
2. Set the selector switch to the desired “V” position, and press the “DC/AC”
button to choose the function. If the magnitude of the voltage is not
known, set the selector switch to the highest range and reduce until a
satisfactory reading is obtained.
3. Connect the probes across the source or load under measurement.
(2) DC/AC Current Measurement
1. Set the selector switch to the desired “A” position, and press the “DC/AC”
button to choose the function.
2. For current measurements less than 400mA, connect the black test lead
to the “COM” socket and the red test lead to the “V
W
Hz” socket.
3. For current measurements over 400mA, connect the black test lead to the
“COM” socket and the red test lead to the “10A” socket.
4. Disconnect the power from the circuit under test and open the normal
circuit path where the measurement is to be taken. Connect the meter in
series with the circuit.
5. Do not continually measure 10A as the shunt wire will heat up. Allow 30
seconds max. At 5A or less, continuous use is okay.
NOTE: BE SURE TO MEASURE WITHIN 30 SECONDS TO AVOID HIGH
CURRENT HAZARD.
(3) Resistance Measurement and Diode, Continuity Test
1. Connect the black test lead to the “COM” socket and the red test lead to
the “V
W
Hz” socket.
2. Set the selector switch to the desired “
W
”, “ ” or “ ” position.
3. Remove the power from the equipment under test, connect the probes
across the circuit to be tested.
CAUTION: Be sure that the circuit to be tested is “dead”. Max. input overload: 250Vrms
and <10sec.
(4) Capacitance Measurement
1. Before testing, discharge the capacitor by shorting its leads together.
Use caution in handling the capacitors because they may have a charge
on them of considerable power before discharging.
2. Connect the black test lead to the “COM” socket and the red test lead to
the “V
W
Hz” socket.
3. Set the selector switch to the “CAP” position.
4. Press the “REL” button. You can use the relative function to eliminate the
zero error.
5. Connect the probes across the capacitor to be tested.
NOTE: When testing a 200
m
F capacitor, note that there will be approx. 30 sec. time lag.
AC Current
400
m
A
0.1
m
A
+(1.5% of rdg+5dgt)
Protected by
4000
m
A
1
m
A
+(1.5% of rdg+5dgt)
Fast
40mA
10
m
A
+(2.0% of rdg+5dgt)
0.5A/250V
400mA
100
m
A
+(2.0% of rdg+5dgt)
Fuse
10A
1mA
+(2.5% of rdg+5dgt)
10A / 250V Fuse
Caution: Maximum operation time is 15 seconds on 10A scale.
Frequency Response: 40-400Hz.
Capacitance (Auto Range)
4nF
10pF
+(5.0% of rdg+10dgt)
40nF
100pF
+(3.0% of rdg+10dgt)
400nF
100pF
+(2.0% of rdg+5dgt)
250V
4
m
F
1nF
+(2.0% of rdg+5dgt)
DC/ACrms
40
m
F
10nF
+(2.0% of rdg+5dgt)
200
m
F
100nF
+(4.0% of rdg+5dgt)
Frequency
10Hz - 10MHz
0.001Hz
+(0.1% of rdg+5dgt)
250V DC/ACrms
Sensitivity: Sine wave 0.6Vrms.
Duty Cycle
0.1% - 99.9%
+(2.0% of rdg+2dgt)
250V DC/ACrms
Sensitivity: Sine wave 0.6Vrms.
Diode Test
1 +0.6mA
Approx. 1.5V
250V DC/ACrms
Continuity Test
Audible Indication: less than 120
W
Approx.
Overload Protection: 250V DC/ACrms
h
FE
Test
lb = 10
m
A
Vce = 2.5V Approx.
Test Range: 0-1000.
Range
Resolution
Accuracy
Overload Protection
Range
Resolution
Accuracy
Overload Protection
Range
Resolution
Accuracy
Overload Protection
Range
Accuracy
Overload Protection
Test Current
Test Voltage
Overload Protection
-7-
-10-