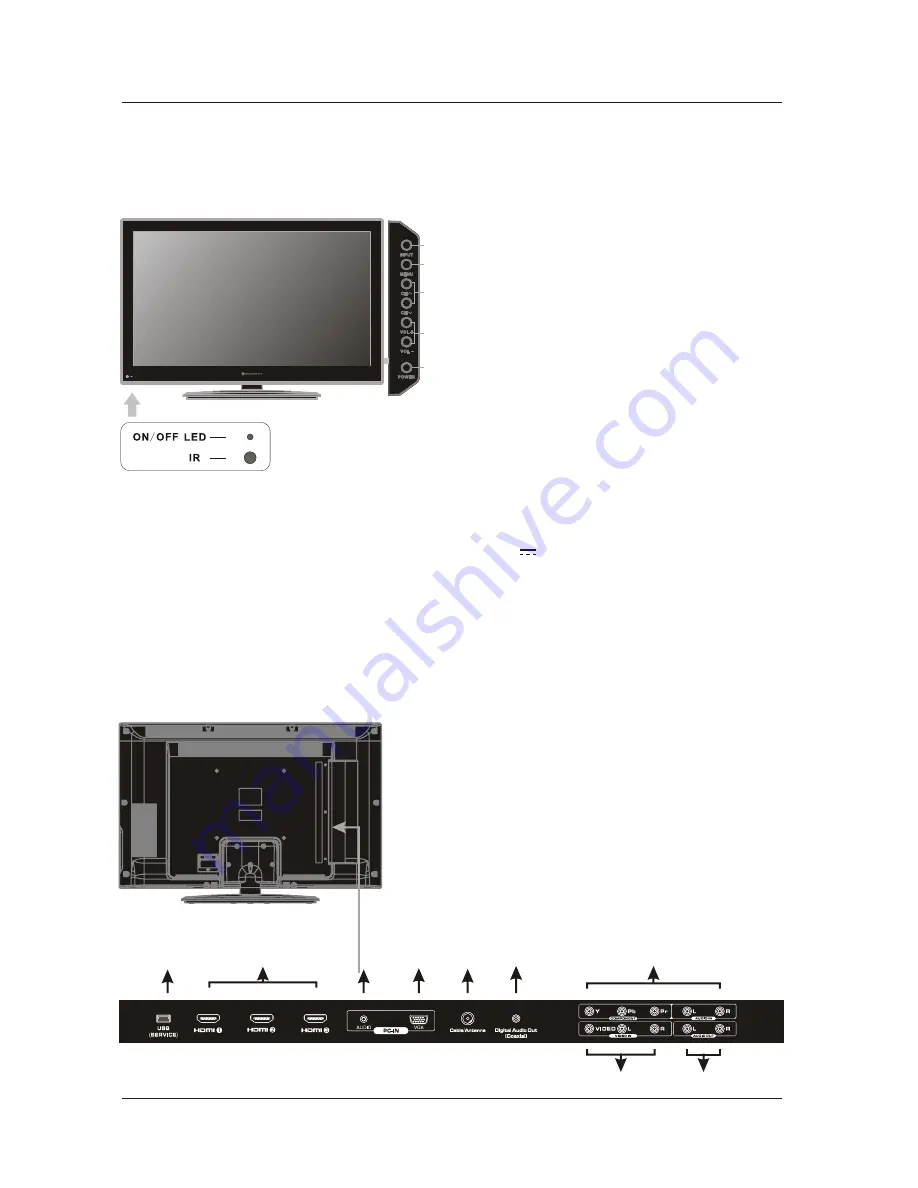
Front View
5. FRONT
/
BACK CONNECTIONS OF LCD TV
Back View and Control Connections
1. Press
“
INPUT
”
to select the input source.
2. Press
“
MENU
”
to bring up the main menu on
the screen.
3. Press
“
CH
”
or
“
CH
”
to scan through channels.
4. Press
“
VOL+
”
or
“
VOL-
”
to increase or decrease
the volume.
5. Press
“
POWER
”
button to turn the
TV on or off.
6. REMOTE SENSOR: Infrared sensor for the
remote control.
7. POWER INDICATOR:
red
in standby
mode
.
blue
when your TV is turned on.
Shows
Shows
6
7
FRONT
/
BACK CONNECTIONS OF LCD TV
7
8. VIDEO
/
AUDIO
(
L
/
R
)
: Connect the Video
/
Audio output
jack of DVD or
VCR
.
9.
L
-
OUT
/
R
-
OUT
:
Connect to Audio Amplifier device
.
7. YPbPr
/
AUDIO
(
L
/
R
)
: Connect the YPbPr
/
Audio
output jack
of DVD or VCR.
5. Cable/Antenna: RF input that connects to your cable or
VHF/UHF antenna.
4
.
VGA
(
PC
)
: Connects to a personal computer's video
output connector.
3.
AUDIO
(
PC
)
:
Connects to a personal computer's audio
output connector.
6. Digital Audio Out (Coaxial): Connects to the coaxial audio input
of your digital stereo equipment.
<
>
1
2
3
4
5
1
9
4
5
8
7
3
2
6
2. HDMI1
/
HDMI2
/
HDMI3: HDMI (High-Definition Multimedia
Interface) provides an uncompressed, all-digital audio/
video interface between this TV and any HDMI-equipped
A/V equipment. HDMI supports enhanced, or high-
definition video, plus digital audio.
1
.
SERVICE
Port: This USB port is for service only.
Output
power
5V
0
.
5A
.


