background image

4

C

Cz

zy

ys

szczenie wn´trza

Przed rozpocz´ciem u˝ytkowania nowego
urzàdzenia nale˝y umyç starannie jego wn´trze i
wszystkie akcesoria letnià wodà z ∏agodnym
detergentem, w celu usuni´cia zapachu typowego
dla fabrycznie nowego wyrobu, a nast´pnie
dok∏adnie osuszyç mi´kkà szmatkà.

Nie nale˝y u˝ywaç detergentów i Êrodków
szorujàcych, mogàcych uszkodziç
powierzchni´ urzàdzenia.

Uruchomienie

W∏o˝yç wtyczk´ przewodu zasilajàcego do gniazdka
elektrycznego.
Przekr´ciç  pokr´t∏o  termostatu  (D)  w  prawo,
ustawiajàc je w pozycji poÊredniej. Zapali si´ lampka
zasilania (C).
W  celu  wy∏àczenia  urzàdzenia,  termostat  nale˝y
ustawiç w pozycji «

».

Regulacja temperatury

Regulacja temperatury odbywa si´ automatycznie.
Przestawienie pokr´t∏a termostatu na ni˝szà wartoÊç
powoduje wzrost temperatury wewn´trznej.
Temperatura spada wraz z przestawieniem pokr´t∏a
na wy˝szà wartoÊç.
W∏aÊciwy wybór temperatury uzale˝niony jest od
nast´pujàcych czynników: 

temperatury otoczenia 

cz´stotliwoÊci otwierania drzwi 

iloÊci przechowywanej ˝ywnoÊci

lokalizacji urzàdzenia.

Ustawienie temperatury w pozycji poÊredniej jest
zalecane przy normalnym u˝ywaniu sprz´tu.

U˚YTKOWANIE

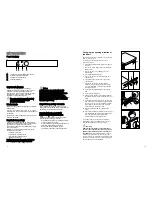
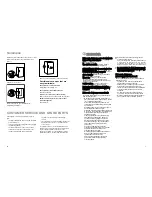
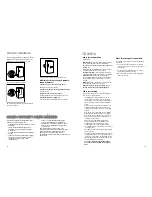
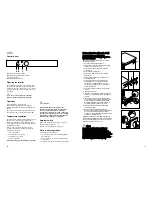
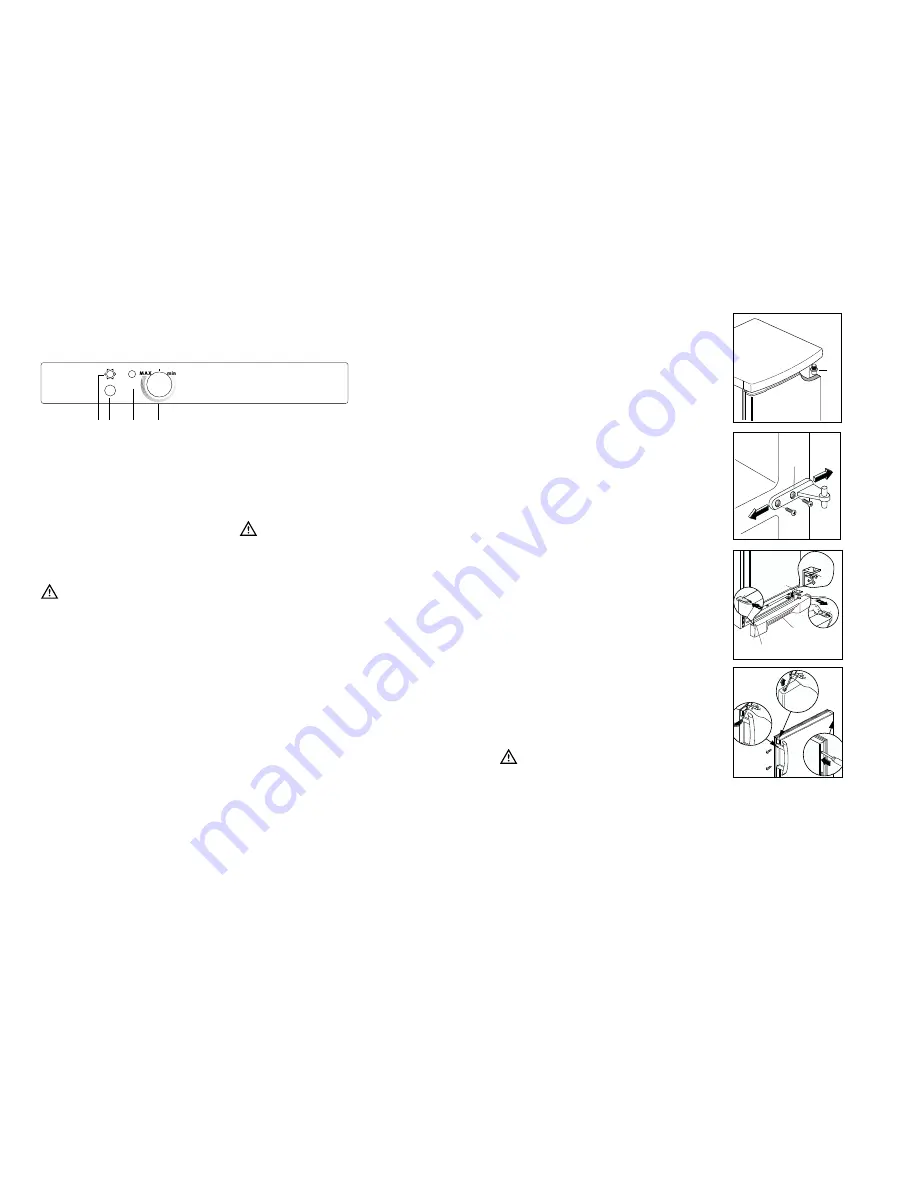
Panel sterujàcy

C

B

D

A

ON

N-S

A

A.

Lampka kontrolna szybkiego zamra˝ania

B.

Pokr´t∏o szybkiego zamra˝ania

C.

Lampka kontrolna zasilania

D.

Pokr´t∏o termostatu

Wa˝ne: 

JeÊli temperatura otoczenia jest wysoka lub
urzàdzenie jest maksymalnie wype∏nione i
ustawione na najni˝szà  temperatur´, urzàdzenie
b´dzie pracowaç bez przerwy powodujàc
gromadzenie si´ lodu na tylnej Êcianie. W tym
wypadku nale˝y przestawiç termostat na ni˝szà
wartoÊç, umo˝liwiajàc samoczynne rozmra˝anie i
obni˝ajàc zu˝ycie energii.

Przycisk temperatury otoczenia

Przy temperaturze otoczenia ni˝szej ni˝ +16°C
nale˝y wcisnàç przycisk temperatury otoczenia (B).
Zapali si´ wówczas lampka kontrolna (A).

Przechowywanie produktów
˝ywnoÊciowych w ch∏odziarce

Optymalne wykorzystanie urzàdzenia wymaga
przestrzegania nast´pujàcych zasad:

Nie wolno przechowywaç w ch∏odziarce ciep∏ej
˝ywnoÊci i parujàcych p∏ynów

˚ywnoÊç powinna byç przykryta lub opakowana,
zw∏aszcza jeÊli wydziela silny zapach

Nale˝y rozmieÊciç produkty w sposób
umo˝liwiajàcy swobodny przep∏yw powietrza

37

Changing the opening direction of
the doors

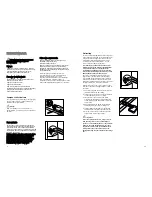
Before carrying out any operations, remove the plug
from the power socket.

To change the opening direction of the door,
proceed as follows:

1. pull off the ventilation grille (D) which is clipped

into place;

2. remove the bottom hinge (E) by unscrewing its

fixing screws;

3. remove the lower door, sliding it out of the

middle hinge;

4. unscrew the middle hinge (H);

5. remove the upper door, releasing it from the

upper pin (G);

6. unscrew the upper pin (G) and refit it on the

opposite side;

7. remove the two plugs of the door (where

available), discovering the holes for the hinge
pins, assemble them on the opposite side and
refit the upper door;

8. reassemble the middle hinge on the opposite

side;

9. reassemble the lower door;

10. using a 10 mm spanner, unscrew the hinge pin

(E) and reassemble it on the opposite side of the
hinge;

11. reassemble the lower hinge (E) on the opposite

side, using the screws previously removed. Slide
the hole cover (F) out of the ventilation grille (D)
by pushing it in the direction of the arrow and
reassemble it on the opposite side;

12. refit the ventilation grille (D), clipping it into

place.

13. Unscrew the handles. Refit them on the opposite

side after having pierced the plugs with a punch.
Cover the holes left open with the plugs
contained in the documentation pack.

To line up the doors, it is possible to adjust the
middle hinge (H) horizontally by means of a tool,
after slackening the two screws (see figure).

Warning:

After having reversed the opening direction of
the doors check that all the screws are properly
tightened and that the magnetic seal adheres to
the cabinet.

If the ambient temperature is cold (i.e.

in Winter), the gasket may not fit perfectly to the
cabinet. In that case, wait for the natural fitting of the
gasket or accelerate this process by heating up the
part involved with a normal hairdrier.

H

G

F

F

D

F

F

E

E

Содержание ERB 3026

Страница 1: ...Ch odziarko zamra arka Chladniãka s mrazákem Refrigerator Freezer INSTRUKCJA OBS UGI NÁVOD NA INSTALACI A POUÎITÍ INSTALLATION AND INSTRUCTION MANUAL ERB 3026 2222 260 64 CZ PL GB ...

Страница 2: ...y odpowiedni przep yw powietrza w tylnej cz Êci urzàdzenia i nie wolno dopuÊciç do jakiegokolwiek uszkodzenia uk adu ch odniczego Dotyczy wy àcznie zamra arek z wyjàtkiem modeli do zabudowy najlepsza lokalizacja to piwnica lub posadzka W zamra arce nie wolno u ywaç innych urzàdzeƒ elektrycznych np maszynki do lodów bez uprzedniej akceptacji producenta Serwis Naprawy Wszelkie interwencje elektryczn...

Страница 3: ...epsucie produktów ywnoÊciowych Wszystkie elementy nagrzewajàce si powinny byç zabezpieczone przed dotykiem Nale y staraç si tak ustawiç zamra ark aby jej tylna cz Êç by a zwrócona do Êciany W razie transportu w pozycji poziomej znajdujàcy si w spr arce olej mo e dostaç si do uk adu ch odzàcego Przed pod àczeniem urzàdzenia do sieci elektrycznej nale y wi c poczekaç przynajmniej dwie godziny aby ol...

Страница 4: ...zasad Nie wolno przechowywaç w ch odziarce ciep ej ywnoÊci i parujàcych p ynów ywnoÊç powinna byç przykryta lub opakowana zw aszcza jeÊli wydziela silny zapach Nale y rozmieÊciç produkty w sposób umo liwiajàcy swobodny przep yw powietrza 37 Changing the opening direction of the doors Before carrying out any operations remove the plug from the power socket To change the opening direction of the doo...

Страница 5: ...zygotowanie kostek lodu W sk ad wyposa enia zamra arki wchodzi pojemnik na kostki lodu Nale y wype niç go wodà i umieÊciç w zamra arce Nie nale y wyjmowaç kostek przy pomocy przedmiotów metalowych Masy kriohydratowe Urządzenie wyposażone jest w dwie masy kriohydratowe Masy kriohydratowe muszą być umieszczone w zamrażarce w przewidzianej pozycji W przypadku przerwy w dopływie energii elektrycznej m...

Страница 6: ...tic Class The technical infomation are situated in the rating plate on the internal left side of the appliance INSTALLATION Location The appliance should be installed well away from sources of heat such as radiators boilers direct sunlight etc For safety reasons minimum ventilation must be as shown in Fig Appliance positioned under overhanging kitchen wall units see Fig A Appliance positioned with...

Страница 7: ...esiàcach Od jakoÊci produktów ywnoÊciowych i od rodzaju ich wst pnej obróbki przed zamro eniem zale y wybór górnej lub dolnej wartoÊci Do zamra alnika nie wolno wk adaç p ynów zawierajàcych w glany napoje gazowane itp gdy mogà one eksplodowaç Zalecenia dotyczàce przechowywania mro onek Aby w optymalny sposób wykorzystaç mo liwoÊci urzàdzenia nale y upewniç si e mro onki by y odpowiednio przechowyw...

Страница 8: ...ega si w ten sposób gromadzeniu wody która mog aby dostaç si do przechowywanej ywnoÊci U yç nale y specjalnej przetyczki znajdujàcej si w otworze odp ywowym 33 D068 Defrosting Frost is automatically eliminated from the evaporator of the refrigerator compartment every time the motor compressor stops during normal use The defrost water drains out through a trough into a special container at the back...

Страница 9: ...ra ania mo e skróciç ich bezpieczny okres przechowywania D068 32 MAINTENANCE Unplug the appliance before carrying out any maintenance operation Warning This appliance contains hydrocarbons in its cooling unit maintenance and recharging must therfore only be carried out by authorized technicians Periods of non operation When the appliance is not in use for long periods take the following precaution...

Страница 10: ...deteriorates rapidly and cannot be refrozen Hints for freezing To help you make the most of the freezing process here are some important hints the maximum quantity of food which can be frozen in 24 hrs is shown on the rating plate the freezing process takes 24 hours No further food to be frozen should be added during this period prepare food in small portions to enable it to be rapidly and complet...

Страница 11: ... wys szer g b cm Napi cie V HZ PojemnoÊç netto zamra alnik l Zu ycie efektywnoÊci energetycznej kWh 24h ZdolnoÊç zamra ania kg 24h ZdolnoÊç utrzymywania temperatury h Poziom ha asu dB A Klasa klimatyczna NP008 100 mm 15 mm 15 mm A B Blokada Półek Wasze urządzenie zostało wyposażone w blokadę półek które pozwala na unieruchomienie półek podczas transportu W celu jej usunięcia postępować w następują...

Страница 12: ...e cubes Fill these trays with water then put them in the freezer compartment Do not use metallic instruments to remove the trays from the freezer Thawing Deep frozen or frozen food prior to being used can be thawed in the refrigerator compartment or at room temperature depending on the time available for this operation Small pieces may even be cooked still frozen directly from the freezer in this ...

Страница 13: ...zyç ten proces ogrzewajàc wymagajàcy tego odcinek zwyk à suszarkà do w osów G H F F D F F E E 28 Cleaning the interior Before using the appliance for the first time wash the interior and all internal accessories with luke warm water and some neutral soap so as to remove the typical smell of a brand new product then dry thoroughly Do not use detergents or abrasive powders as these will damage the f...

Страница 14: ...ce z tohoto dÛvodu doporuãujeme spotfiebovat uskladnûné potraviny co nejdfiíve RozmraÏené potraviny nesmí b t znovu zmrazovány Pfiesnû dodrÏujte doporuãení v robce t kající se skladování Seznamte se s pfiíslu n mi instrukcemi Vnitfiní obloÏení pfiístroje je tvofieno kanálky kter mi proudí mrazící smûs Pfii jejich naru ení dojde k nenávratnému po kození pfiístroje a ztrátû uchovávan ch potravin NEPOUÎÍVEJTE...

Страница 15: ...liance featuring magnetic door seals is to replace an older appliance having a spring lock latch on the door or lid be sure to make that spring lock unusable before you discard the old appliance This will prevent it from becoming a death trap for a child These warnings are provided in the interest of safety You must read them carefully before installing or using the appliance General Safety This a...

Отзывы: