electrolux e:volution barbecue
installing the gas cylinder / leak test procedure / conversion to natural gas 15
Installing the gas cylinder
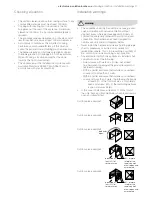
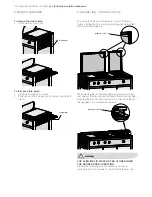
To install bottle:
1. Open both gas bottle compartment doors and pull out
sliding tray.
2. Wind out clamp screw to allow base of bottle to fit.
3. Place gas bottle into tray and tighten clamp to secure
bottle.
4. Make connection of gas hose to gas bottle.
Gas bottles vary in size and there may be some variations
that do not fit into the space provided. As an alternative to
mounting the gas bottle in slide out tray, the bottle can be
placed on the ground and hose placed through hole in rear
panel for connection to inlet.
clamp screw
• Ensure all gas valves are in the ‘OFF’ position.
• In a small container, mix a solution of water and
detergent or soap.
• After connection of the hose, turn on the valve at the
gas bottle or mains as appropriate.
• Using a brush apply the solution to the gas connection
points and look for bubbles forming.
• Bubbling will indicate a leak.
• Turn off the valve and re-tighten the joint. Repeat the
leak test.
• If the leak persists, turn off the gas at the isolation valve
and contact a licensed gas fitter to correct.
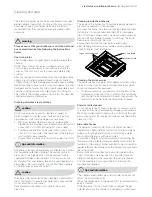
Leak test procedure (Universal LPG)
leak test points
check hose for
signs of abrasions,
cracks or leaks
Preparing the unit for Natural Gas installation.
This barbecue is supplied set up for Universal LPG and is
labelled accordingly. A Natural Gas conversion kit can be
purchased from Electrolux Spare Parts to enable conversion
to Natural Gas use.
NOTE: Conversion of this unit to Natural Gas must be
carried out by a qualified licensed person and a Certificate
of Compliance must be issued to the owner on completion
of the installation and conversion.
The conversion kit consists of:
• Regulator
• Hose with quick connect bayonet fitting one end
• Socket tool to remove injectors
• Natural Gas sticker
Procedure
1. Changing the injectors
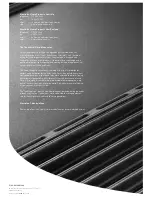
• Remove the hotplates & grills
• Remove the flame tamers
• Remove rear heat shield (push up and then forward to
release)
• Remove front heat shield panel
• Remove screws securing burner at rear
Conversion to Natural Gas
rear heat shield
remove screws to remove front heat shield
remove screws securing burners


