background image

15

Chapter2AdjustingScreens

2. 

Prepare to use analog screen adjustment patterns.

Load the “EIZO LCD Utility Disk” to your PC, and then open the “Screen adjustment pattern files”.

Note

•  For details and instructions on opening the “Screen adjustment pattern files”, refer to the Readme.txt file.

3. 

Perform the auto adjustment again with the analog screen adjustment pattern 

displayed.


To adjust flickering, screen position, and screen size automatically  <Screen>

Procedure

1.  Display Pattern 1 in full screen on the monitor using the “Screen adjustment pattern files”.

2.  Choose <Auto Adjustment> from the Adjustment menu, and press 

.

3.  Choose <Screen> from the <Auto Adjustment> menu, and press 

.

The <Auto Adjustment> menu appears.

4.  Select <Execute> with   or  , and press 

.

Flickering, screen position, and screen size are corrected by the auto-adjustment function.

Ifthescreenisnotdisplayedcorrectlyevenafterperforming

“3.Performtheautoadjustmentagain

withtheanalogscreenadjustmentpatterndisplayed.”(page15)

,performtheadjustmentsaccordingto

theproceduresonthefollowingpages.Ifthescreenisdisplayedcorrectly,goto

“5.Adjustingcolor

gradation.”(page17)

.

4. 

Choose  <Screen> from the Adjustment menu to perform advanced 

adjustments.

Adjust the clock, phase and position, in this order.


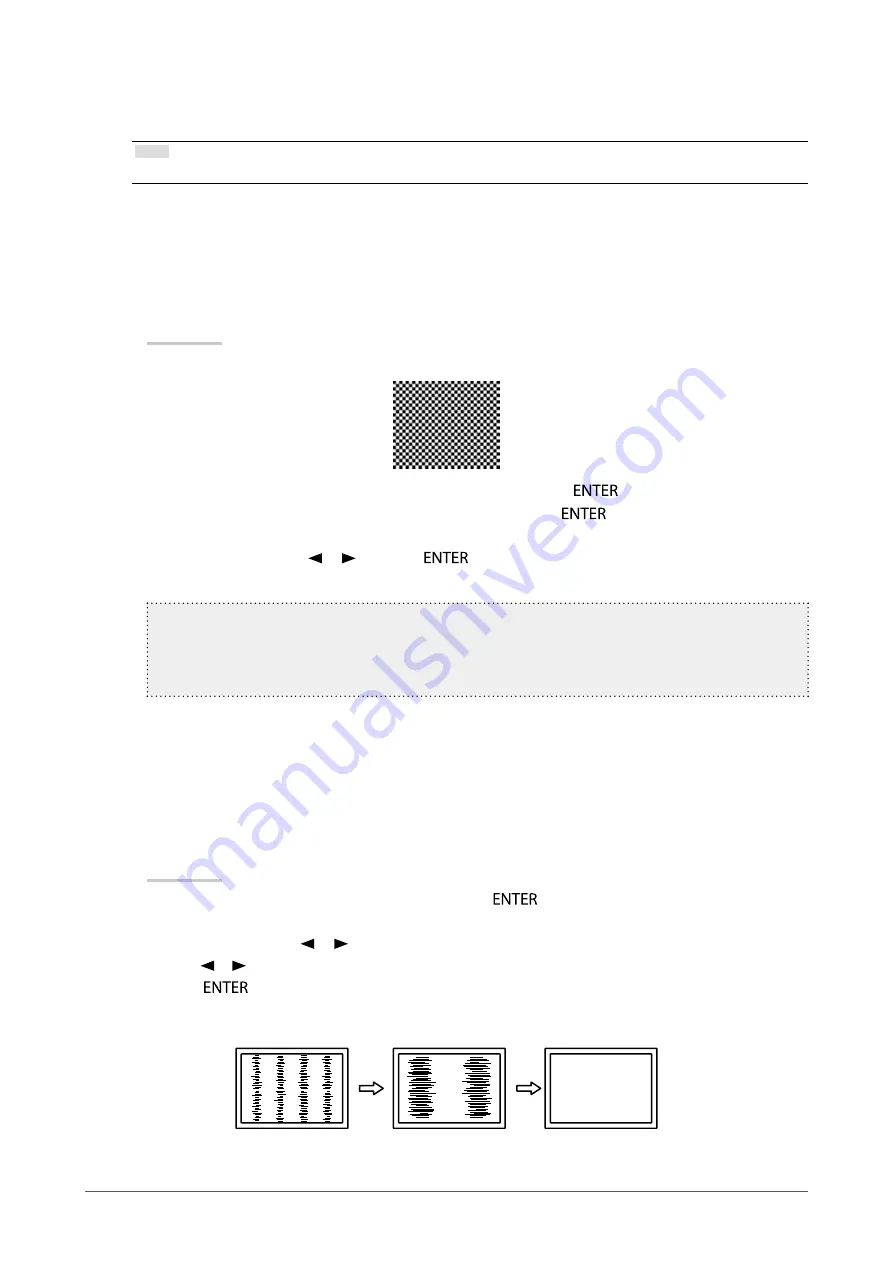
To eliminate vertical bars <Clock>

Procedure

1.  Choose <Clock> from the <Screen> menu, and press 

.

The <Clock> menu appears.

2.  Adjust the clock with   or   to eliminate vertical bars.

Press   or   slowly so as not to miss the adjustment point.

3.  Press 

 to exit the adjustment.

When blurring, flickering or bars appear on the screen after adjustment, proceed to “Phase” to remove flickering or 
blurring.

Содержание FLEXSCAN T1751 -

Страница 1: ...olume carefully to familiarize yourself with safe and effective usage Please refer to the Setup Guide for basic information ranging from connection of the monitor to a PC to using the monitor The late...

Страница 2: ...ORATION All rights reserved No part of this manual may be reproduced stored in a retrieval system or transmitted in any form or by any means electronic mechanical or otherwise without the prior writte...

Страница 3: ...r brightness is recommended When the screen image is changed after displaying the same image for extended periods of time an afterimage may appear Use the screen saver or power save function to avoid...

Страница 4: ...n cloth or lens cleaning paper If necessary stubborn stains can be removed by moistening part of a cloth with water to enhance its cleaning power After that clean the panel again with a dry cloth for...

Страница 5: ...ion Menu Position 21 3 3 Locking Buttons 21 To lock adjustments settings in the Adjustment menu 21 To lock all operations 21 3 4 Setting the EIZO Logo Display 22 3 5 Setting Language Language 22 3 6 E...

Страница 6: ...management software EIZO EcoView NET For more information refer to our web site http www eizo com HDCP High bandwidth Digital Content Interface Built in stereo speakers See 1 2 Controls and Functions...

Страница 7: ...the power on or off 8 Power indicator Indicates the monitor s operation status Blue Operating Orange Power saving mode OFF Power off 9 Power connector Connects the power cord 10 Stereo mini jack Conn...

Страница 8: ...es or equipment damage When using the stand unfold it to at least 15 and set it up correctly Folding the stand LaidBack Stand Perform the following procedure to fold the stand when re packing the moni...

Страница 9: ...n adjustment pattern files Used when adjusting the image of analog signal input manually Touch panel driver Driver software for the touch panel Calibration utility Utility for correcting the touch pos...

Страница 10: ...to adjust set with or and then press The Sub menu appears 2 Choose an item to adjust set with or and then press The adjustment setting menu appears 3 Adjust set the selected item with or and then pre...

Страница 11: ...tments page 23 Others Input Signal To set input signal selection Input Signal page 27 Off Timer 4 5 Enabling Disabling Auto Power OFF Off Timer page 25 Menu Position 3 2 Changing Adjustment Menu Displ...

Страница 12: ...p to 75 Hz 135 MHz Max 720 400 VGA TEXT 70 Hz 800 600 VESA up to 75 Hz 1024 768 VESA up to 75 Hz 1152 864 VESA 75 Hz 1280 960 VESA 60 Hz 1280 1024 VESA up to 75 Hz Digital Input DVI D Resolution Appli...

Страница 13: ...esolution dialog box select the monitor 4 Click Resolution to select the desired resolution 5 Click the OK button 6 When a confirmation dialog box is displayed click Keep changes Windows Vista 1 Right...

Страница 14: ...graphic boards The monitor screen adjustment is used to suppress flickering of the screen or adjust screen position and screen size correctly according to the PC to be used Note The self adjustment fu...

Страница 15: ...ith or and press Flickering screen position and screen size are corrected by the auto adjustment function If the screen is not displayed correctly even after performing 3 Perform the auto adjustment a...

Страница 16: ...ntion Flickering or blurring may not be eliminated depending on your PC or graphics board To correct the screen position Hor Position Ver Position Note Since the number of pixels and the pixel positio...

Страница 17: ...Select Execute with or and press The output range is set automatically 5 Close Pattern 2 6 Modify blurred characters or lines To modify blurred characters lines Smoothing When an image is displayed wi...

Страница 18: ...justment menu allows you to configure and save a separate set of color settings for each mode Attention The monitor will take about 30 minutes before its internal electric components stabilize Wait 30...

Страница 19: ...st To adjust contrast Contrast The brightness of the screen is adjusted by varying the video signal level Adjustable range 0 to 100 Procedure 1 Choose Color from the Adjustment menu and press 2 Choose...

Страница 20: ...it the adjustment Note Gain allows you to perform more advanced adjustment see To adjust gain Gain page 20 If you set to Off the image is displayed in the preset color of the monitor Gain 100 for each...

Страница 21: ...menu and press 2 Choose Menu Position from the Others menu and press The Menu Position menu appears 3 Adjust the position with or 4 Press to exit the adjustment 3 3 Locking Buttons This function allow...

Страница 22: ...nu and messages Selectable languages English German French Spanish Italian Swedish Simplified Chinese Traditional Chinese Japanese Procedure 1 Choose Language from the Adjustment menu and press The La...

Страница 23: ...justments This function only resets the color adjustments for the currently selected mode to the default settings Procedure 1 Choose Color from the Adjustment menu and press 2 Choose Reset from the Co...

Страница 24: ...e Digital Signal Input This monitor complies with the DVI DMPM standard The monitor enters the power saving mode in five seconds in connection with the PC setting PC Monitor Power Indicator On Operati...

Страница 25: ...e EcoView menu appears Note Power reduction the backlight s reduction of electricity consumption as a result of the adjusted brightness value CO2 reduction converted from the Power reduction value thi...

Страница 26: ...uter used for touch operation one unit only Do not use dual link cables Connection examples D Sub mini 15 pin connector DVI connector Signal cable supplied FD C39 Signal cable supplied MD C87 D Sub co...

Страница 27: ...gnal Manual The monitor detects only the PC s signals currently displaying automatically Select an active input signal with Note When Auto is selected for Input Signal the monitor s power saving funct...

Страница 28: ...ven when the monitor functions properly This message appears when no signal is input Example The message shown left may appear because some PCs do not output the signal soon after power on Check wheth...

Страница 29: ...eriods of time 6 Green red blue white dots or defective dots remain on the screen This is due to LCD panel characteristics and is not a failure 7 Interference patterns or pressure marks remain on the...

Страница 30: ...ion does not work during digital signal input This function is intended for use on the Macintosh and on AT compatible PC running Windows It does not work properly when an image is displayed only on a...

Страница 31: ...the panel may be touched Touch the panel with your finger the supplied touch pen or a non reflective object that has no risk of damaging the panel surface If any of the following is used the touch pa...

Страница 32: ...between the screw holes 100 mm 100 mm Thickness of plate 2 6 mm Strong enough to support weight of the monitor unit except the stand and attachments such as cables When using an arm or stand attach i...

Страница 33: ...signal status current resolution and model name Information 1 3 Input signal status resolution and horizontal vertical scan frequencies Information 2 3 DDC CI Enable Disable status Information 3 3 Mod...

Страница 34: ...d and EIZO EcoView NET is disabled 0 8 W or less when only the D Sub signal connector is connected with no stereo mini jack cable nor USB device and EIZO EcoView NET is disabled Power Off 0 6 W or les...

Страница 35: ...cal device MDD 93 42 EEC Class I Environmental conditions Temperature Operating 0 C to 35 C 32 F to 95 F Storage 20 C to 60 C 4 F to 140 F Humidity Operating 20 to 80 R H no condensation Storage 10 to...

Страница 36: ...3 7 0 93 23 7 0 93 9 6 0 38 52 8 2 08 132 3 5 2 83 3 27 39 4 1 55 20 2 0 8 40 1 57 19 4 0 76 Tilt stand Unit mm inch 30 103 7 4 1 103 7 4 1 392 15 4 344 6 13 6 167 6 6 23 7 0 93 23 7 0 93 28 1 1 59 2...

Страница 37: ...DVI DMPM as the monitor s power mode Gain This is used to adjust each color parameter for red green and blue An LCD monitor displays the color by the light passing through the panel color filter Red...

Страница 38: ...on devices Temperature Color temperature is a method to measure the white color tone generally indicated in degrees Kelvin The screen becomes reddish at a low temperature and bluish at a high temperat...

Страница 39: ...Horizontal kHz Vertical Hz Horizontal Vertical 640 480 VGA 25 18 31 47 59 94 Negative Negative 640 480 VESA 31 50 37 86 72 81 Negative Negative 640 480 VESA 31 50 37 50 75 00 Negative Negative 720 40...

Страница 40: ...g AG Eye One colormunki and X Rite are registered trademarks or trademarks of X Rite Incorporated TouchWare is a trademark of 3M Touch Systems Inc NextWindow is a registered trademark of NextWindow Lt...

Страница 41: ...pplied equipment can emit electromagnetic waves that could influence limit or result in malfunction of the monitor Install the equipment in a controlled environment where such effects are avoided This...

Страница 42: ...ause harmful interference to radio communications However there is no guarantee that interference will not occur in a particular installation If this equipment does cause harmful interference to radio...

Страница 43: ...b Die Befestigung des Standfusses mu derart erfolgen da die oberste Zeile der Bildschirmanzeige nicht h her als die Augenh he eines Benutzers in sitzender Position ist c Im Fall eines stehenden Benutz...

Страница 44: ...ic emissions IEC EN61000 3 2 Class D Voltage fluctuations flicker emissions IEC EN61000 3 3 Complies Guidance and manufacturer s declaration electromagnetic immunity The FlexScan T1751 is intended for...

Страница 45: ...transmitters as determined by an electromagnetic site surveya should be less than the compliance level in each frequency rangeb Interference may occur in the vicinity of equipment marked with the foll...

Страница 46: ...2 P 80MHz to 800MHz d 1 2 P 800MHz to 2 5GHz d 2 3 P 0 01 0 12 0 12 0 23 0 1 0 38 0 38 0 73 1 1 2 1 2 2 3 10 3 8 3 8 7 3 100 12 12 23 For transmitters rated at a maximum output power not listed above...

Страница 47: ...terioration of display performance caused by the deterioration of expendable parts such as the LCD panel and or backlight etc e g changes in brightness changes in brightness uniformity changes in colo...

Страница 48: ...der Helligkeitsverteilung Ver nderungen von Farbe oder Farbverteilung Pixeldefekte einschlie lich von durchgebrannten Pixeln usw e Produktdefekte die durch externe Ger te verursacht werden f Jeglicher...

Страница 49: ...emple des changements de luminosit des changements de l uniformit de la luminosit des modifi cations de couleur des changements de l uniformit des couleurs des d fectuosit s de pixels y compris des pi...

Страница 50: ...brillo cambios de color cambios de uniformidad del color defectos de p xeles incluyendo p xeles muertos etc e Cualquier defecto del Producto causado por un equipo externo f Cualquier defecto del Prod...

Страница 51: ...li come il pannello LCD e o la retroilluminazione ecc per esempio i cambiamenti di luminosit cambiamenti di uniformit della luminosit i cambiamenti di colore i cambiamenti di uniformit del colore i di...

Страница 52: ...ande pixlar etc e Alla defekter hos Produkten som orsakats av extern utrustning f Alla defekter hos Produkten p vilken det ursprungliga serienumret har ndrats eller avl gsnats g All normal f rs mring...

Страница 53: ...53 Appendix EIZO NANAO CORPORATION EIZO EIZO EIZO EIZO 3 EIZO EIZO 7 EIZO EIZO EIZO LCD pixel pixel LCD EIZO EIZO EIZO EIZO EIZO EIZO...

Страница 54: ...54 Appendix EIZO NANAO CORPORATION EIZO EIZO EIZO EIZO 3 EIZO EIZO 7 EIZO QC EIZO EIZO EIZO EIZO EIZO EIZO EIZO EIZO...

Страница 55: ...55 Appendix EIZO NANAO EIZO EIZO EIZO EIZO 3 EIZO 7 EIZO EIZO EIZO a EIZO b c d LCD e f g h LCD EIZO EIZO EIZO EIZO EIZO EIZO...

Страница 56: ...56 Appendix China Measures for RoHS Compliance in ChinaRoHS Pb Hg Cd Cr VI PBB PBDE SJ T 11363 2006 SJ T 11363 2006...

Страница 57: ......

Отзывы: