GB
- 43 -
time” under “Perimeter wire”.
•
Mowing
When you start the robot lawn mower to mow
the lawn, the mower will switch to normal ope-
rating mode with the set time schedule.
•
Boundary cut
Place the robot lawn mower close to the peri-
meter wire (18) or start the mower while it is in
the charging station (19). With its mower unit
activated, the robot lawn mower will follow
the perimeter wire (18) in counter-clockwise
direction until it reaches the rear of the char-
ging station (19). Provided no work window is
active, the robot lawn mower will then return
to the charging station (19).
•
Spot mowing
It may happen that your robot lawn mower
fails to mow some spots sufficiently. Place the
robot lawn mower at the spot in question and
start the mower. The robot lawn mower will
begin to mow the lawn in a spiral pattern until
it collides with an obstacle or the perimeter
wire (18). Provided no work window is active,
the robot lawn mower will then return to the
charging station (19).
•
Back to station
Send your robot lawn mower back to the
charging station (19). The robot lawn mower
will look for the perimeter wire (18) and follow
it counter-clockwise to the charging station
(19). The secondary area option does not
exist in this case.
6.6 Controlling the robot lawn mower
Starting procedure
1. Press the “STOP” button (3) and open the
display cover (23) fully.
2. Unlock the control panel (2).
3. Use the“MODE” button (52) to select the mo-
wing program and the respective work area
you want.
4. Press the “START” button (53).
5. Close the display cover (23).
The robot lawn mower will now operate in ac-
cordance with the mowing time setting. During
work time the battery charge level will appear on
the LCD (50). Whenever the battery charge level
drops to 30%, the robot lawn mower will return
automatically to the charging station (19).
Canceling the mowing operation
1. To bring the robot lawn mower to an immedia-
te stop, press the STOP button (3).
2. Open the display cover (23) fully.
3. Unlock the control panel (2).
4. Press the “MODE” button (52) and select
“Back to station” in order to send the robot
lawn mower along the perimeter wire (18) and
back to the charging station (19).
5. Press the “START” button (53).
6. Close the display cover (23).
STOP status:
When you press the STOP button (3), the robot
lawn mower will adopt a STOP status. This will be
indicated in the LCD (50). The robot lawn mower
will interrupt its mowing until this STOP status is
canceled.
When the control panel (2) is unlocked, a window
will appear and ask if you want to cancel the
STOP status. If you con
fi
rm, the status will be
canceled. If you don’t con
fi
rm, the robot lawn mo-
wer will remain stopped. If the robot lawn mower
is started or returned to the charging station (19),
the STOP status will be canceled likewise. Close
the display cover (23).
6.7 Control of the robot lawn mower using
the app
All settings that you can make using the control
panel can also be made using the app. To do
so,
fi
rst download the Einhell app for robot lawn
mowers to your smart phone. The Einhell app is
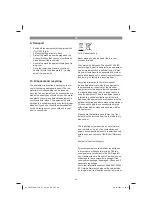
available via the following link and QR code:
iOS:
http://qr.einhell.com/12e103ce
Android:
http://qr.einhell.com/176c0443
Use a Bluetooth connection to connect the robot
lawn mower with your smart phone and follow the
steps shown there.
Anl_FREELEXO_LCD_BT_plus_SPK13.indb 43
Anl_FREELEXO_LCD_BT_plus_SPK13.indb 43
05.10.2022 11:10:36
05.10.2022 11:10:36


