-13-
Mechanical Disassembly
Mechanical disassembly should be made following procedures in numerical or-
der.
Following steps show the basic procedures, therefore unnecessary step may
be ignored.
Caution:
The parts and screws should be placed exactly the same position as the original
otherwise it may cause loss of performance and product safety.
Screws Expression
(Type
Diameter x Length
) mm
T type
M Type
Fig.1
z
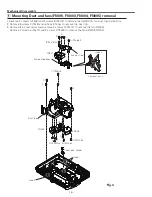
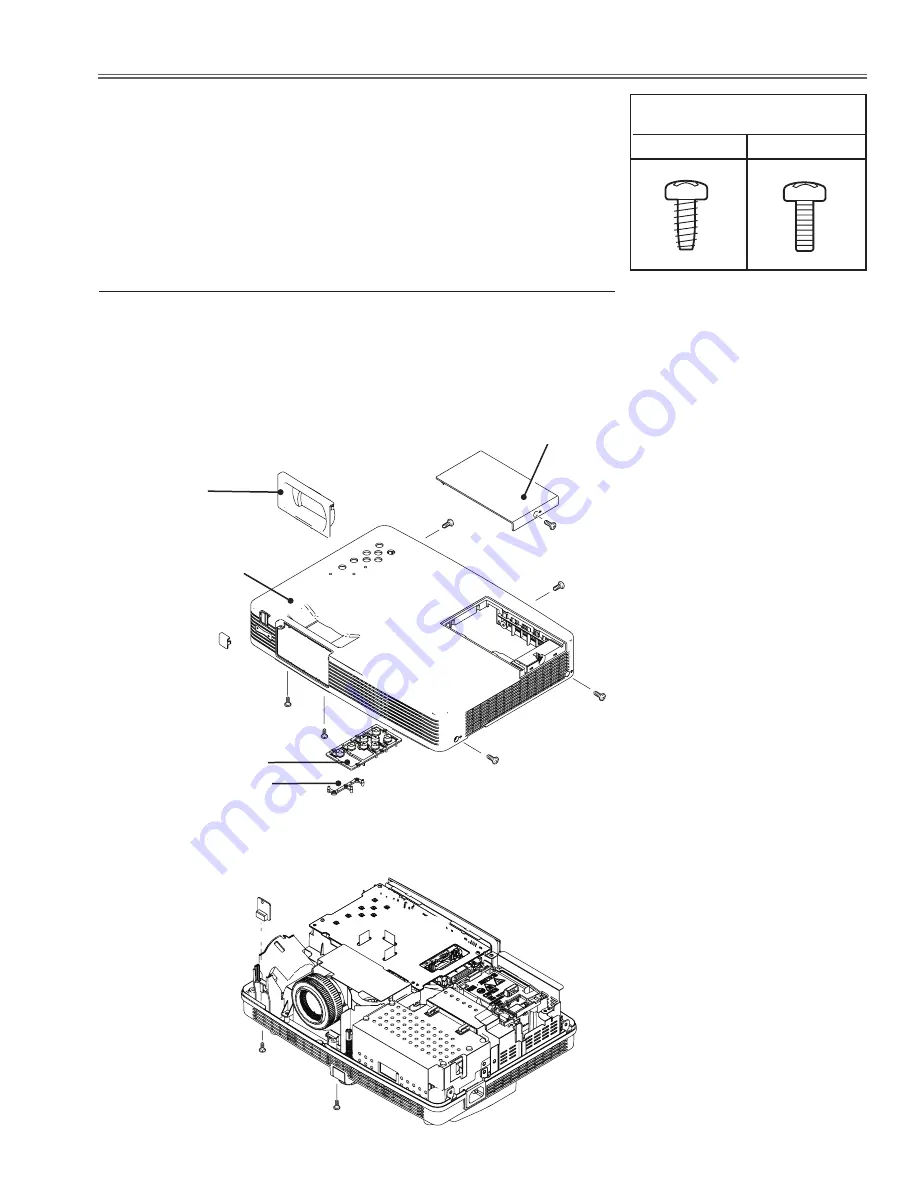
cabinet top, r/c Board removal
1. Loose screw A (M3x8 ) to remove the Lamp Cover.
2. Remove 4 screws B (M3x8 ) and 2 screws C(T3x10) to remove
the Cabinet top.
3. Remove the Control Buttons and Dec Inlay LED.
4. Remove 2 screws D (T2x6) to remove the Dec Ring.
5. Remove the R/C Board.
B (M3x8)x4
R/C Board
Cabinet top
D (T2X6)x2
Control Buttons
Lamp Cover
A (M3x8)
B
B
B
D
Dec Ring
C
Dec Inlay LED
C (T3X10)x2
Dec Inlay RC
Содержание LC-XBM31
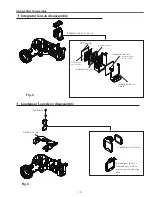
Страница 20: ...20 Optical Parts Disassembly b Relay Out lens disassembly Relay Out lens Relay lens Ass y Fig 5 M 2 5x6...
Страница 66: ...66 IC Block Diagrams MAX232ECPWRP RS 232C Driver IC3801 L3E06200P0A D A S H LCD Driver IC501 IC531 IC561...
Страница 67: ...67 IC Block Diagrams PW190 Scaler IC301 MR4010 Power OSC IC631...
Страница 69: ...69 IC Block Diagrams TB6608FNG IRIS Control IC601 TLV320AIC3105 Audio Control IC5002...
Страница 74: ...74 Parts Location Diagrams KT8 XBM3100 S03 L05 Relay out M03 Relay lens Out assembly...
Страница 95: ...Key No Part No Description Key No Part No Description 95 Electrical Parts List KT8 XBM3100...
Страница 96: ...KT8BE November 2010 Printed in Japan 2010 Eiki Internatinal Inc A key to better communications...


