background image

8

Monday and Sunday. Then adjust the day 

by pressing the 4 o’clock pusher.

When finished, press the crown into posi-

tion 1. 

Step 3

Final Control « perpetual calendar » is 

set correctly. 

Pull the crown into position 2.

Verify the date hands and the small hands 

align with 

Monday, January 1

. Push the 

crown into position 1. All hands must 

return to the selections made under 

Step 2. If this is not the case, you need to 

go back to Step 1 and 2. 

Movement 0165

Watch functions:

Display of hours, minutes, seconds, date, 

moon phase counter, 60 minutes and 

12 hours counter, second counter.

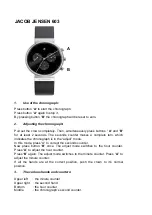
The crown has 3 positions: I, II and III, 

there is two pushers, A and B.

Zero setting for the counters:

Pull the crown in position II, press the 

pusher A (to select the hand), the big sec-

ond hand makes one full turn. Press the 

pusher B (short pressure: step by step, 

long pressure: rapid continuous rotation).

Date setting:

 Pull the crown in position II, 

correct the date, press the crown back in 

position I.

Time and moonphase setting:

Turn the crown in position III, turn the 

crown, adjust the time. To correct the 

moon phase, press the pusher B (short 

pressure: step by step, long pressure: 

rapid continuous rotation). Press the 

crown back in initial position.

Chronograph functions:

Press pusher A: start of timing

Press pusher A. stop of timing

Press pusher A: re-start of timing

Press pusher B: setting back the hands to 

zero

Split timing functions:

Press pusher A: start of timing

Press pusher B: stop of timing, split timing

Press pusher B: re-start of timing

Press pusher A: stop of timing

Press pusher B: setting back the hands to 

zero

Movements 10, 101, 102, 103, 

104

Watch functions:

The crown has 3 positions:

1. Normal position (wearing posi-

tion):

 when the crown is positioned 

against the case, the crown ensures that 

the watch is water-resistant.

2. Correcting the date:

 pull the crown 

out to position 2, turn the crown forwards 

and push it back to position 1.

3. Time setting: 

hours, minutes and sec-

onds. Pull the crown out to position 3. The 

seconds hand will stop. 

Turn the crown forwards or backwards. 

Synchronise the seconds by pushing the 

crown back to position 1 to coincide with 

a given time signal.

Chronograph functions:

Pusher A: start – stop, start – stop, etc.

Timing to 1/10 of a second for up to 

30 minutes.

Pusher B: reset (after a stop)

Accumulated timing chronograph:

Press button A to start. Press button B after 

arrival of the first “sprinter” – The time will 

be indicated. Press button A after arrival of 

the second “sprinter” – The time is memo-

rized. Read the time of the first “sprinter”. 

Press button B to read the time of the sec-

ond “sprinter” (the chronograph hands will 

turn at a faster speed until indication of the 

time). Press button B to reset hands to zero.

NB: the hands should be reset to their origi-

nal position before the chronograph is used:

Hand adjusting:

Pull out the crown to position 3.

Press the button A and B at the same time 

for at least 2 seconds.

Press (1 x short for single or 1 x long for 

continuous) button A to adjust the centre 

stop second.

Press button B to adjust the next hand.

Press (1 x short for single or 1 x long for 

continuous) button A to adjust the hand of 

the small sub couters.

Press button B to adjust the next hand.

Press (1 x short for single or 1 x long for 

continuous) button A to adjust the minute 

hand.

Return to crown position 1.

Movement 105

Watch functions:

The crown has two positions. There are 

two pushers A and B. There are three cor-

rectors C D and E.

Time setting:

Pull the crown in position II. Turn the 

crown until the correct time is reached. 

Push the crown back in position I.

Содержание 016

Страница 1: ... PVD COATING 4 3 7 TITANIUM 4 3 8 STAINLESS STEEL 4 4 OPERATING INSTRUCTIONS 4 4 1 SELF WINDING AUTOMATIC CHRONOGRAPH 4 4 2 SELF WINDING AUTOMATIC WATCHES 5 4 3 HAND WINDING WATCHES 6 4 4 QUARTZ CHRONOGRAPH 7 TABLE OF CONTENTS 011 5 012 5 015 7 016 7 0165 8 07 4 10 8 23 11 34 11 37 5 38 9 40 10 45 5 47 6 56 11 57 11 62 11 63 11 64 11 70 11 72 6 77 5 80 5 82 5 83 5 84 11 85 6 87 6 88 5 90 6 91 5 93...

Страница 2: ... watches bought from non authorized retailers since Edox is not able to check if the watches were handled and stocked correctly Any further claim against Montres Edox Vista SA for example for damages addi tional to the above described warranty is expressly excluded except mandatory statutory rights the purchaser may have against the manufacturer The above manufacturer s warranty Is independent of ...

Страница 3: ...ckwise about 20 times Now set the time and if possible the date etc 2 1 Mechanical watches accuracy Depending on the movement the daily tolerance of a mechanical watch can be of 30 seconds If you notice a bigger toler ance rate you can have your watch adjusted at a service center in your coun try free of charge within the guarantee period 2 2 Chronometer watches accuracy Every Edox Chronometer com...

Страница 4: ...PVD is that it is a thin but hard layer resistant to corrosion has a strong adherence offers many choices of colours and is hypoallergenic 3 7 Titanium The titanium is a light metal of a metallic white aspect Lighter than the steel it possesses the main characteristics cor rosion resistance dilation etc Its properties make titanium a material determinedly adapted to the modern tech nologies and in...

Страница 5: ...si tion 1 2 Correcting the date pull the crown out to position 2 turn the crown forwards backwards for references 30 and 45 then push the crown back to position 1 Correcting the day for the references 011 pull the crown out to position 2 turn the crown backwards then push the crown to position 1 Push the crown back in NB For all references do not correct the date between 22h00 and 02h00 3 Time set...

Страница 6: ...ition 1 2 Time setting hours and minutes Pull the crown out to position 2 Turn the crown forwards or backwards Push the crown back to position 1 Moon phase adjustment press the push button C until the full moon appears in the centre of the moon aperture Determine the date of the last full moon by using a calendar Press the push button C as often as the number of days which have passed since the la...

Страница 7: ...o crown position 1 Movement 016 Setting the perpetual calendar Step 1 Start by pulling the crown into position 2 Select the counter to be adjusted by pressing the 2 o clock pusher The selected counter hand makes full turn Reset the selected counter by pressing the 4 o clock pusher The selected counter hand advances single push 1 step ongoing push rotation Manipulations Crown must always be in posi...

Страница 8: ...ng posi tion when the crown is positioned against the case the crown ensures that the watch is water resistant 2 Correcting the date pull the crown out to position 2 turn the crown forwards and push it back to position 1 3 Time setting hours minutes and sec onds Pull the crown out to position 3 The seconds hand will stop Turn the crown forwards or backwards Synchronise the seconds by pushing the c...

Страница 9: ...hronograph Keeping totals with the chronograph Start Press Button A Stop Press Button A Restart Press Button A Stop Press Button A Reset to zero Press Button B Time keeping Timing lap times Start Press Button A Display the lap time Press Button B Catching up on the time lapsed Start Press Button B Stop Press Button A Reset to zero Press Button B Adjusting the chronograph hands to the zero position...

Страница 10: ...d II Pusher A at 2 o clock pusher B at 5 o clock Position I the watch is running Position II during the blocking time men tioned below automatic changes are in progress Pressing the pusher during the blocking time may damage the move ment Pusher A quick change correction for the date most not be pressed during the blocking time from 11 30pm 5 30am Pusher B quick change correction for the calendar ...

Страница 11: ...crown has 3 positions 1 Normal position wearing posi tion when the crown is positioned against the case the crown ensures that the watch is water resistant 2 Correcting the date pull the crown out to position 2 turn the crown forwards backwards for references 86 and push it back to position 1 3 Time setting hours minutes and sec onds Pull the crown out to position 3 The seconds hand will stop Turn...

Страница 12: ...Edox 011 Edox 012 Edox 015 Edox 016 Edox 0165 Edox 07 Edox 10 Edox 23 Edox 34 Edox 37 Edox 38 Edox 40 Edox 45 Edox 47 Edox 56 ...

Страница 13: ...Edox 57 Edox 62 Edox 63 Edox 64 Edox 70 Edox 72 Edox 77 Edox 80 Edox 82 Edox 83 Edox 84 Edox 85 Edox 87 Edox 88 Edox 90 ...

Страница 14: ...Edox 91 Edox 93 Edox 94 Edox 95 Edox 96 Edox 101 Edox 102 Edox 103 Edox 104 Edox 105 Edox 401 Edox 853 3 1 ...

Отзывы: